
There are times when you need to extend a partition either root or home to have more space on your virtual server. The end result should be a smooth process without data loss and issues. If your server or virtual machine is on Linux (Ubuntu, CentOS, AlmaLinux, Rocky Linux etc), read on how to extend/grow XFS partition based on LVM.
NOTE: Always backup your data no matter what.
I assume that you already have:
- Partition(s) created and have volume group
- Added the space you would like to extend to your existing drive (explained below)
This article covers
- Grow the desired partition
- Grow the volume group
- Grow the volume(s) inside a volume group
What it not covers:
- Adding and mounting new drive
- Attaching it to the volume group
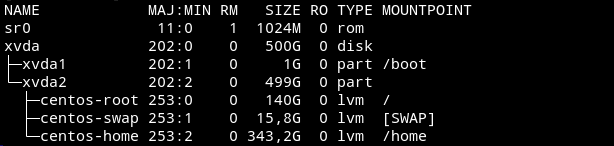
The following image explain my setup. I have a drive xvda and have two partitions on it xvda1 and xvda2. xvda2 is a volume group here and has three sub volumes root, swap and home. home is where all my data and server apps reside.
The size of the drive was 200GB before and extended with 300GB, makes it 500GB (xvda) total. You can confirm that from root and home volumes, which is 183GB excluding swap. So I have 300GB of space to allocate.
lsblk -f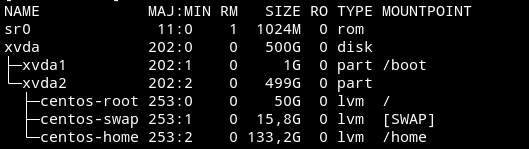
df -h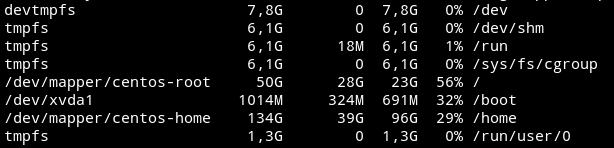
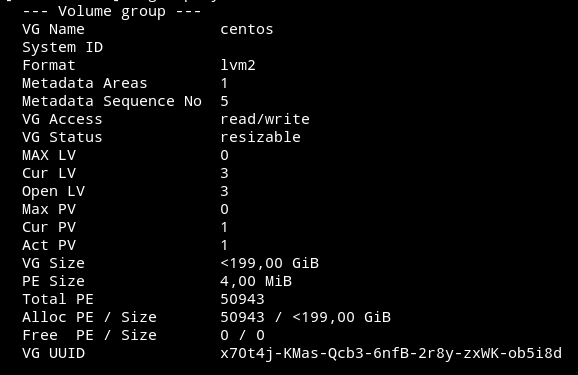
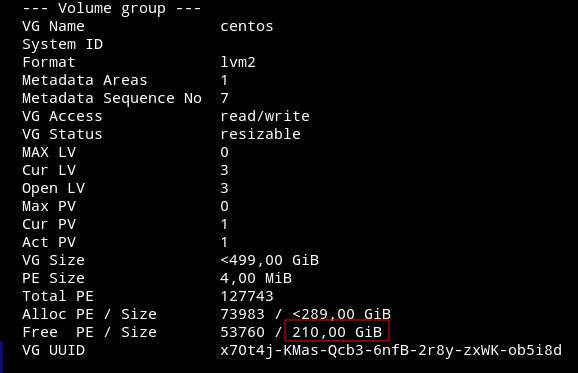
vgdisplay centoscentos is the group name. As you can see the volume group size is 199GB. And no free space is available yet.
Extend partition
As I mentioned this article is not about adding a new drive, creating file system and then mount it. It is about your current drive which you extended by using virtual machine software (e.g: VirtualBox, XCP-ng) hosting the server or by other means.

Install the necessary utilities.
CentOS / AlmaLinux / Rocky Linux
yum install cloud-utils-growpart xfsprogsUbuntu
apt install -y cloud-guest-utilsFrom the first image above I have two partitions on xvda (xvda1 and xvda2). I am going to extend xvda2. 2 represent xvda2.
growpart /dev/xvda 2
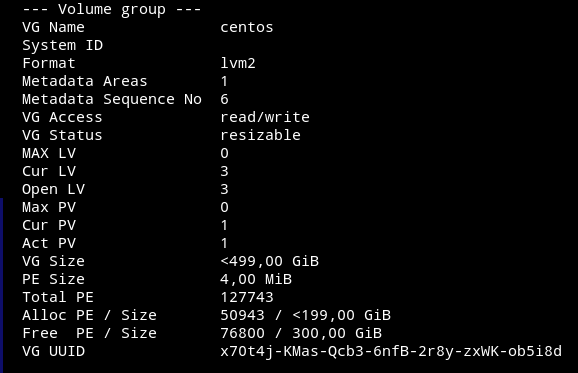
pvresize /dev/xvda2Check with lsblk -f and you will notice that xvda2 has extended now and vgdisplay centos will show free size.
Other useful commands are pvs (view the physical volume details), lvs (view the logical volume details).
Extend volume(s)
With pvresize we have already the free space available to extend any of our volume(s) like root, swap or home.
I am going to show you how to extend root by let’s say 30% and allocate the rest of the free space to home which will be the remaining 70%.
lvextend -l +30%FREE /dev/mapper/centos-root

xfs_growfs /dev/mapper/centos-root
+30%FREE is to add 30% from the free space to the root volume (/dev/mapper/centos-root). We have now 210GB of space left.
Now let’s extend the home volume.
lvextend -l +100%FREE /dev/mapper/centos-home

xfs_growfs /dev/mapper/centos-home
Note: Remember to use 100% for the last allocation, otherwise you will have free space left.
Check with lsblk and df -h.

I hope you have extended your partition and volumes successfully with this guide.


