
Nextcloud 24 and above comes with a default Office suite now which is based on Collabora CODE version and it works pretty well. But if you want to install OnlyOffice on a separate Ubuntu 22.04 server and then connect it to Nextcloud instead, read on how to do that.
What we will cover in this article:
- OnlyOffice docker installation
- Apache as reverse proxy
- SSL via Certbot
Looking to upgrade to the latest OnlyOffice document server? Click here
What you need:
- Ubuntu 22.04 server
- Point a domain or sub domain to the server IP
- Nextcloud already installed
Minimum requirements for OnlyOffice:
- Single Core 2 GHz CPU
- 2 GB of RAM or more
- 20 GB of free space
- 4 GB of swap
Initial setup
1st we will prepare our server and install some packages including docker etc.
apt install apt-transport-https ca-certificates curl software-properties-commonAdd docker repository for Ubuntu 22.04:
curl -fsSL https://download.docker.com/linux/ubuntu/gpg | sudo gpg --dearmor -o /usr/share/keyrings/docker.gpg

add-apt-repository "deb [arch=amd64 signed-by=/usr/share/keyrings/docker.gpg] https://download.docker.com/linux/ubuntu jammy stable"
Update the system and install Apache, docker.
apt update && apt install apache2 vim docker-ceEnable Apache modules and enable it at boot time.
a2enmod ssl rewrite headers proxy proxy_http deflate cache proxy_wstunnel

systemctl enable apache2
systemctl start apache2
SSL and virtual host
Create a virtual host file oo.conf.
cd /etc/apache2/sites-available/
vim oo.conf
Paste the following in it and change DOMAIN.COM.
<VirtualHost *:80>

	ServerName DOMAIN.COM
    DocumentRoot /var/www/html

    <Directory "/var/www/html">
       AllowOverride All
       Options -Indexes +FollowSymLinks
    </Directory>

	ErrorLog ${APACHE_LOG_DIR}/onlyoffice_error.log

</VirtualHost>
Enable this configuration and disable the default one.
a2ensite oo.conf
a2dissite 000-default.conf

systemctl restart apache2
Install certbot via snap.
snap install certbot --classicIf snap is not installed:
apt install snapdGet a staging certificate 1st to make sure your settings are correct.
Note: before running this command make sure your domain is pointed to the IP.
certbot certonly --test-cert --webroot -w /var/www/html -d DOMAIN.COMIf everything is good, get a production certificate.
certbot certonly --webroot -w /var/www/html -d DOMAIN.COMOnlyOffice docker installation
Install OnlyOffice community document server via docker and start it in the background.
docker run -i -t -d -p 127.0.0.1:9981:80 --restart=always \
    -e JWT_ENABLED=true \
    -e JWT_SECRET=7bSds623nf2341k932ds2 \
    -e JWT_HEADER=Authorization \
    -e JWT_IN_BODY=true \
    -v /app/onlyoffice/DocumentServer/data:/var/www/onlyoffice/Data onlyoffice/documentserver
Change JWT_SECRET to a strong secret.
You can check the docker containers with docker ps.
To enter a docker container:
docker exec -it CONTAINER_ID bashUpdate virtual host
Till here if you have successfully installed everything, the last step is to update our virtual host file with SSL and reverse proxy to OnlyOffice container.
<VirtualHost *:443>

   ServerName DOMAIN.COM

   ErrorLog ${APACHE_LOG_DIR}/onlyoffice_error.log

   # SSL configuration
   SSLEngine on
   SSLCertificateFile /etc/letsencrypt/live/DOMAIN.COM/fullchain.pem
   SSLCertificateKeyFile /etc/letsencrypt/live/DOMAIN.COM/privkey.pem

   SSLProtocol all -SSLv2 -SSLv3
   SSLCipherSuite ECDHE-ECDSA-CHACHA20-POLY1305:ECDHE-RSA-CHACHA20-POLY1305:ECDHE-ECDSA-AES128-GCM-SHA256:ECDHE-RSA-AES128-GCM-SHA256:ECDHE-ECDSA-AES256-GCM-SHA384:ECDHE-RSA-AES256-GCM-SHA384:DHE-RSA-AES128-GCM-SHA256:DHE-RSA-AES256-GCM-SHA384:ECDHE-ECDSA-AES128-SHA256:ECDHE-RSA-AES128-SHA256:ECDHE-ECDSA-AES128-SHA:ECDHE-RSA-AES256-SHA384:ECDHE-RSA-AES128-SHA:ECDHE-ECDSA-AES256-SHA384:ECDHE-ECDSA-AES256-SHA:ECDHE-RSA-AES256-SHA:DHE-RSA-AES128-SHA256:DHE-RSA-AES128-SHA:DHE-RSA-AES256-SHA256:DHE-RSA-AES256-SHA:ECDHE-ECDSA-DES-CBC3-SHA:ECDHE-RSA-DES-CBC3-SHA:EDH-RSA-DES-CBC3-SHA:AES128-GCM-SHA256:AES256-GCM-SHA384:AES128-SHA256:AES256-SHA256:AES128-SHA:AES256-SHA:DES-CBC3-SHA:!DSS
   SSLHonorCipherOrder on
   SSLCompression off

   SetEnvIf Host "^(.*)$" THE_HOST=$1
   RequestHeader setifempty X-Forwarded-Proto https
   RequestHeader setifempty X-Forwarded-Host %{THE_HOST}e
   ProxyAddHeaders Off

   ProxyPassMatch (.*)(\/websocket)$ "ws://127.0.0.1:9981/$1$2"
   ProxyPass / "http://127.0.0.1:9981/"
   ProxyPassReverse / "http://127.0.0.1:9981/"

</VirtualHost>
Restart Apache and go to the domain with https. You will see a welcome screen.
Connect to Nextcloud
Go to your Nextcloud instance and install OnlyOffice app from the store.
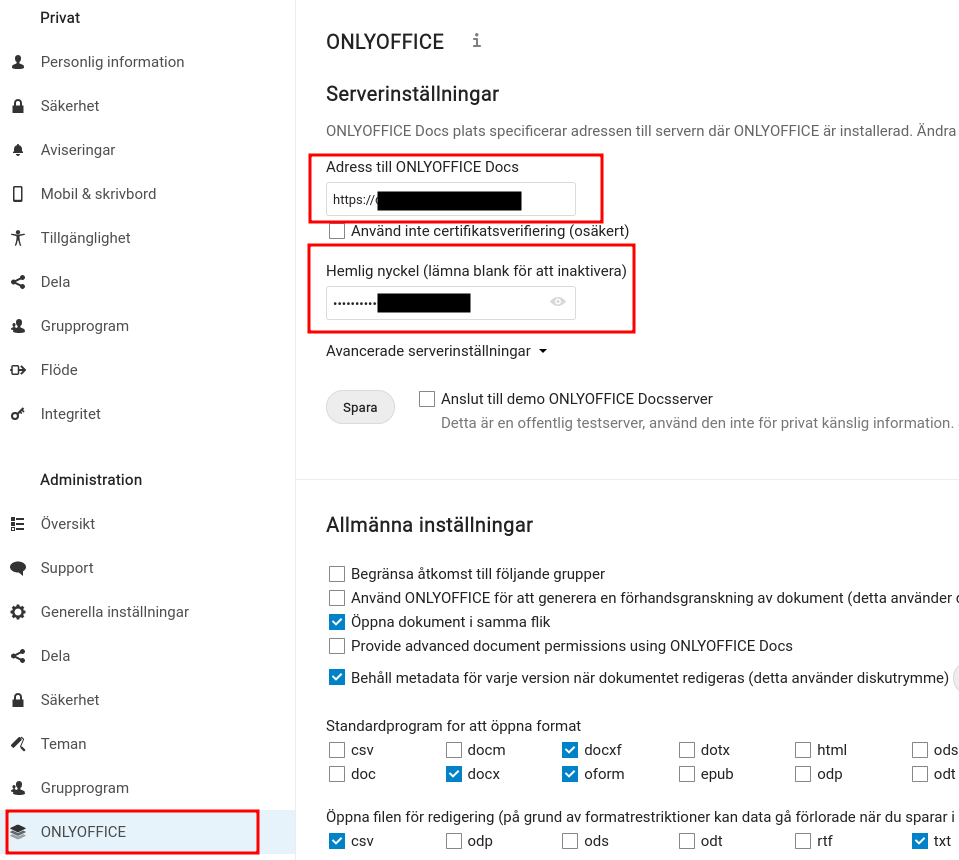
Now go to Settings as Admin and click ONLYOFFICE. Input the URL and secret, save.
After save you can change any settings and enable different options.


I just wanted to say, “Thank you.”
I tried the Nextcloud app install, but it had some (minor) errors and was not scalable.
I tried other installations on the same server, but failed to get Apache/nginx to play nice.
Your approach worked perfectly for my situation (both on the same server).
Thanks again!
Thanks for the instruction – working perfect.
Can you make a tutorial how to update this OO instance?
Would be great. 🙂
Sure, I will try to write one.
Upgrade article: https://najigram.com/2023/02/how-to-upgrade-onlyoffice-document-server/