
A year or so ago Nextcloud team introduced AIO (All In One), which simplifies the installation with containers. In this article I will guide you how to install Nextcloud AIO on Ubuntu with Apache reverse proxy, and SSL from Let’s encrypt.
Please bear with me, this is going to be a long article.
Nextcloud AIO has the following bundled with it:
- Nextcloud
- Nextcloud Office (Collabora)
- High performance backend for Nextcloud Files
- High performance backend for Nextcloud Talk
- Backup solution (based on BorgBackup)
- Imaginary (for previews of heic, heif, illustrator, pdf, svg, tiff and webp)
- ClamAV (Antivirus backend for Nextcloud)
- Fulltextsearch
Looking to install Nextcloud 26 (Hub 4) on Ubuntu 22.04? Click here
Please note, that you need a good system with enough RAM and processing power if you are going to install ClamAV and Fulltextsearch etc with it. The minimum setup would need at least 4GB of RAM and 2 CPU cores. To install ClamAV and Fulltextsearch with it, add another 2GB RAM and 1 or 2 cores.
In this guide I will setup the following containers on Ubuntu 22.04 LTS server.
- Nextcloud
- Nextcloud Office (Collabora)
- High performance backend for Nextcloud Files
- High performance backend for Nextcloud Talk
- Imaginary (for previews of heic, heif, illustrator, pdf, svg, tiff and webp)
Don’t worry, you will have the option to choose what to install during the installation.
1- Update the system
Before going to the next steps, let’s do the necessary.
apt update && apt upgrade

apt autoremove && apt autoclean
Reboot the system if needed.
2- Firewall setup
We will now enable UFW firewall and only allow few ports for communication which we need.
ufw default allow outgoing
ufw default deny incoming
ufw allow 22
ufw allow 80
ufw allow 443
ufw allow 8080
ufw allow 3478
ufw enable
ufw status
We will block port 8080, once we are done with the installation.
3- Install Apache
Install Apache, Snap and vim. I use vim, you can skip if you want to use nano or any other.
apt install apache2 curl vim snapsystemctl enable apache2
a2enmod ssl rewrite headers proxy proxy_http deflate cache proxy_wstunnel http2 proxy_fcgi env expiresRestart Apache.
systemctl restart apache24- Install docker
Follow one of the option to install docker which suits you best.
Option 1
We will install the default docker version provided in the Ubuntu repositories.
apt install docker.ioOption 2
But if you want to install it from the docker repository, follow this installation method.
Also there is simple bash script to do the heavy lifting for you. Just run the following command instead of following the documentation.
curl -fsSL get.docker.com | sudo sh5- Apache virtual host
Let’s create a configuration file for Nextcloud.
cd /etc/apache2/sites-available

vim nextcloud.conf
Paste the following in it and change the domain name.
<VirtualHost *:80>
	ServerName DOMAIN.COM
	ServerAlias DOMAIN.COM
	DocumentRoot /var/www/html

	<Directory "/var/www/html">
		AllowOverride All
		Options -Indexes +FollowSymLinks
	</Directory>

	ErrorLog /var/log/apache2/nc-error.log
</VirtualHost>
Enable it and restart Apache.
a2dissite 000-default.conf
a2ensite nextcloud.conf

apachectl -t
systemctl restart apache2
6- SSL certificate
For this to work, make sure your domain DNS is properly propagated. Otherwise no certificate will be issued by Let’s Encrypt.
snap install certbot --classic
certbot certonly --webroot -w /var/www/html -d DOMAIN.COM7- Update Apache virtual host
After we get our certificates, it’s time to update the virtual host file with 443 block.
<VirtualHost *:443>
	ServerName DOMAIN.COM

	SSLEngine on
	SSLCertificateKeyFile /etc/letsencrypt/live/DOMAIN.COM/privkey.pem
	SSLCertificateFile /etc/letsencrypt/live/DOMAIN.COM/fullchain.pem

	Protocols h2 h2c http/1.1

	SSLCipherSuite EECDH+AESGCM:EDH+AESGCM:AES256+EECDH:ECDHE-RSA-AES128-SHA:DHE-RSA-AES128-GCM-SHA256:AES256+EDH:ECDHE-RSA-AES256-GCM-SHA384:ECDHE-RSA-AES128-GCM-SHA256:DHE-RSA-AES256-GCM-SHA384:ECDHE-RSA-AES256-SHA384:ECDHE-RSA-AES128-SHA256:ECDHE-RSA-AES256-SHA:DHE-RSA-AES256-SHA256:DHE-RSA-AES128-SHA256:DHE-RSA-AES256-SHA:DHE-RSA-AES128-SHA:ECDHE-RSA-DES-CBC3-SHA:EDH-RSA-DES-CBC3-SHA:AES256-GCM-SHA384:AES128-GCM-SHA256:AES256-SHA256:AES128-SHA256:AES256-SHA:AES128-SHA:DES-CBC3-SHA:HIGH:!aNULL:!eNULL:!EXPORT:!DES:!MD5:!PSK:!RC4
	SSLProtocol All -SSLv2 -SSLv3 -TLSv1 -TLSv1.1
	SSLHonorCipherOrder On
	Header always set Strict-Transport-Security "max-age=63072000; includeSubDomains; preload"
	Header always set X-Frame-Options DENY
	Header always set X-Content-Type-Options nosniff

	<Location />
		Require all granted
	</Location>

	ErrorLog /var/log/apache2/DOMAIN.COM_error.log
</VirtualHost>
Check and restart:
apachectl -t
systemctl restart apache2
Go to your domain in the browser and check if https is working.
Until here we are done with the basics and our Apache host and SSL are ready.
8- Add Apache proxy
Before we jump into the Nextcloud AIO containers setup, let’s add Apache proxy code for Nextcloud AIO to our virtual host file (443 block).
I have highlighted the changes.
Full 443 block
<VirtualHost *:443>
	ServerName DOMAIN.COM

	SSLEngine on
	SSLCertificateKeyFile /etc/letsencrypt/live/DOMAIN.COM/privkey.pem
	SSLCertificateFile /etc/letsencrypt/live/DOMAIN.COM/fullchain.pem

	Protocols h2 h2c http/1.1

	SSLCipherSuite EECDH+AESGCM:EDH+AESGCM:AES256+EECDH:ECDHE-RSA-AES128-SHA:DHE-RSA-AES128-GCM-SHA256:AES256+EDH:ECDHE-RSA-AES256-GCM-SHA384:ECDHE-RSA-AES128-GCM-SHA256:DHE-RSA-AES256-GCM-SHA384:ECDHE-RSA-AES256-SHA384:ECDHE-RSA-AES128-SHA256:ECDHE-RSA-AES256-SHA:DHE-RSA-AES256-SHA256:DHE-RSA-AES128-SHA256:DHE-RSA-AES256-SHA:DHE-RSA-AES128-SHA:ECDHE-RSA-DES-CBC3-SHA:EDH-RSA-DES-CBC3-SHA:AES256-GCM-SHA384:AES128-GCM-SHA256:AES256-SHA256:AES128-SHA256:AES256-SHA:AES128-SHA:DES-CBC3-SHA:HIGH:!aNULL:!eNULL:!EXPORT:!DES:!MD5:!PSK:!RC4
	SSLProtocol All -SSLv2 -SSLv3 -TLSv1 -TLSv1.1
	SSLHonorCipherOrder On
	Header always set Strict-Transport-Security "max-age=63072000; includeSubDomains; preload"
	Header always set X-Frame-Options DENY
	Header always set X-Content-Type-Options nosniff

	<Location />
		Require all granted
	</Location>

	## nc proxy
	RewriteEngine On
	ProxyPreserveHost On
	AllowEncodedSlashes NoDecode

	ProxyPass / http://localhost:9000/ nocanon
	ProxyPassReverse / http://localhost:9000/

	RewriteCond %{HTTP:Upgrade} websocket [NC]
	RewriteCond %{HTTP:Connection} upgrade [NC]
	RewriteCond %{THE_REQUEST} "^[a-zA-Z]+ /(.*) HTTP/\d+(\.\d+)?$"
	RewriteRule .? "ws://localhost:9000/%1" [P,L]

	LimitRequestBody 0
	H2WindowSize 5242880
	TraceEnable off
	<Files ".ht*">
	    Require all denied
	</Files>

	ErrorLog /var/log/apache2/DOMAIN.COM_error.log
</VirtualHost>
9- Download Nextcloud AIO
We will be using data directory on the host system, for that we will create a directory inside www.
mkdir /var/www/ncdata
chown -R www-data:www-data /var/www/ncdata
If you have another mount point like an additional drive attached, just use that path for the data directory.
Let’s run the docker command to start Nextcloud AIO. If you want to see the progress/logs just remove the -d flag.
sudo docker run -d \
--sig-proxy=false \
--name nextcloud-aio-mastercontainer \
--restart always \
--publish 8080:8080 \
-e APACHE_PORT=9000 \
-e NEXTCLOUD_DATADIR="/var/www/ncdata" \
--volume nextcloud_aio_mastercontainer:/mnt/docker-aio-config \
--volume /var/run/docker.sock:/var/run/docker.sock:ro \
nextcloud/all-in-one:latest
This will start the Nextcloud docker in the background.
docker ps
Important things to note from the command above are:
- Port 8080, this will be used to start the initial setup
- Port 9000 is Apache port to proxy to it inside the container
- Data will be saved in
/var/www/ncdata - latest will pull the recent docker container for AIO
Once the command finished downloading the container, you can open Nextcloud AIO in the browser pointing to https://IP_ADDRESS:8080.
Please note, that Nextcloud AIO will use a self signed certificate.
10- Install Nextcloud AIO
Once you have successfully done all of the above, it’s time to setup Nextcloud AIO.
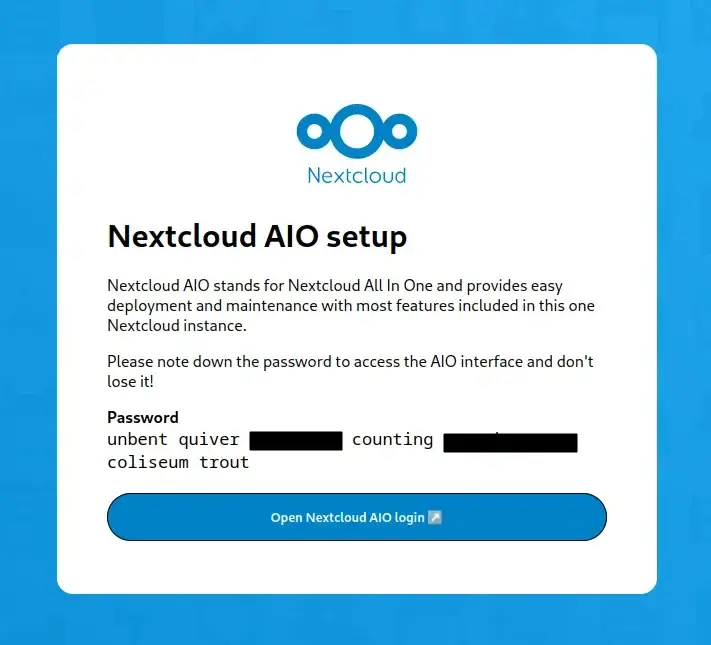
1- The first screen you see will provide you a password, copy it and save it somewhere. Click on Open Nextcloud AIO login button.
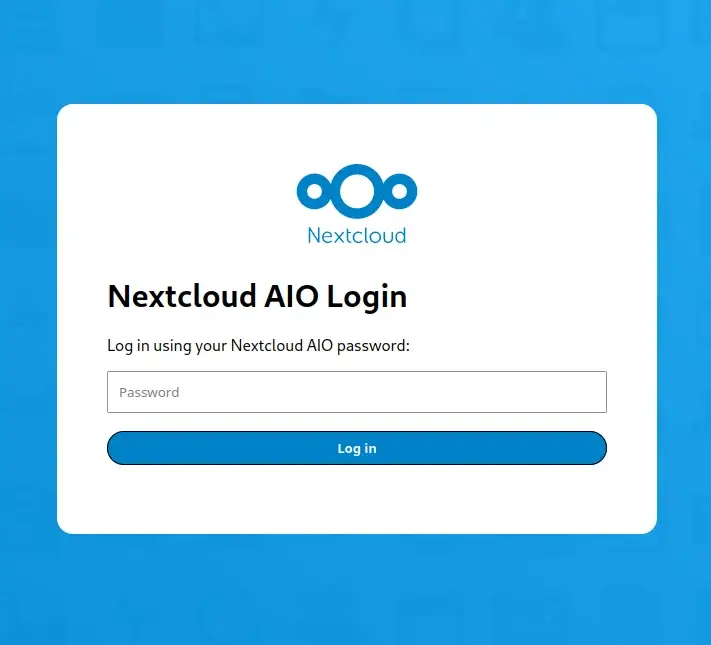
2- Enter the password which you just copied and click the Log in button.
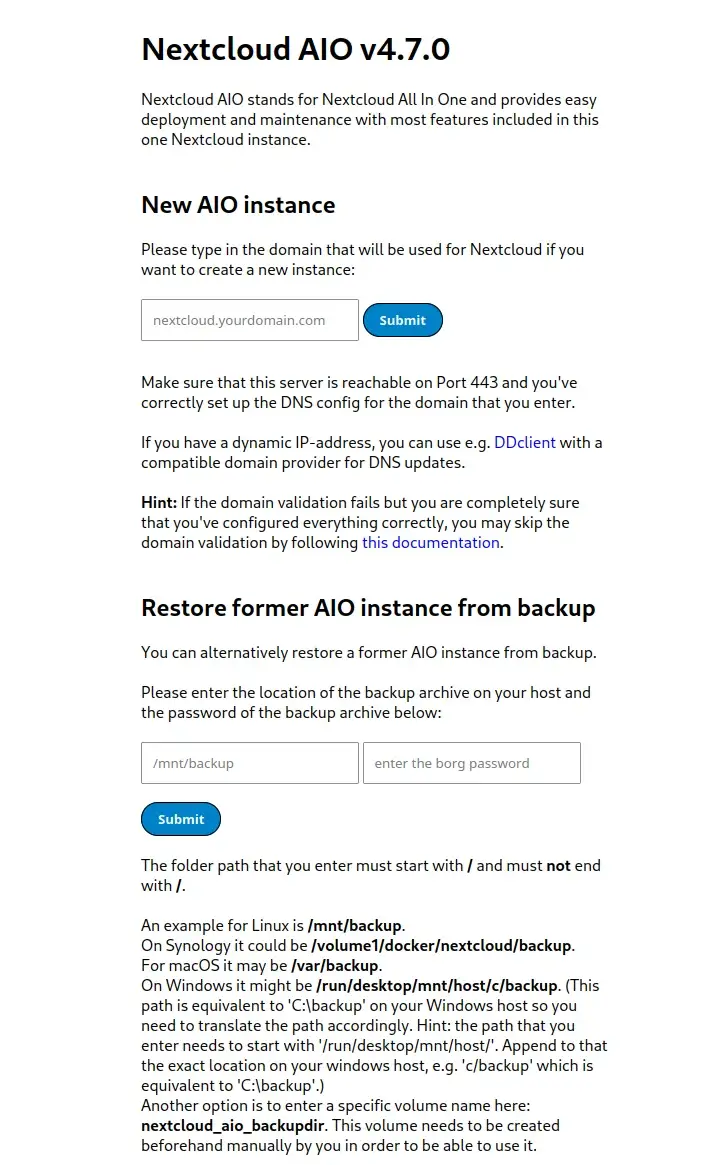
3- At this screen we will enter our domain. If you have setup the proxy correctly, after clicking Submit you will be moved to the next screen. Otherwise an error will be thrown complaining about the issue.
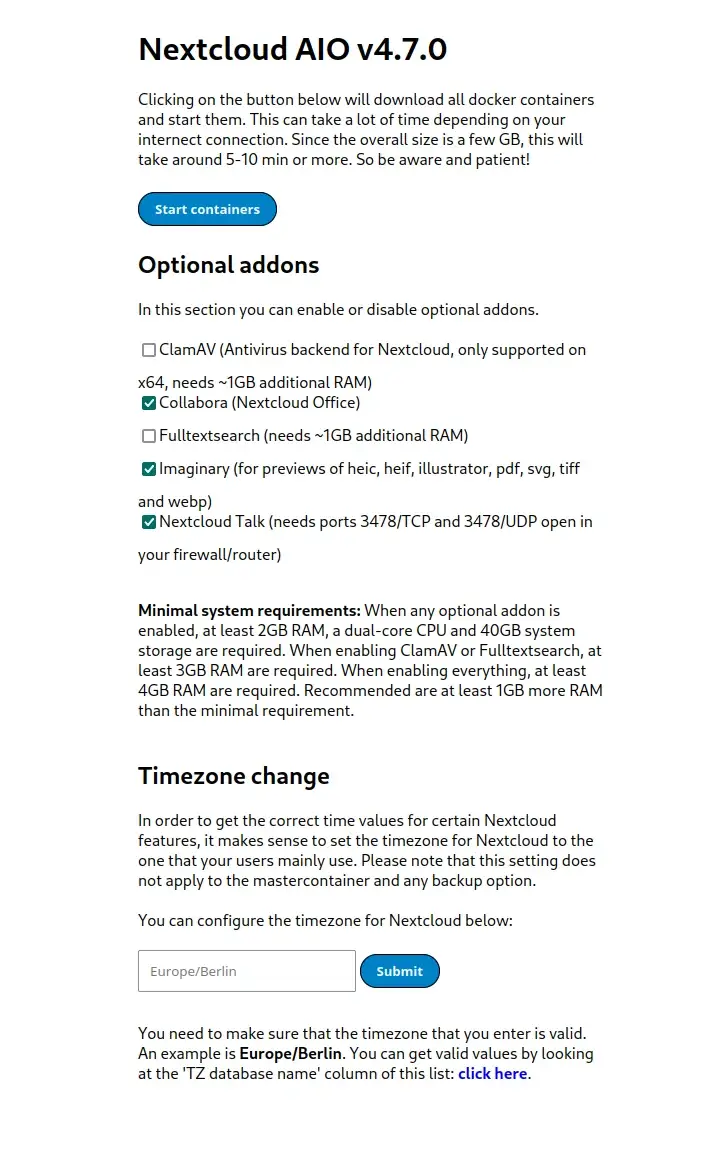
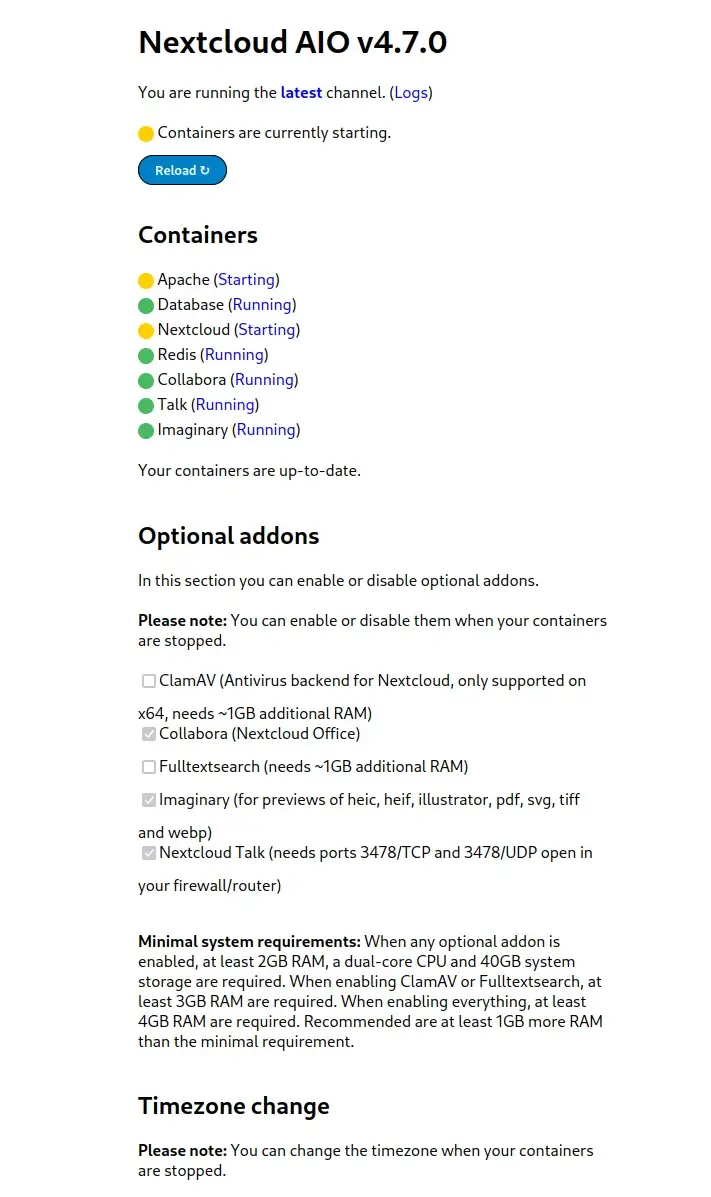
4- Before clicking Start containers button, select which containers to run and update your timezone if necessary. This step will take few minutes to complete.
5- You will see what containers are started already and what are still starting. Click the Reload button to check the status after a few minutes.
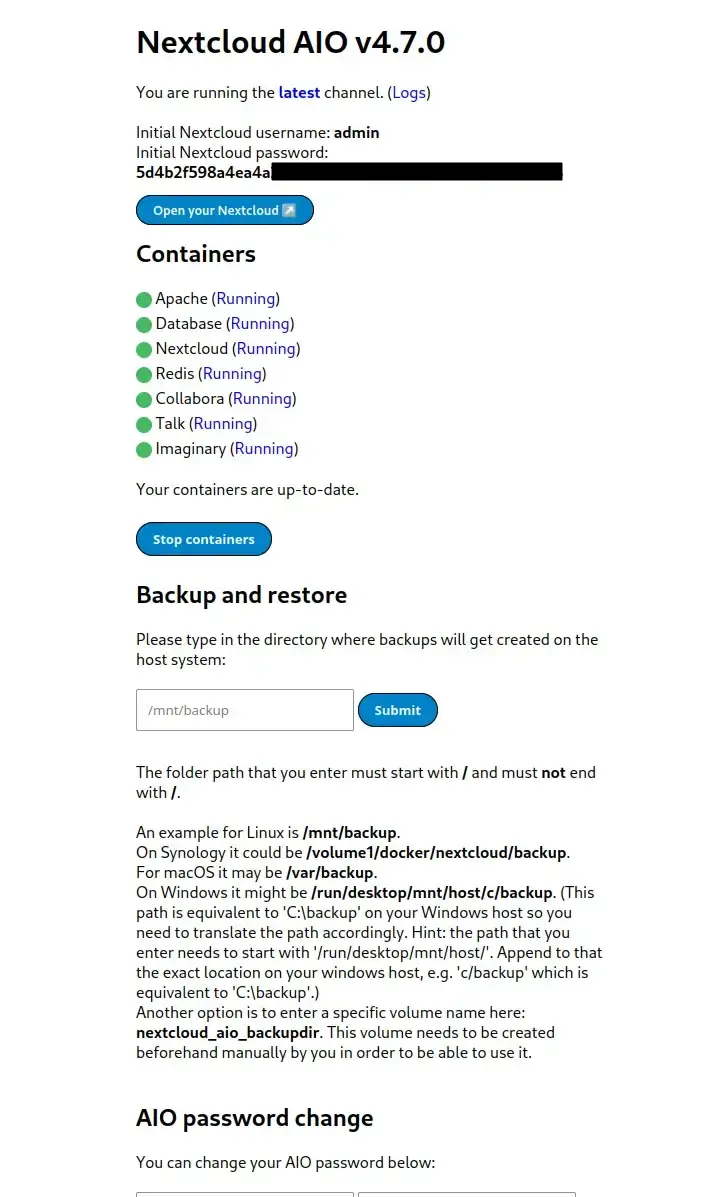
6- So all our selected containers are up now and things are right where they should be. You will be given a password to login to Nextcloud. Click Open your Nextcloud button to get started.
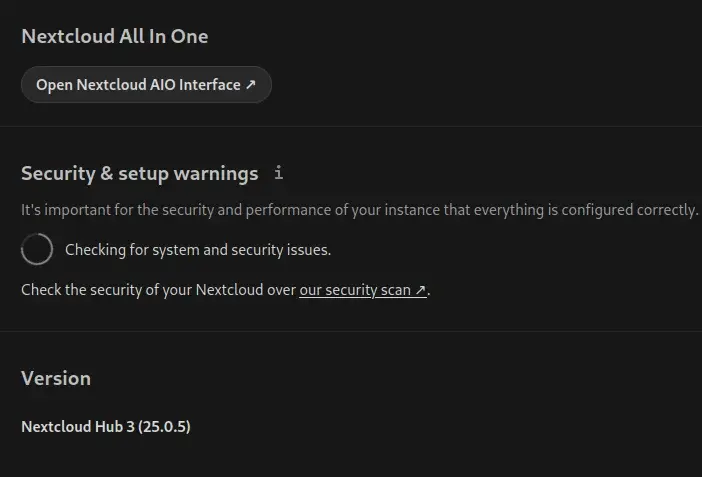
7- Once the setup is done, as we have passed the docker our custom path for data. You can check that now if everything is in order and Nextcloud created the required folders and files in it.

It’s done, Nextcloud is installed and reachable with your domain.
You can now remove port 8080 from firewall.
ufw delete allow 8080Add it back if you want to access Nextcloud AIO interface.


