
Nextcloud team has announced Nextcloud Hub 24 with bunch of new features. If you want to install fresh copy of Nextcloud, read on how to install Nextcloud 24 on Ubuntu 22.04 LTS.
It is also the first major release which now support PHP 8.1. If you are upgrading from 23 and have older version of PHP, you should have minimum PHP 7.3 now.
New Features
- User migration
- Export and import data
- Enhanced Nextcloud Files
- 4x lower database load for common operations
- Nextcloud Talk – Reactions and Media Tab
- Automatic file locking
- Improved Nextcloud Text
Check out the release blog post for more details.
Looking for Nextcloud 25?
System update
Update your system and enable firewall.
apt update && apt upgradeufw default allow outgoing
ufw default deny incoming
ufw allow 22 80 443
ufw enablePHP, Apache and MariaDB installation
We will install all the latest and base packages available in the repositories.
apt install apache2 mariadb-server libapache2-mod-php8.1 php8.1 php8.1-gmp php8.1-bcmath php8.1-gd php-json php8.1-mysql php8.1-curl php8.1-mbstring php8.1-intl php8.1-imagick php8.1-xml php8.1-zip php8.1-fpm php8.1-redis php8.1-apcu php8.1-opcache php8.1-ldap bzip2 zip unzip imagemagick vim ffmpeg redis-serverEnable PHP 8.1 FPM and it’s Apache configuration. This is to use http2.
a2enconf php8.1-fpm
a2dismod php8.1
a2dismod mpm_prefork
a2enmod mpm_event
Apache modules
a2enmod ssl rewrite headers proxy proxy_http deflate cache proxy_wstunnel http2 proxy_fcgi env expiressystemctl restart apache2Enable the services at boot time.
systemctl enable apache2
systemctl enable php8.1-fpm
systemctl enable mariadb
PHP configuration
Configure php.ini to fulfill Nextcloud requirements.
vim /etc/php/8.1/fpm/php.ini*Line numbers are for information only
output_buffering = off (line 226)
max_execution_time = 180 (line 409)
memory_limit = 512M (line 430)
post_max_size = 200M (line 698)
upload_max_filesize = 200M (line 850)
date.timezone = Europe/Berlin (line 968)

opcache.enable=1 (line 1767)
opcache.enable_cli=1 (line 1770)
opcache.memory_consumption=128 (line 1773)
opcache.interned_strings_buffer=8 (line 1776)
opcache.max_accelerated_files=10000 (line 1780)
opcache.revalidate_freq=1 (line 1798)
opcache.save_comments=1 (line 1805)
Check PHP timezone manual for your timezone.
systemctl restart php8.1-fpmDatabase setup
/usr/bin/mysql_secure_installation
Login to the database server and create nextcloud database.
mysql -u root -p

create database nextcloud CHARACTER SET utf8mb4 COLLATE utf8mb4_general_ci;
grant all on nextcloud.* to 'ncuser'@'localhost' identified by 'PASSWORD';

flush privileges;
exit
Download Nextcloud 24
cd /var/www
wget https://download.nextcloud.com/server/releases/nextcloud-24.0.3.zip
Unzip and move it to the web server root directory.
unzip nextcloud-24.0.3.zip
rm -r /var/www/html/*
shopt -s dotglob
mv nextcloud/* html/
Change the owner and group
chown -R www-data:www-data /var/www/htmlApache virtual host
cd /etc/apache2/sites-available
vim nextcloud.conf
Paste the following in it, change where necessary (Bold).
<VirtualHost *:80>
	ServerName DOMAIN.COM
	ServerAlias DOMAIN.COM
	DocumentRoot /var/www/html

	<Directory "/var/www/html">
		AllowOverride All
		Options -Indexes +FollowSymLinks
	</Directory>

	ErrorLog /var/log/apache2/DOMAIN.COM-error.log
</VirtualHost>
Enable this configuration and reload Apache.
a2dissite 000-default.conf
a2ensite nextcloud.conf

apachectl configtest
systemctl reload apache2
Installation
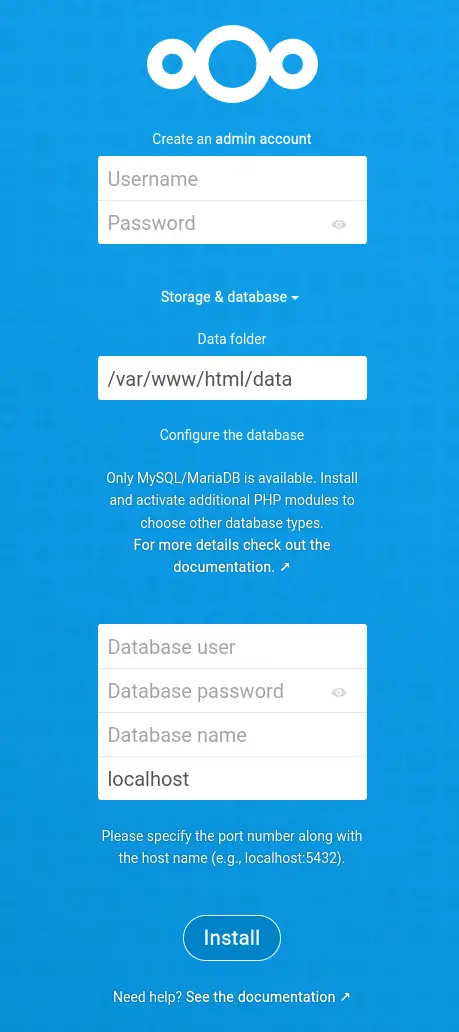
Input your server URL/domain in the browser to start the setup process.
1- Enter the necessary details
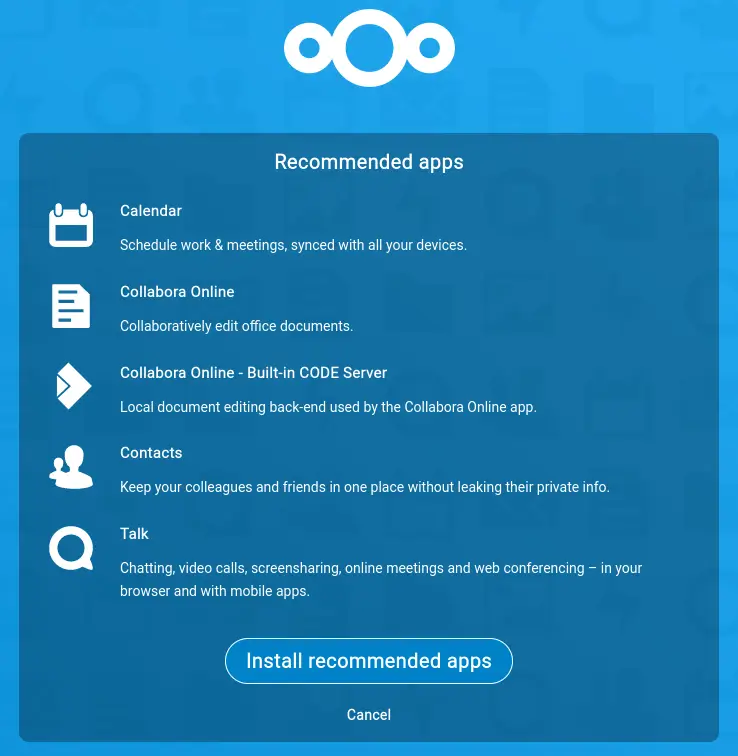
2- Install or cancel the recommended apps
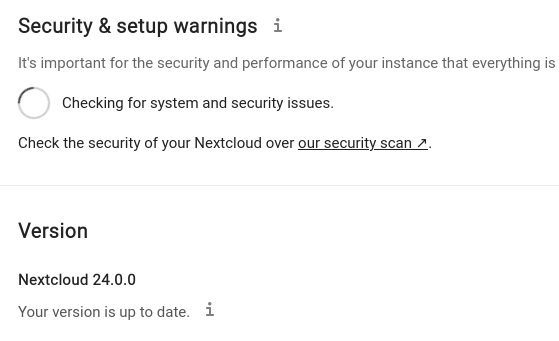
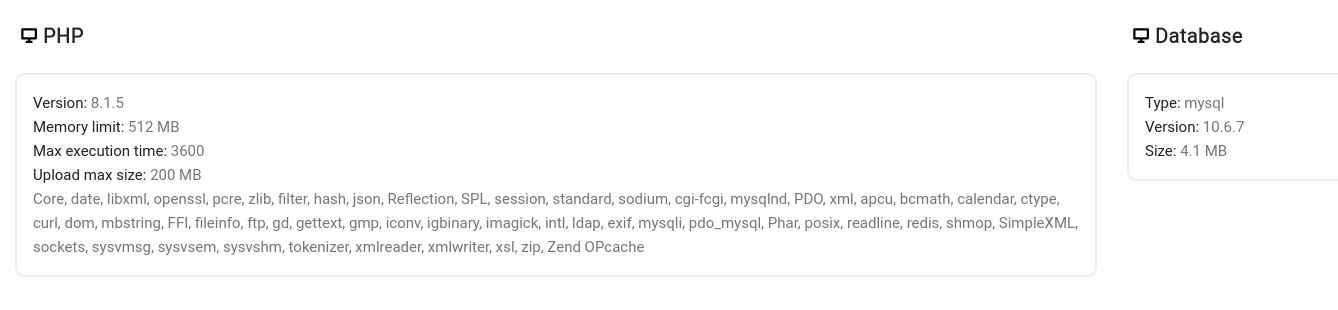
3- Dashboard after successful installation

Check the basic overview and system info from settings.
SSL certificate – certbot
Install Certbot and get a certificate for web root.
snap install certbot --classic
certbot certonly --webroot -w /var/www/html -d DOAMIN.COM
Check the certbot complete guide for other options and renewal.
Apache configuration
Final virtual host configuration /etc/apache2/sites-available/nextcloud.conf after getting SSL certificate.
- It will redirect from http(80) to https(443)
- HSTS strong ciphers
- Cache static files
- Enable http2
<VirtualHost *:80>
	ServerName DOMAIN.COM
	ServerAlias www.DOMAIN.COM
	DocumentRoot /var/www/html
	RewriteEngine On
	RewriteCond %{HTTPS} off
	RewriteRule (.*) https://%{HTTP_HOST}%{REQUEST_URI}

	<Directory "/var/www/html">
		AllowOverride All
		Options -Indexes +FollowSymLinks
	</Directory>

	ErrorLog /var/log/apache2/DOMAIN.COM-error.log
</VirtualHost>

<VirtualHost *:443>
	ServerName DOMAIN.COM
	ServerAlias www.DOMAIN.COM
	DocumentRoot /var/www/html

	SSLCipherSuite EECDH+AESGCM:EDH+AESGCM:AES256+EECDH:ECDHE-RSA-AES128-SHA:DHE-RSA-AES128-GCM-SHA256:AES256+EDH:ECDHE-RSA-AES256-GCM-SHA384:ECDHE-RSA-AES128-GCM-SHA256:DHE-RSA-AES256-GCM-SHA384:ECDHE-RSA-AES256-SHA384:ECDHE-RSA-AES128-SHA256:ECDHE-RSA-AES256-SHA:DHE-RSA-AES256-SHA256:DHE-RSA-AES128-SHA256:DHE-RSA-AES256-SHA:DHE-RSA-AES128-SHA:ECDHE-RSA-DES-CBC3-SHA:EDH-RSA-DES-CBC3-SHA:AES256-GCM-SHA384:AES128-GCM-SHA256:AES256-SHA256:AES128-SHA256:AES256-SHA:AES128-SHA:DES-CBC3-SHA:HIGH:!aNULL:!eNULL:!EXPORT:!DES:!MD5:!PSK:!RC4
	SSLProtocol All -SSLv2 -SSLv3 -TLSv1 -TLSv1.1
	SSLHonorCipherOrder On
	Header always set Strict-Transport-Security "max-age=63072000; includeSubDomains; preload"
	Header always set X-Frame-Options DENY
	Header always set X-Content-Type-Options nosniff

	Protocols h2 http/1.1

	<Directory "/var/www/html">
		AllowOverride All
		Options -Indexes +FollowSymLinks
	</Directory>

	<FilesMatch ".(ico|pdf|flv|jpg|jpeg|png|gif|js|css|swf|ttf|woff)$">
		Header set Cache-Control "max-age=31536000, public"
	</FilesMatch>

	ErrorLog /var/log/apache2/DOMAIN.COM-error.log

	SSLEngine on
	SSLCertificateKeyFile /etc/letsencrypt/live/DOMAIN.COM/privkey.pem
	SSLCertificateFile /etc/letsencrypt/live/DOMAIN.COM/fullchain.pem
</VirtualHost>
You can apply some quick hacks to enhance your setup. Check the article below to move data directory out of the web root, enable cache etc.


This is the best tutorial I’ve ever seen
I tried your guide and php is showing source code and not the actual website. Do you have a fix?
Have you installed Apache modules for PHP and PHP FPM is running?
Thank you for such a complete and straightforward tutorial!