
I am sure you have heard of Wikipedia, it is powered by MediaWiki software. In simple terms it is a documentation and collaboration software used by many across the web. The good thing is it is free and open source, you can host it on your PC or server with no cost. I will guide you here how to install MediaWiki on Ubuntu 22.04 LTS with free SSL certificate from Let’s encrypt.
MediaWiki has not much requirements hardware wise. It can run fine with just 512MB of RAM, but keep in mind that this may vary depending on the amount of traffic.
Software required are:
- PHP
- Apache or Nginx
- Database server
What we will have on the server:
- PHP 8.1.x
- Apache 2.4.x
- MariaDB 10.6.x
1- Install LAMP stack
Update your server and install latest PHP, Apache, MariaDB and some PHP extensions.
apt update && apt upgradeapt install apache2 mariadb-server libapache2-mod-php8.1 php8.1 php8.1-gmp php8.1-bcmath php8.1-gd php-json php8.1-mysql php8.1-curl php8.1-mbstring php8.1-intl php8.1-imagick php8.1-xml php8.1-zip php8.1-fpm php8.1-redis php8.1-apcu php8.1-opcache php8.1-memcache php8.1-memcached php8.1-ldap bzip2 zip unzip imagemagick vimEnable Apache modules:
a2enmod ssl rewrite headers proxy proxy_http deflate cache proxy_wstunnel http2 proxy_fcgi env expiresWe are going to use PHP FPM. Let’s enable it.
a2enconf php8.1-fpm
a2dismod php8.1
a2dismod mpm_prefork
a2enmod mpm_event
systemctl restart apache2

systemctl enable apache2
systemctl enable mariadb
systemctl enable php8.1-fpm
You can configure some options in php.ini, it is available in /etc/php/8.1/fpm/php.ini.
- max_execution_time = 180
- memory_limit = 512M
- post_max_size = 200M
- upload_max_filesize = 200M
- date.timezone = Europe/London
Restart PHP FPM afterwards.
systemctl restart php8.1-fpm2- Database
We will now create a user and database. Before that run the following command to set basic database configuration.
/usr/bin/mysql_secure_installation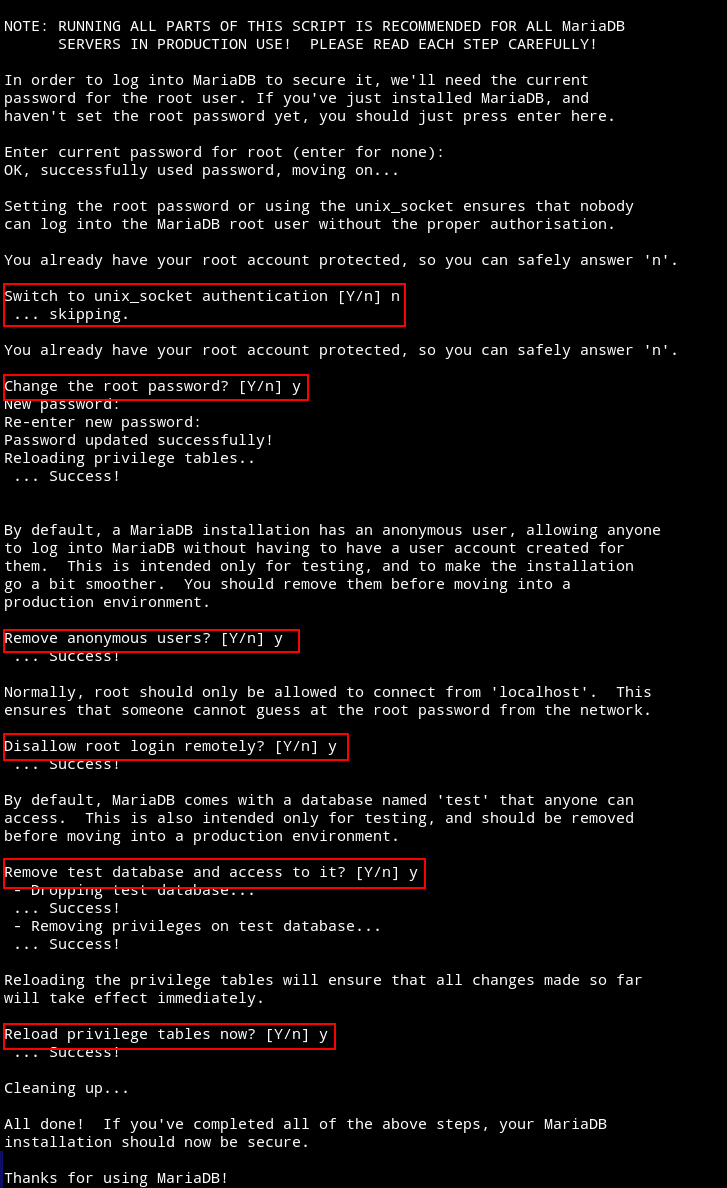
Now login to the database server to create a user and database.
mysql -u root -p

create database mediawiki CHARACTER SET utf8mb4 COLLATE utf8mb4_general_ci;
grant all on mediawiki.* to 'wiki_user'@'localhost' identified by 'PASSWORD';

flush privileges;
exit
3- Apache virtual host
Create a virtual host file mediawiki.conf.
cd /etc/apache2/sites-available

vim mediawiki.conf
Paste the following in it.
<VirtualHost *:80>
	ServerName DOMAIN.COM
	ServerAlias DOMAIN.COM
	DocumentRoot /var/www/html

	<Directory "/var/www/html">
		AllowOverride All
		Options -Indexes +FollowSymLinks
	</Directory>

	ErrorLog /var/log/apache2/DOMAIN.COM-error.log
</VirtualHost>
Disable the default vhost file and enable mediawiki configuration.
a2dissite 000-default.conf
a2ensite mediawiki.conf

apachectl -t
systemctl restart apache2
4- SSL
Please note, this step you can follow later.
Install Let’s Encrypt certbot snap package.
snap install certbot --classicIf you have already pointed your domain to the server IP and is propagated (use dig command to check), get a SSL certificate.
certbot certonly --webroot -w /var/www/html -d DOAMIN.COMOnce you successfully get the certificate, update your Apache mediawiki conf file with 443 block.
<VirtualHost *:443>
	ServerName DOMAIN.COM
	DocumentRoot /var/www/html

	SSLCipherSuite EECDH+AESGCM:EDH+AESGCM:AES256+EECDH:ECDHE-RSA-AES128-SHA:DHE-RSA-AES128-GCM-SHA256:AES256+EDH:ECDHE-RSA-AES256-GCM-SHA384:ECDHE-RSA-AES128-GCM-SHA256:DHE-RSA-AES256-GCM-SHA384:ECDHE-RSA-AES256-SHA384:ECDHE-RSA-AES128-SHA256:ECDHE-RSA-AES256-SHA:DHE-RSA-AES256-SHA256:DHE-RSA-AES128-SHA256:DHE-RSA-AES256-SHA:DHE-RSA-AES128-SHA:ECDHE-RSA-DES-CBC3-SHA:EDH-RSA-DES-CBC3-SHA:AES256-GCM-SHA384:AES128-GCM-SHA256:AES256-SHA256:AES128-SHA256:AES256-SHA:AES128-SHA:DES-CBC3-SHA:HIGH:!aNULL:!eNULL:!EXPORT:!DES:!MD5:!PSK:!RC4
	SSLProtocol All -SSLv2 -SSLv3 -TLSv1 -TLSv1.1
	SSLHonorCipherOrder On
	Header always set Strict-Transport-Security "max-age=63072000; includeSubDomains; preload"
	Header always set X-Frame-Options DENY
	Header always set X-Content-Type-Options nosniff

    Protocols h2 http/1.1

	<Directory "/var/www/html">
		AllowOverride All
		Options -Indexes +FollowSymLinks
	</Directory>

    ErrorLog /var/log/apache2/DOMAIN.COM-error.log

	SSLEngine on
	SSLCertificateKeyFile /etc/letsencrypt/live/DOMAIN.COM/privkey.pem
	SSLCertificateFile /etc/letsencrypt/live/DOMAIN.COM/fullchain.pem
</VirtualHost>
Add this to the Port 80 block to redirect automatically to HTTPS.
RewriteEngine On
RewriteCond %{HTTPS} off
RewriteRule (.*) https://%{HTTP_HOST}%{REQUEST_URI}
Restart Apache:
apachectl -t
systemctl restart apache2
5- Download and install MediaWiki
Once you are done with the basic server setup, it’s time to download and install MediaWiki.
cd /var/www

wget https://releases.wikimedia.org/mediawiki/1.39/mediawiki-1.39.1.zip
Unzip and move it to the web root directory.
unzip mediawiki-1.39.1.zip
rm -r /var/www/html/*
shopt -s dotglob
mv mediawiki-1.39.1/* html/
Clean up and change the directory ownership.
rm -r mediawiki-1.39.1
rm mediawiki-1.39.1.zip

chown -R www-data:www-data /var/www/html
Point your browser to the domain to start the installation.
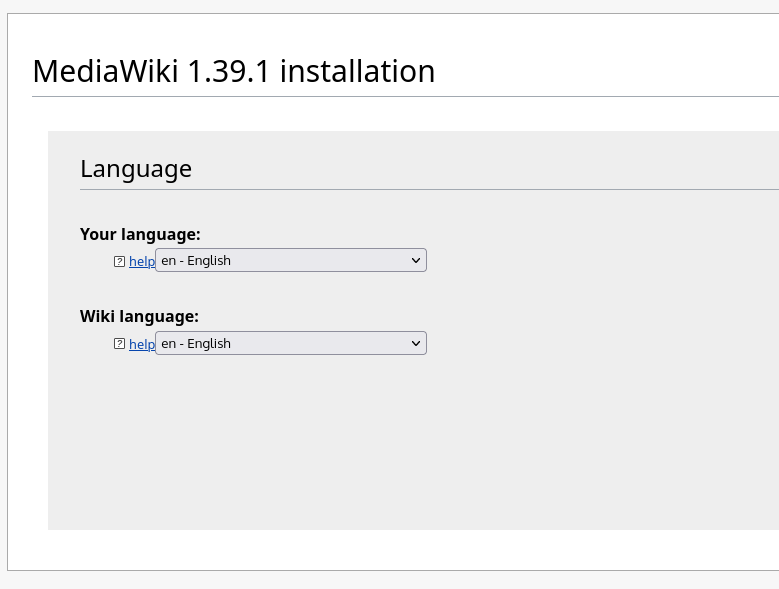
1- You will see the following page when start the installation. Click on the set up the wiki link to continue.
2- Choose your languages.
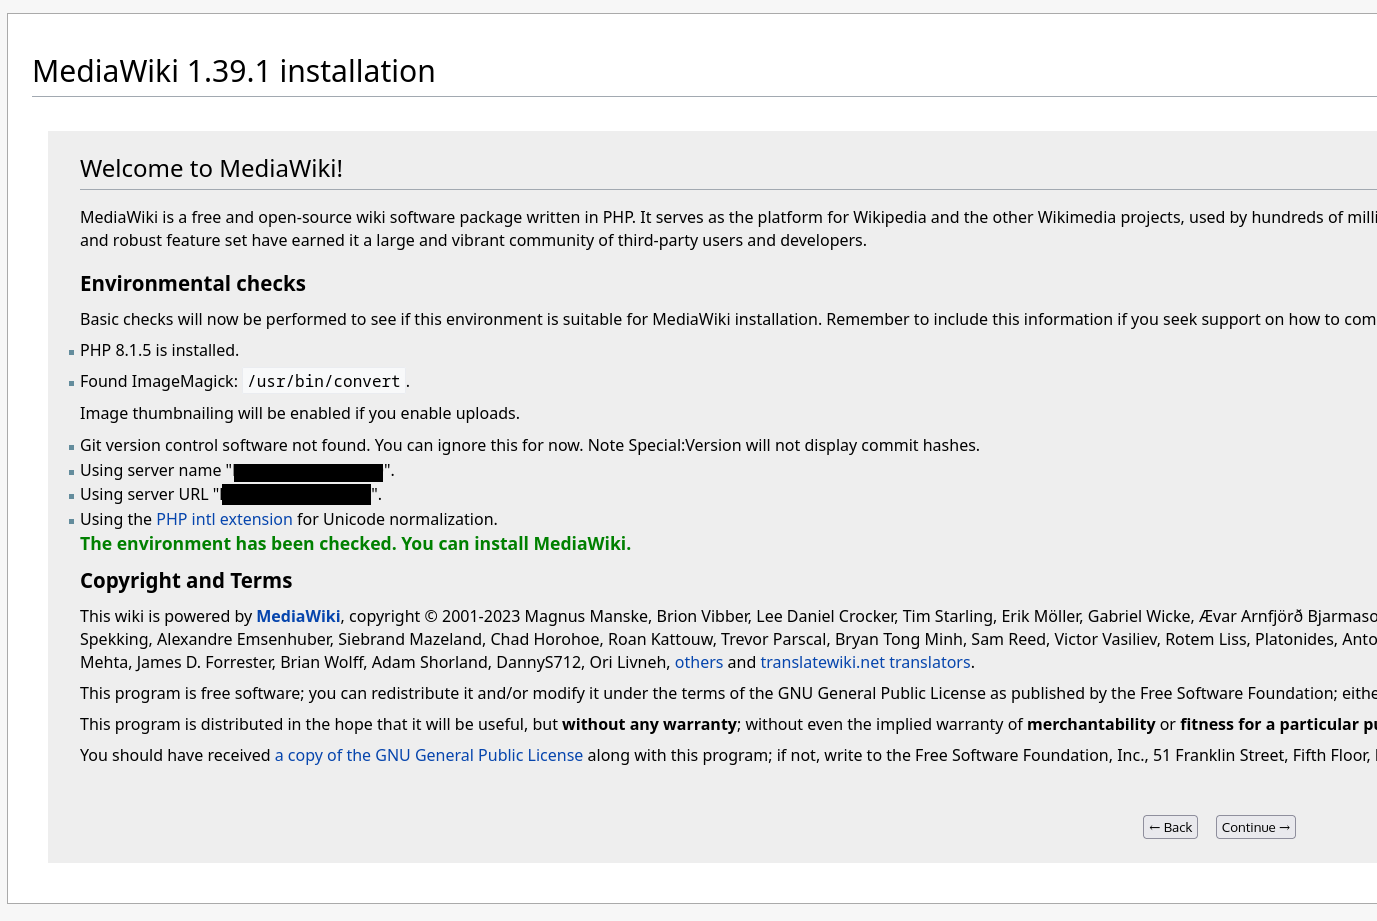
3- Here you will see the checks performed by MediaWiki. If anything missing, fix them and restart the installation.
4- Enter the database name and credentials.

5- Check the checkbox if your database username and password are the same with the previous screen.

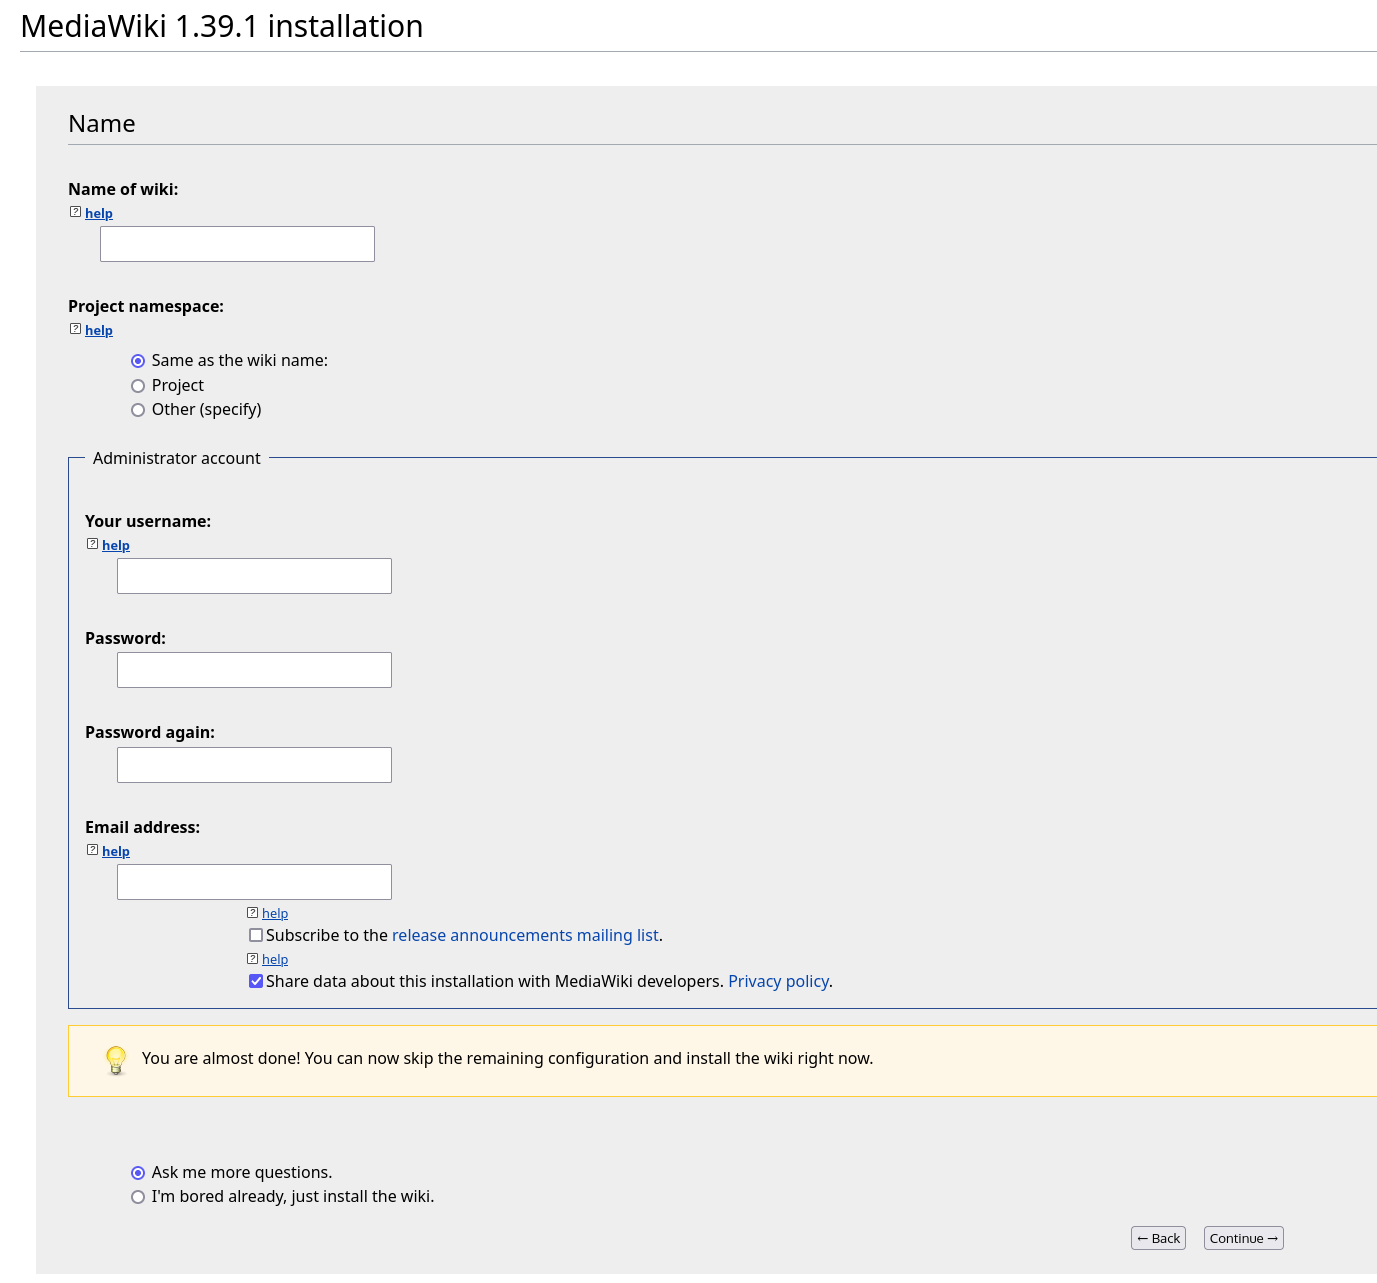
6- Type name of the site, username, password and email address.
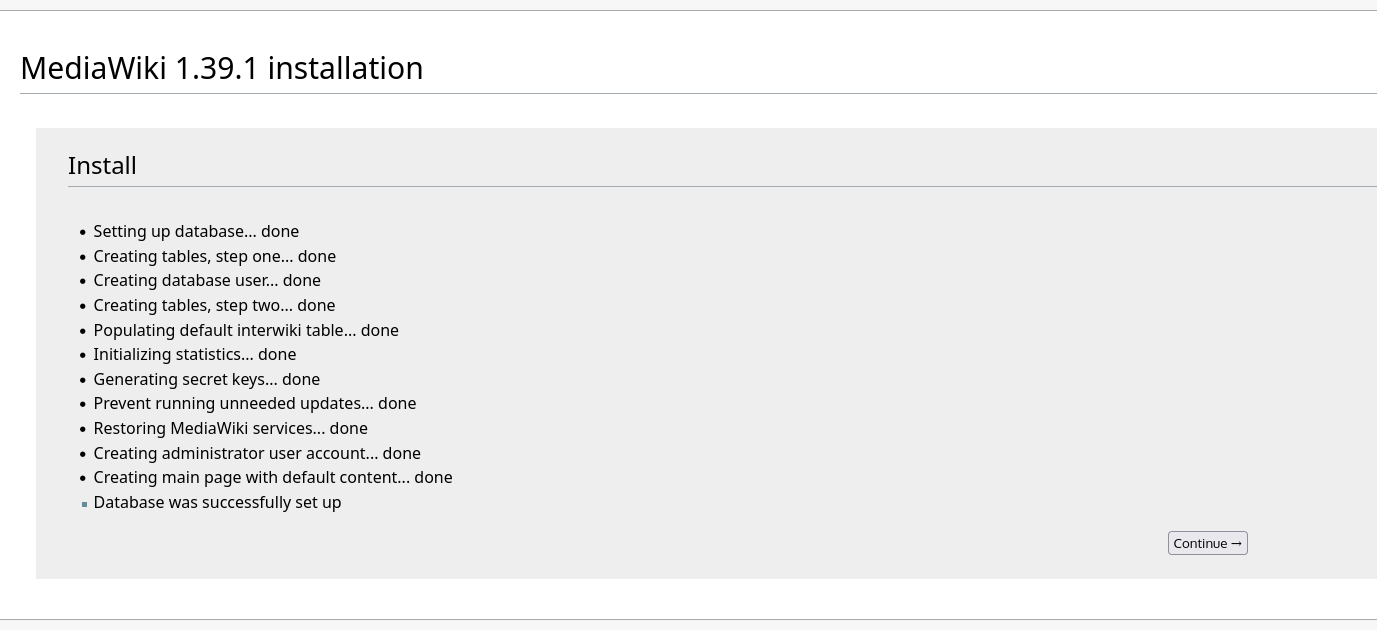
7- After entering site name etc, it will ask to continue. Once done, you will see the following screen.
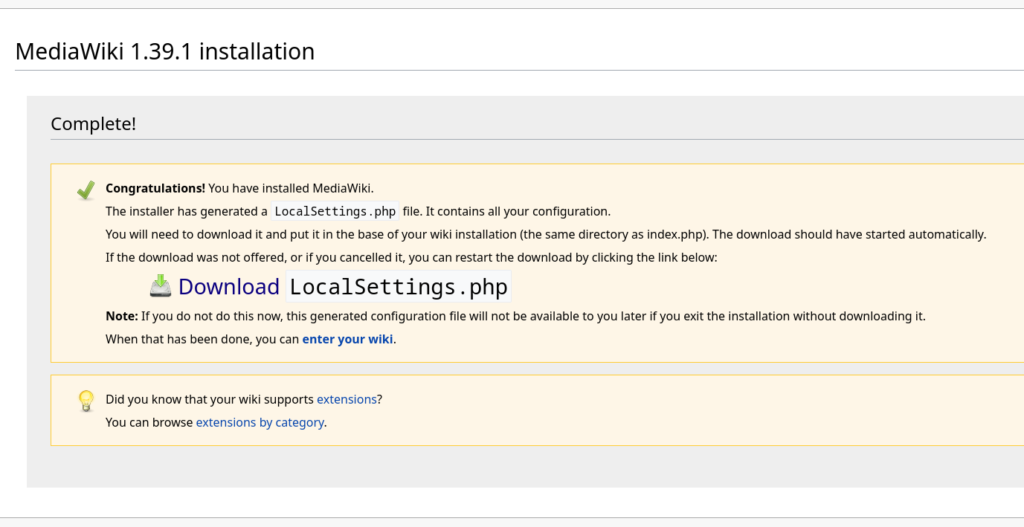
8- A file LocalSettings.php will be downloaded to your local PC.
Don’t do anything yet, just leave this page open.
You have now two options to push this file to the server.
Option-1: Upload it to the web root directory and give it proper permissions.
Option-2: Just create the file on the server and paste the contents into it.
cd /var/www/html
vim LocalSettings.php
Save and give it proper permissions.
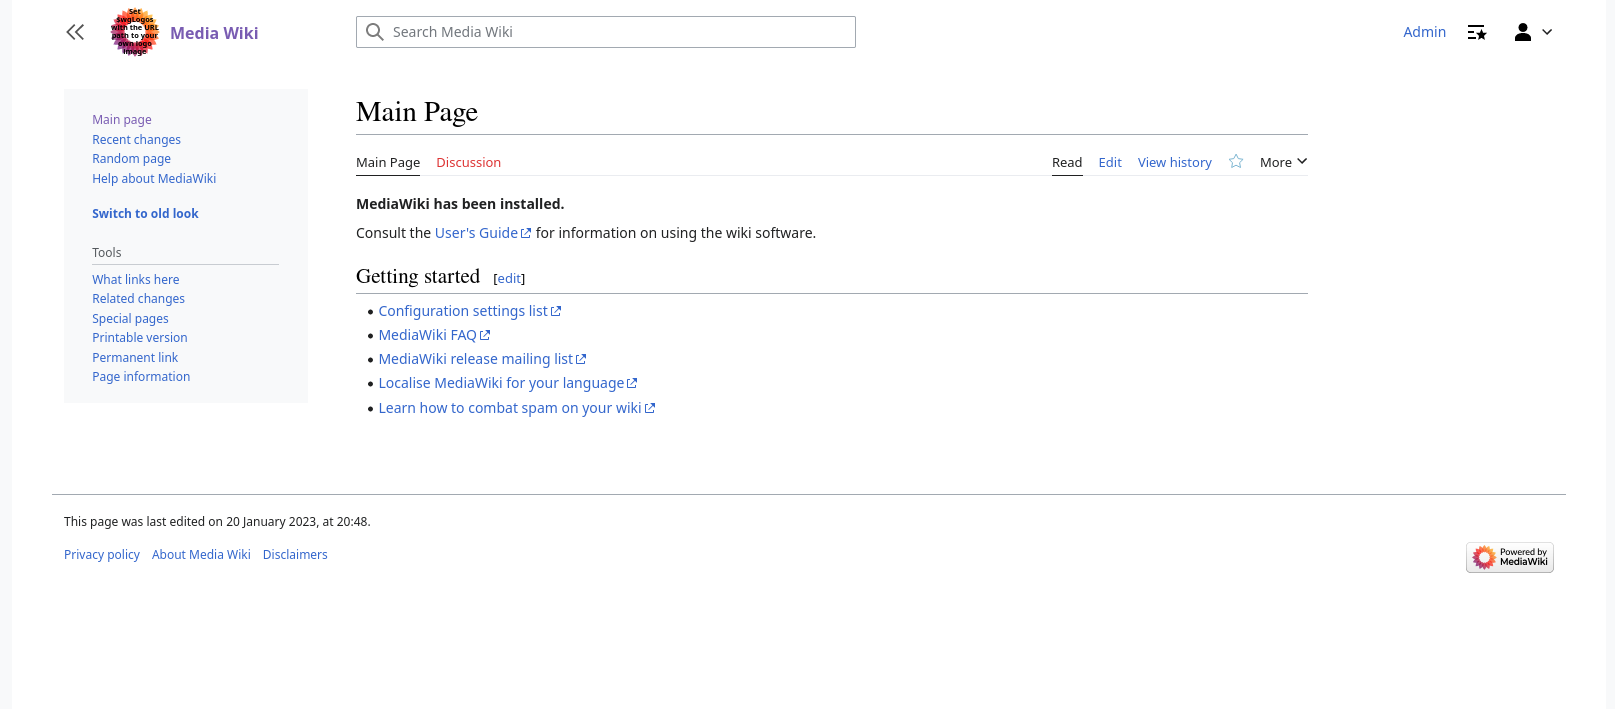
chown www-data:www-data LocalSettings.php9- We are done.
New look
To get the new look, login and go to Preferences page. Click on Appearance and choose Vector (2022).


