Plausible is an alternative to Google Analytics and Matomo. It is a web based analytics software which you can self-host too on your own server. They also provide cloud accounts to host your data on their servers like Google Analytics. Here I will guide you how to setup Plausible on Ubuntu 22.04 with Apache as proxy and SSL certificate from Let’s encrypt on your own server.
From Plausible home page:
Plausible is lightweight and open source web analytics. No cookies and fully compliant with GDPR, CCPA and PECR. Made and hosted in the EU, powered by European-owned cloud infrastructure
Let’s get started. We will prepare our server first.
This is going to be a long article, so make your coffee ready.
1- Server setup
Update and clean the system.
apt update && apt upgrade

apt autoremove && apt autoclean
Restart the server if needed.
Let’s install Apache and some other apps and libraries.
apt install apache2 snap vim curl gitEnable Apache at boot time.
systemctl enable apache2Enable some required Apache modules.
a2enmod ssl rewrite headers proxy proxy_http proxy_ajp deflate cache proxy_wstunnel http2 proxy_fcgi env expires remoteipsystemctl restart apache2We will now install certbot via snap.
snap install certbot --classicAnd for the basics we will enable UFW firewall.
ufw default allow outgoing
ufw default deny incoming
ufw allow 22
ufw allow 80
ufw allow 443
ufw enable
ufw status2- Apache virtual host
cd /etc/apache2/sites-available
vim plausible.conf
Type or paste the following in it.
<VirtualHost *:80>
	ServerName DOMAIN.COM
	ServerAlias DOMAIN.COM
	DocumentRoot /var/www/html

	<Directory "/var/www/html">
		AllowOverride All
		Options -Indexes +FollowSymLinks
	</Directory>

	ErrorLog ${APACHE_LOG_DIR}/DOMAIN.COM-error.log
</VirtualHost>
Enable plausible configuration and restart Apache.
a2dissite 000-default.conf
a2ensite plausible.conf

apachectl -t
systemctl restart apache2
3- SSL certificate
Make sure your domain DNS is properly propagated. You will get errors if LE cannot reach the server. Change your domain in the command below.
certbot certonly --webroot -w /var/www/html -d DOMAIN.COMCheck the Certbot article for renewal and other options.
4- Download Plausible
Plausible needs docker to run, we will install docker from the official docker repository.
curl -fsSL get.docker.com | sudo sh

apt install docker-compose
Clone the plausible repository.
cd /var/www
git clone https://github.com/plausible/hosting

cd hosting
5- Configure Plausible
There are two files we are interested in, docker-compose.yml and plausible-conf.env.
docker-compose.ymlcomes with the default values which are almost ready to go unless you want to change something.plausible-conf.envthis one needs changes.
Create a strong secret using openssl.
openssl rand -base64 64 | tr -d '\n' ; echoCopy the resulted key.
vim plausible-conf.envChange or add the following in this file:
- BASE_URL = the base URL
- PORT = leave it as 8000
- SECRET_KEY_BASE = the key from the openssl command output
A sample plausible-conf.env would be:
BASE_URL=https://DOMAIN.COM
PORT=8000
SECRET_KEY_BASE=qUdDB8L03gLzGNqYqb3TfOc1P1i2OUAIzp16mZKCsxNWBC4
Change DOMAIN.COM to your actual domain which will be used to access it in the browser.
Don’t forget to change the secret key.
There are more configuration options available, like mailer (SMTP). Check it out and add whatever fits your need.
6- Start the docker
We have set our env configuration file and it’s time to run docker-compose to start the containers.
Before that I would like to iterate that we will be pulling the latest container which will have the latest stable version of Plausible. It is mentioned in the docker-compose.yml.
plausible:
    image: plausible/analytics:latest
But if you want to have a different version, then you will need to add that version. Let’s say version 1.5.1. But I recommend to stick to latest.
plausible:
    image: plausible/analytics:v1.5.1
Once you are happy with the compose file, run it with the following command.
docker-compose up -d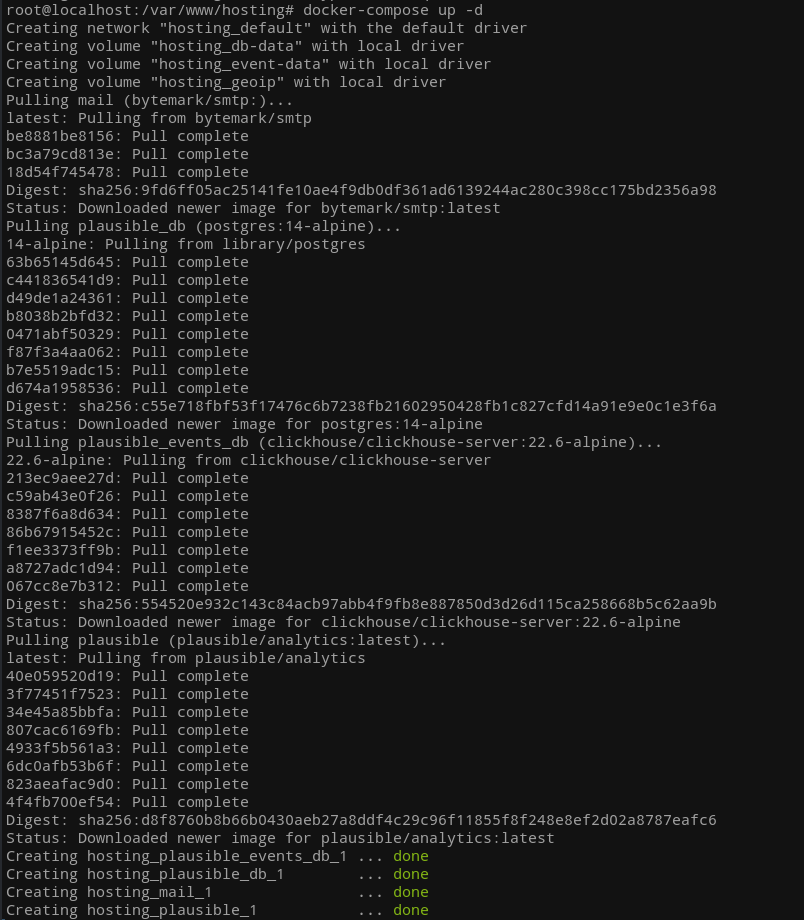
This will pull and setup all the necessary containers.
You can check the current docker containers with docker ps.
7- Update Apache virtual host
It’s time we update our Apache virtual host with block 443 and proxy for Plausible.
<VirtualHost *:443>
    ServerName DOMAIN.COM

    ProxyPreserveHost On
    ProxyPass / http://localhost:8000/
    ProxyPassReverse / http://localhost:8000/

    SetEnvIf X-Forwarded-For "^.*\..*\..*\..*" forwarded
    LogFormat "%h %l %u %t \"%r\" %>s %b \"%{Referer}i\" \"%{User-Agent}i\"" combined
    LogFormat "%{X-Forwarded-For}i %l %u %t \"%r\" %>s %b \"%{Referer}i\" \"%{User-Agent}i\"" forwarded

    SSLEngine on
    SSLCertificateKeyFile /etc/letsencrypt/live/DOMAIN.COM/privkey.pem
    SSLCertificateFile /etc/letsencrypt/live/DOMAIN.COM/fullchain.pem

    Protocols h2 h2c http/1.1

    SSLCipherSuite EECDH+AESGCM:EDH+AESGCM:AES256+EECDH:ECDHE-RSA-AES128-SHA:DHE-RSA-AES128-GCM-SHA256:AES256+EDH:ECDHE-RSA-AES256-GCM-SHA384:ECDHE-RSA-AES128-GCM-SHA256:DHE-RSA-AES256-GCM-SHA384:ECDHE-RSA-AES256-SHA384:ECDHE-RSA-AES128-SHA256:ECDHE-RSA-AES256-SHA:DHE-RSA-AES256-SHA256:DHE-RSA-AES128-SHA256:DHE-RSA-AES256-SHA:DHE-RSA-AES128-SHA:ECDHE-RSA-DES-CBC3-SHA:EDH-RSA-DES-CBC3-SHA:AES256-GCM-SHA384:AES128-GCM-SHA256:AES256-SHA256:AES128-SHA256:AES256-SHA:AES128-SHA:DES-CBC3-SHA:HIGH:!aNULL:!eNULL:!EXPORT:!DES:!MD5:!PSK:!RC4
    SSLProtocol All -SSLv2 -SSLv3 -TLSv1 -TLSv1.1
    SSLHonorCipherOrder On
    Header always set Strict-Transport-Security "max-age=63072000; includeSubDomains; preload"
    Header always set X-Frame-Options DENY
    Header always set X-Content-Type-Options nosniff

    <Location />
        Require all granted
    </Location>

    ErrorLog ${APACHE_LOG_DIR}/DOMAIN.COM_error.log
    CustomLog ${APACHE_LOG_DIR}/DOMAIN.COM_access.log combined env=!forwarded
    CustomLog ${APACHE_LOG_DIR}/DOMAIN.COM_access.log forwarded env=forwarded
</VirtualHost>
The only change you would want is DOMAIN.COM.
Check the syntax for errors and restart Apache:
apachectl -t
systemctl restart apache2
Type the domain in the browser tab and you should see the installation page.
Full plausible.conf configuration:
<VirtualHost *:80>
    ServerName DOMAIN.COM
    ServerAlias DOMAIN.COM
    DocumentRoot /var/www/html

    <Directory "/var/www/html">
        AllowOverride All
        Options -Indexes +FollowSymLinks
    </Directory>

    RewriteEngine On
    RewriteCond %{HTTPS} off
    RewriteRule (.*) https://%{HTTP_HOST}%{REQUEST_URI}

    ErrorLog ${APACHE_LOG_DIR}/DOMAIN.COM-error.log
</VirtualHost>


<VirtualHost *:443>
    ServerName DOMAIN.COM

    ProxyPreserveHost On
    ProxyPass / http://localhost:8000/
    ProxyPassReverse / http://localhost:8000/

    SetEnvIf X-Forwarded-For "^.*\..*\..*\..*" forwarded
    LogFormat "%h %l %u %t \"%r\" %>s %b \"%{Referer}i\" \"%{User-Agent}i\"" combined
    LogFormat "%{X-Forwarded-For}i %l %u %t \"%r\" %>s %b \"%{Referer}i\" \"%{User-Agent}i\"" forwarded

    SSLEngine on
    SSLCertificateKeyFile /etc/letsencrypt/live/DOMAIN.COM/privkey.pem
    SSLCertificateFile /etc/letsencrypt/live/DOMAIN.COM/fullchain.pem

    Protocols h2 h2c http/1.1

    SSLCipherSuite EECDH+AESGCM:EDH+AESGCM:AES256+EECDH:ECDHE-RSA-AES128-SHA:DHE-RSA-AES128-GCM-SHA256:AES256+EDH:ECDHE-RSA-AES256-GCM-SHA384:ECDHE-RSA-AES128-GCM-SHA256:DHE-RSA-AES256-GCM-SHA384:ECDHE-RSA-AES256-SHA384:ECDHE-RSA-AES128-SHA256:ECDHE-RSA-AES256-SHA:DHE-RSA-AES256-SHA256:DHE-RSA-AES128-SHA256:DHE-RSA-AES256-SHA:DHE-RSA-AES128-SHA:ECDHE-RSA-DES-CBC3-SHA:EDH-RSA-DES-CBC3-SHA:AES256-GCM-SHA384:AES128-GCM-SHA256:AES256-SHA256:AES128-SHA256:AES256-SHA:AES128-SHA:DES-CBC3-SHA:HIGH:!aNULL:!eNULL:!EXPORT:!DES:!MD5:!PSK:!RC4
    SSLProtocol All -SSLv2 -SSLv3 -TLSv1 -TLSv1.1
    SSLHonorCipherOrder On
    Header always set Strict-Transport-Security "max-age=63072000; includeSubDomains; preload"
    Header always set X-Frame-Options DENY
    Header always set X-Content-Type-Options nosniff

    <Location />
        Require all granted
    </Location>

    ErrorLog ${APACHE_LOG_DIR}/DOMAIN.COM_error.log
    CustomLog ${APACHE_LOG_DIR}/DOMAIN.COM_access.log combined env=!forwarded
    CustomLog ${APACHE_LOG_DIR}/DOMAIN.COM_access.log forwarded env=forwarded
</VirtualHost>
8- Plausible setup
Once the docker is up and Apache proxy is configured, we can now browse the domain to start the final installation.
1- Create admin account.

2- Add your first website.
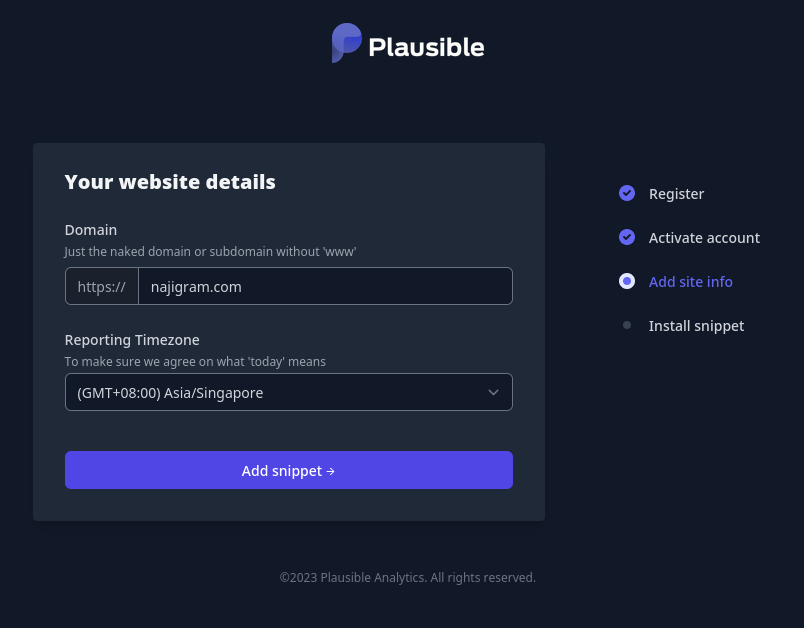
3- Add code snippet to your website head section and click Collect site data button.
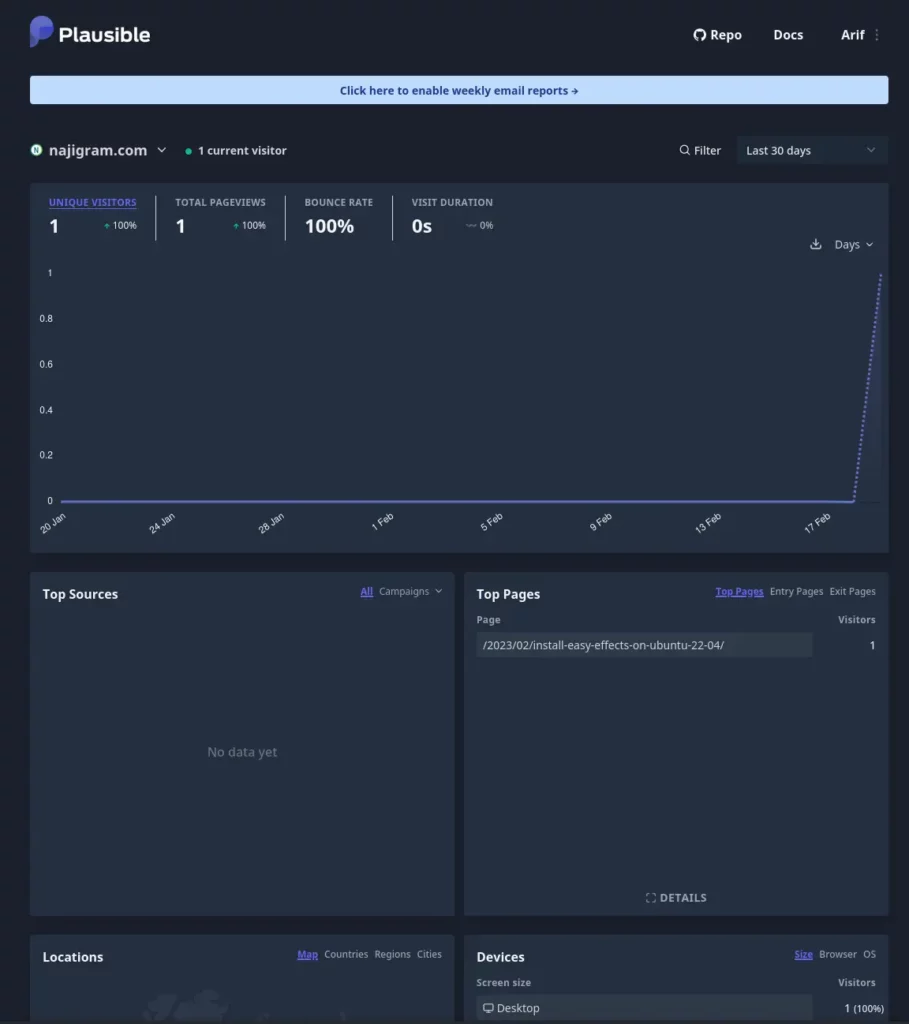
4- Plausible dashboard to view your domains and websites.
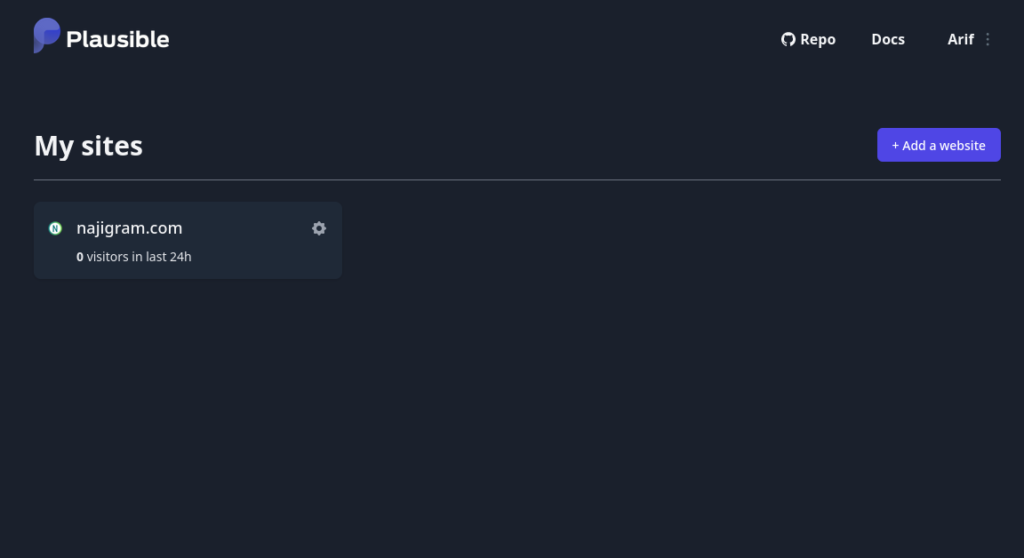
5- Wait for the data to be collected.
9- Update Plausible
You can easily update Plausible by running the following commands.
docker-compose down --remove-orphans
docker-compose pull plausible
docker-compose up -d
This will safely update Plausible and in a minute or two Plausible will be up again.
If you are stuck somewhere or have issues, you can refer to Plausible official forum or documentation for help.


