
Matomo previously known as Piwik is an analytic tool which can be installed on-premise. It is a Google Analytics alternative with data in your control. If you want to install and setup an analytic tool on your server for different reasons, Matomo is the one you should be looking to install. Let’s jump in to install Matomo (Piwik) on Ubuntu 22.04 server.
Take back control with Matomo – a powerful web analytics platform that gives you 100% data ownership.
https://matomo.org/
Before we get into the installation, here is the setup we will have to host Matomo.
- Ubuntu LTS (I recommend 22.04 LTS)
- PHP 8 (8.1), Apache and MariaDB
- SSL with Let’s Encrypt
Hardware based on views:
- 100K page views/m – 2GB RAM, 2 CPU cores and up to 50GB disk space
- 1M page views/m – 8GB RAM, 4 CPU cores and up to 250GB disk space
- 10M page views/m – 16GB RAM, 8 CPU cores and up to 400GB disk space
I guess you already may have get the idea of what hardware you would need. If you are going over 100M, you can separate the app and database to two separate servers.
1- Prepare the server
I assume you just launched a fresh VPS, in that case we will update the server and enable firewall.
apt update && apt upgrade

apt autoremove && apt autoclean
ufw default allow outgoing
ufw default deny incoming
ufw allow 22
ufw allow 80
ufw allow 443
ufw enable
ufw statusReboot the system if required at this point.
2- Install LAMP stack
Let’s install PHP, Apache and MariaDB from the default repositories.
apt install apache2 mariadb-server libapache2-mod-php8.1 php8.1 php8.1-gmp php8.1-bcmath php8.1-gd php-json php8.1-mysql php8.1-curl php8.1-mbstring php8.1-intl php8.1-imagick php8.1-xml php8.1-zip php8.1-fpm php8.1-apcu php8.1-opcache bzip2 zip unzip imagemagick vimAfter installation enable PHP FPM.
a2enconf php8.1-fpm
a2dismod php8.1
a2dismod mpm_prefork
a2enmod mpm_event
Enable some required Apache modules.
a2enmod ssl rewrite headers proxy proxy_http deflate cache proxy_wstunnel http2 proxy_fcgi env expiresRestart Apache and enable services at boot time.
systemctl restart apache2

systemctl enable apache2
systemctl enable php8.1-fpm
systemctl enable mariadb
3- Database
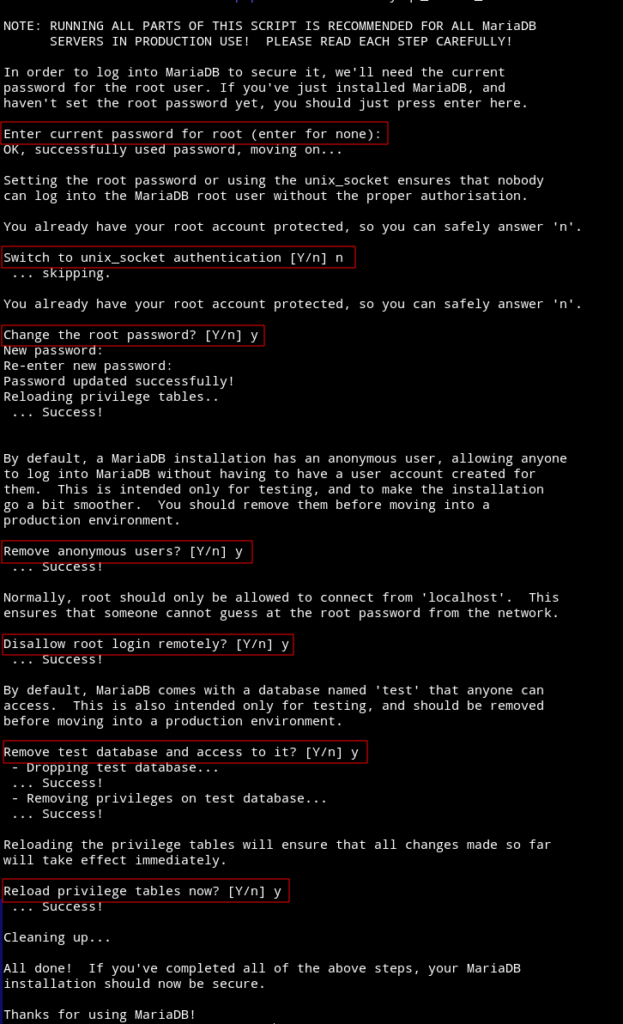
Run mysql_secure_installation script to perform the initial setup.
Login to the database server and create matomo database with a user and password.
*Change PASSWORD in the following commands.
mysql -u root -p

create database matomo CHARACTER SET utf8mb4 COLLATE utf8mb4_general_ci;

grant all on matomo.* to 'matomo_user'@'localhost' identified by 'PASSWORD';

flush privileges;
exit
Change or add the following in /etc/mysql/mariadb.conf.d/50-server.cnf file under [mysqld] section.
Note: these values are fine for tracking around 1M views per month.
max_allowed_packet = 1G
wait_timeout = 28800
Restart the database server afterwards.
systemctl restart mariadb4- PHP configuration
Let’s do changes to PHP FPM configuration file to adjust some options.
vim /etc/php/8.1/fpm/php.iniCheck PHP timezone manual for your timezone.
max_execution_time = 0 (line 409)
memory_limit = 2G (line 430)
date.timezone = Europe/Berlin (line 968)
Restart PHP FPM after the changes.
systemctl restart php8.1-fpm5- Download Matomo
Switch to www directory and download Matomo zip file.
cd /var/www

wget https://builds.matomo.org/matomo.zip
Unzip and move it to the web server root directory.
unzip matomo.zip
rm -r /var/www/html/*
shopt -s dotglob
mv matomo/* html/
rm -r matomo
rm matomo.zip
Change the directory ownership and group.
chown -R www-data:www-data /var/www/html6- Apache virtual host
We will create a new virtual host file for Matomo.
cd /etc/apache2/sites-available/
vim matomo.conf
Paste the following into it, change where necessary (Bold).
<VirtualHost *:80>
	ServerName DOMAIN.COM
	DocumentRoot /var/www/html

	<Directory "/var/www/html">
		AllowOverride All
		Options -Indexes +FollowSymLinks
	</Directory>

	ErrorLog /var/log/apache2/matomo-error.log
</VirtualHost>
Enable the newly created configuration and restart Apache.
a2dissite 000-default.conf
a2ensite matomo.conf

apachectl -t
systemctl restart apache2
7- SSL certificate
Install Certbot via snap and get a certificate for the web root.
Make sure your domain is propagated before getting an SSL, otherwise LE will throw errors.
snap install certbot --classic
certbot certonly --webroot -w /var/www/html -d DOAMIN.COM
Note down the path to the SSL certificates.
8- Update Apache configuration
At this point, you will be able to see the Matomo installation screen when you browse the domain. But before we start the setup, we will update our Apache virtual host configuration with SSL to finish this part. Open matomo.conf file for updating.
Paste the following in it under Port 80 block. Change where you see fit for your needs.
<VirtualHost *:443>
	ServerName DOMAIN.COM
	DocumentRoot /var/www/html

	SSLCipherSuite EECDH+AESGCM:EDH+AESGCM:AES256+EECDH:ECDHE-RSA-AES128-SHA:DHE-RSA-AES128-GCM-SHA256:AES256+EDH:ECDHE-RSA-AES256-GCM-SHA384:ECDHE-RSA-AES128-GCM-SHA256:DHE-RSA-AES256-GCM-SHA384:ECDHE-RSA-AES256-SHA384:ECDHE-RSA-AES128-SHA256:ECDHE-RSA-AES256-SHA:DHE-RSA-AES256-SHA256:DHE-RSA-AES128-SHA256:DHE-RSA-AES256-SHA:DHE-RSA-AES128-SHA:ECDHE-RSA-DES-CBC3-SHA:EDH-RSA-DES-CBC3-SHA:AES256-GCM-SHA384:AES128-GCM-SHA256:AES256-SHA256:AES128-SHA256:AES256-SHA:AES128-SHA:DES-CBC3-SHA:HIGH:!aNULL:!eNULL:!EXPORT:!DES:!MD5:!PSK:!RC4
	SSLProtocol All -SSLv2 -SSLv3 -TLSv1 -TLSv1.1
	SSLHonorCipherOrder On
	Header always set Strict-Transport-Security "max-age=63072000; includeSubDomains; preload"
	Header always set X-Frame-Options DENY
	Header always set X-Content-Type-Options nosniff

	Protocols h2 http/1.1

	<Directory "/var/www/html">
		AllowOverride All
		Options -Indexes +FollowSymLinks
	</Directory>

	<FilesMatch ".(ico|pdf|flv|jpg|jpeg|png|gif|js|css|swf|ttf|woff)$">
		Header set Cache-Control "max-age=31536000, public"
	</FilesMatch>

	ErrorLog /var/log/apache2/matomo-ssl-error.log

	SSLEngine on
	SSLCertificateKeyFile /etc/letsencrypt/live/DOMAIN.COM/privkey.pem
	SSLCertificateFile /etc/letsencrypt/live/DOMAIN.COM/fullchain.pem
</VirtualHost>
Now browse the domain with HTTPS, if all is good you can update the port 80 block to redirect to HTTPS. I have highlighted the changes in bold.
<VirtualHost *:80>
	ServerName DOMAIN.COM
	DocumentRoot /var/www/html
	RewriteEngine On
	RewriteCond %{HTTPS} off
	RewriteRule (.*) https://%{HTTP_HOST}%{REQUEST_URI}

	<Directory "/var/www/html">
		AllowOverride All
		Options -Indexes +FollowSymLinks
	</Directory>

	ErrorLog /var/log/apache2/matomo-error.log
</VirtualHost>
9- Matomo installation
Point your browser to your domain with HTTPS and start the installation process.
1- Click Next on the Welcome screen.
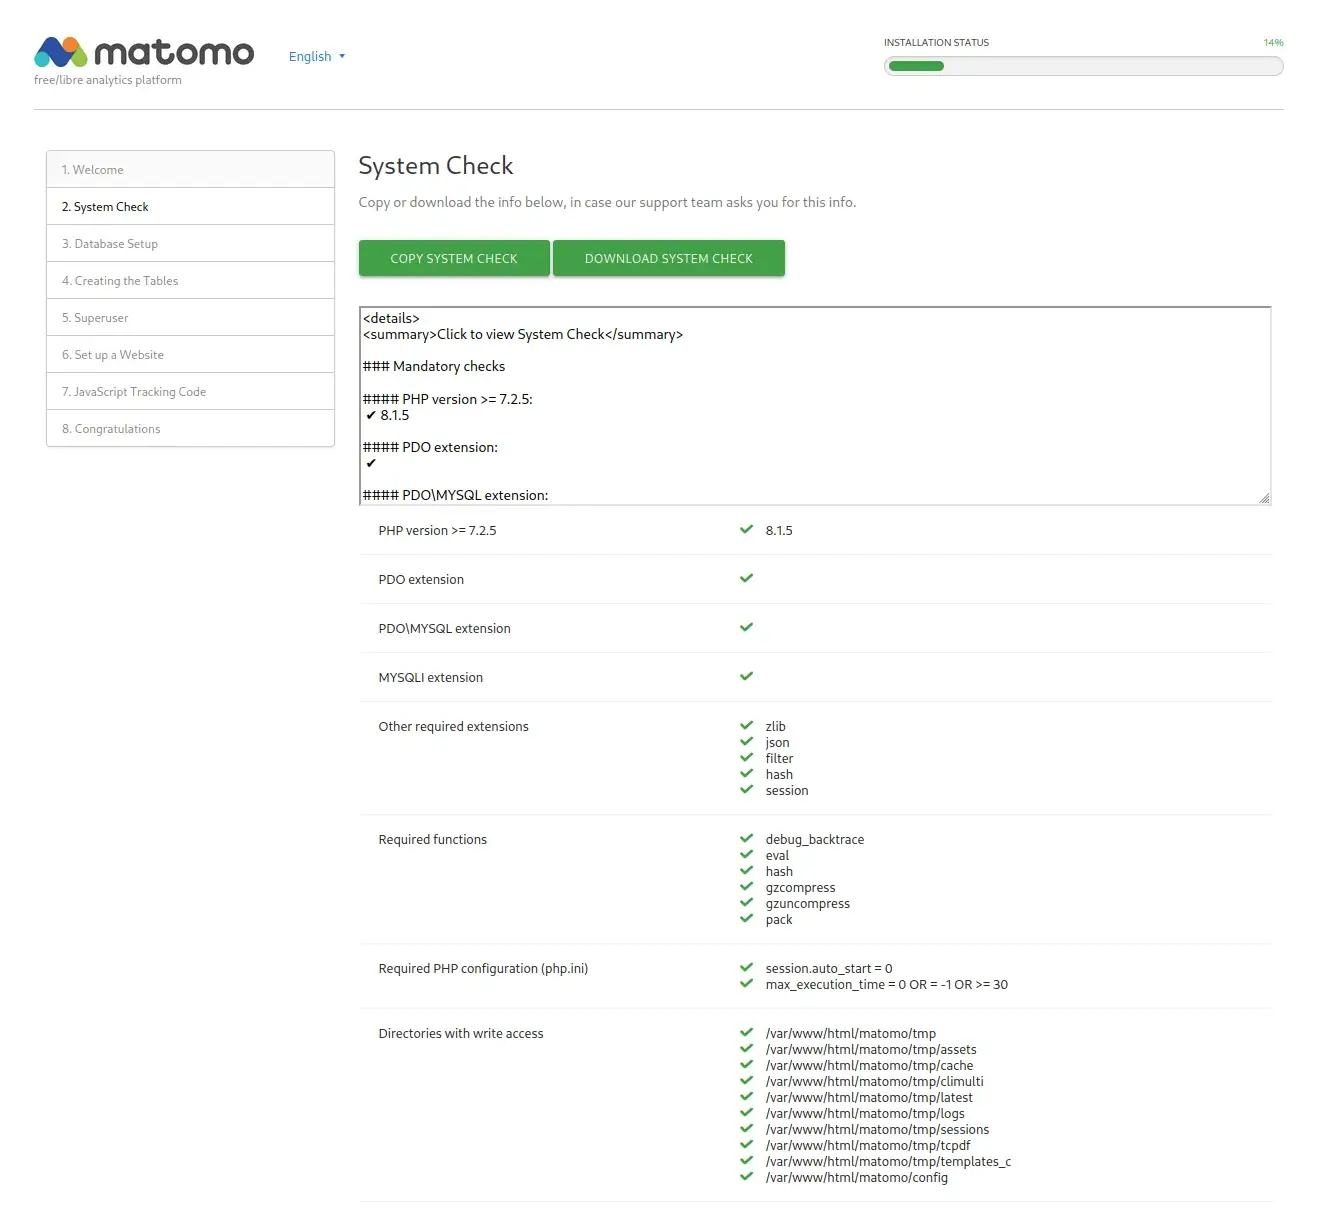
2- This screen checks system status, if you have followed the article correctly you may not have any issues here.
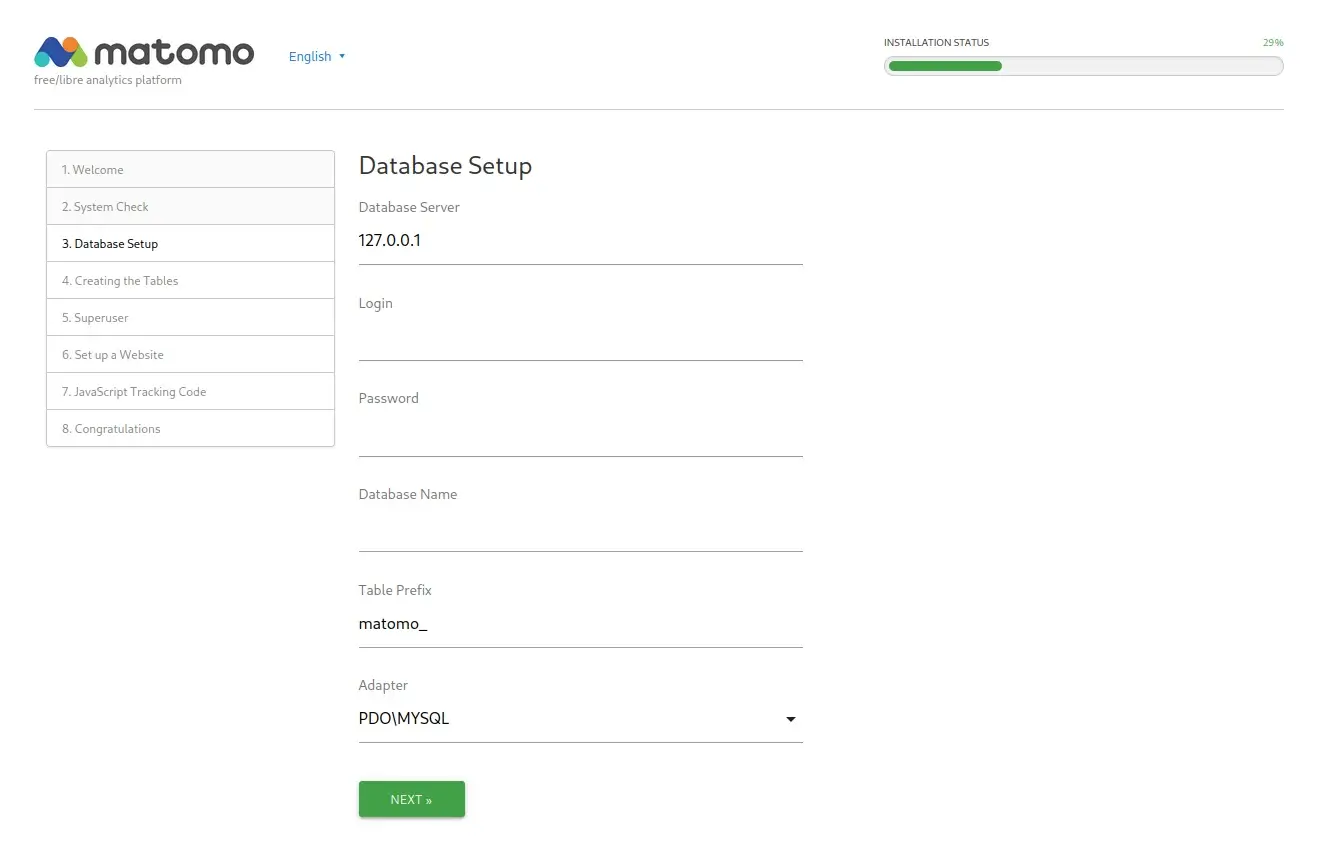
3- Enter the database name, user and password.
4- If the database check pass, it will create the tables.
5- Create a super user here.

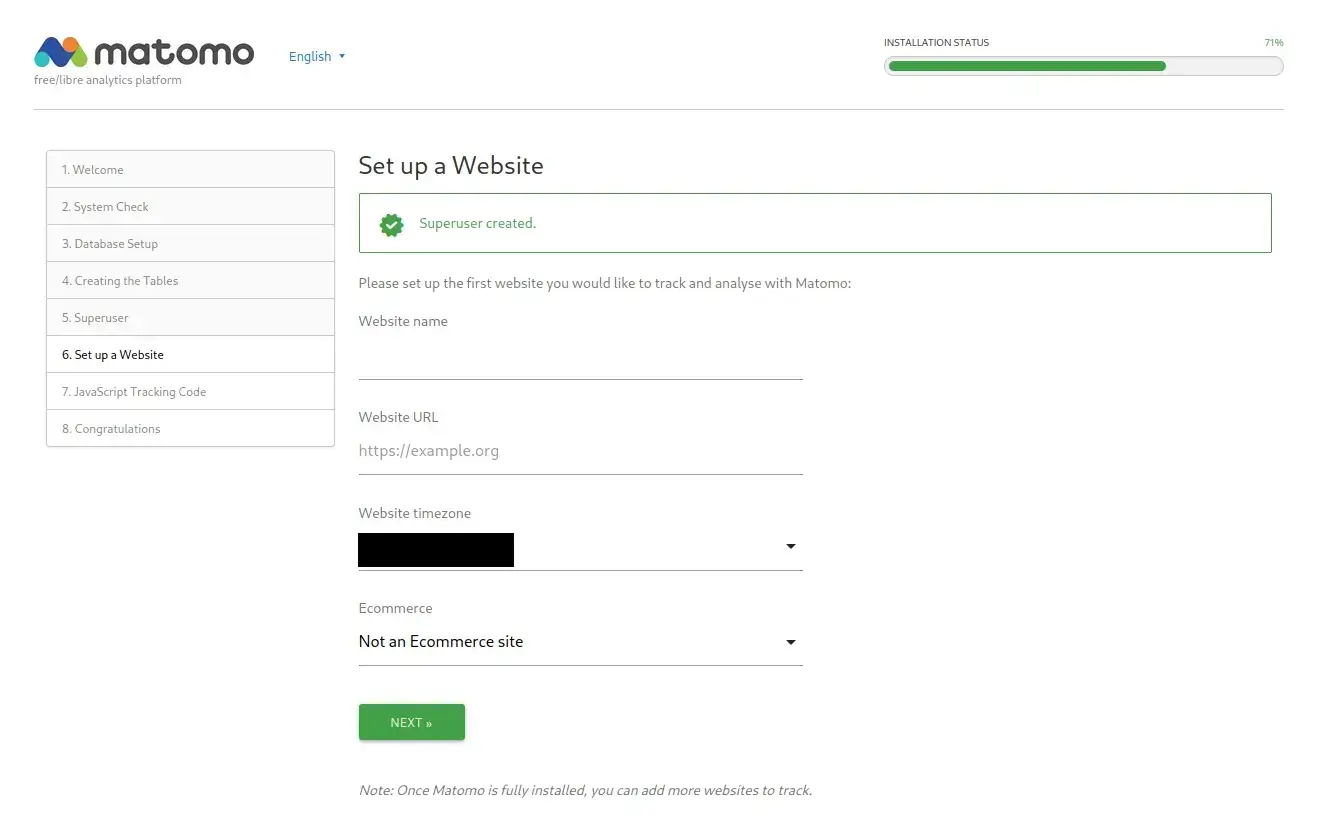
6- Setup your website name, starting URL for tracking etc.
7- Implement the provided code on your website. You can do this at later stage.
8- Setup is done. Click the button at the bottom to continue to Matomo.
10- Setup cron
To make Matomo faster and load data faster, we will use cron job to process the background jobs.
crontab -e -u www-dataEnter the following in it:
5 * * * * /usr/bin/php /var/www/html/console core:archive --url=https://DOMAIN.COM/ > /dev/nullYou can now disable Archiving settings under System -> General settings.
If you want to read more about tweaking your setup, read here. Although we have covered most of it.


