
Moodle is one of the popular software used for education and online course systems. It has comprehensive modules for students and teachers, as well as plugins to install that provide the extra functionality you need for your system. In this article, I am going to guide you step by step on how to install Moodle on Ubuntu 22.04 LTS from scratch.
Requirements:
- Ubuntu 22.04 LTS OS
- VPS with 2GB ram and 50GB space
- Domain pointed to the server ip
1- Prepare the system
Update the system, and enable firewall.
apt update && apt upgrade

apt autoremove && apt autoclean
ufw default allow outgoing
ufw default deny incoming
ufw allow 22
ufw allow 80
ufw allow 443
ufw enable
ufw statusIt’s time to install LAMP stack.
apt install apache2 mariadb-server libapache2-mod-php php php-gmp php-bcmath php-gd php-json php-mysql php-curl php-mbstring php-intl php-imagick php-xml php-zip php-fpm php-redis php-apcu php-opcache php-ldap php-soap bzip2 zip unzip imagemagick vim ffmpeg libsodium23After the installation has completed, enable PHP 8.1 FPM and its Apache configuration.
a2enconf php8.1-fpm
a2dismod php8.1
a2dismod mpm_prefork
a2enmod mpm_event
Enable some Apache modules.
a2enmod ssl rewrite headers proxy proxy_http deflate cache proxy_wstunnel http2 proxy_fcgi env expiressystemctl restart apache2Enable Apache, MariaDB and PHP-FPM at boot time.
systemctl enable apache2
systemctl enable php8.1-fpm
systemctl enable mariadb
2- Update php configuration
Some of these settings are required, so it’s important to configure them. Other options, such as upload_max_filesize depend on your specific needs.
vim /etc/php/8.1/fpm/php.iniCheck PHP timezone manual for your timezone.
max_execution_time = 180
max_input_vars = 5000
memory_limit = 512M
post_max_size = 500M
upload_max_filesize = 500M
date.timezone = Europe/Berlin

opcache.enable = 1
opcache.memory_consumption = 512
opcache.max_accelerated_files = 10000
opcache.revalidate_freq = 60

opcache.use_cwd = 1
opcache.validate_timestamps = 1
opcache.save_comments = 1
opcache.enable_file_override = 0
systemctl restart php8.1-fpm3- Database creation
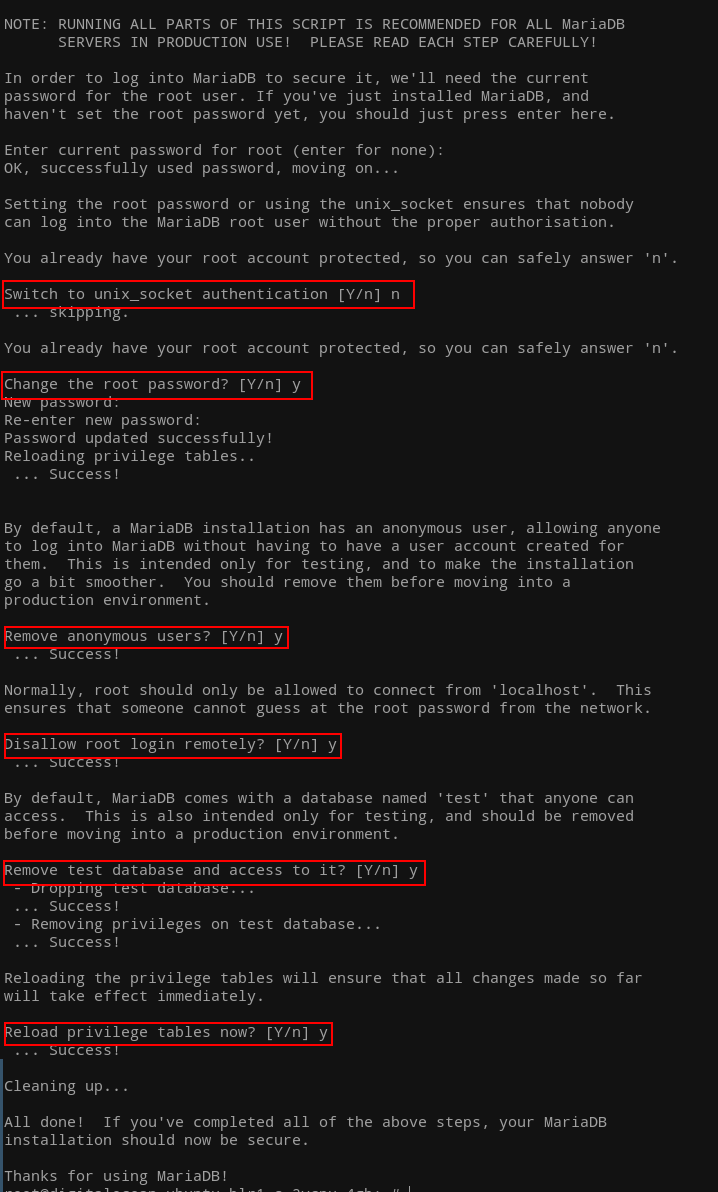
Ubuntu come pre-installed with mysql_secure_installation. Let’s run it to perform the initial setup.
Now, log in to the database server and create the moodle database.
mysql

create database moodle CHARACTER SET utf8mb4 COLLATE utf8mb4_general_ci;

grant all on moodle.* to 'moodle_user'@'localhost' identified by 'PASSWORD';

flush privileges;
exit
4- Download and configure Moodle
Navigate to the www directory to continue.
cd /var/www
wget https://packaging.moodle.org/stable402/moodle-latest-402.zip
At the time of writing this article, the latest stable version is 4.2.2. Please check the releases page for any other available versions.
Extract and move it to the root directory of your web server.
unzip moodle-latest-402.zip
rm -r /var/www/html/*
shopt -s dotglob
mv moodle/* html/
Create a Moodle data directory outside of the web root in /var/www.
mkdir /var/www/moodledataModify the ownership and group of the web server root and moodle data directory.
chown -R www-data:www-data /var/www/html
chown -R www-data:www-data /var/www/moodledata
5- Create Apache virtual host
cd /etc/apache2/sites-available/
vim moodle.conf
Copy and paste the following content into the configuration file. Change the domain name.
<VirtualHost *:80>
	ServerName DOMAIN.COM
	ServerAlias DOMAIN.COM
	DocumentRoot /var/www/html

	<Directory "/var/www/html">
		AllowOverride All
		Options -Indexes +FollowSymLinks
	</Directory>

	ErrorLog /var/log/apache2/moodle_error.log
</VirtualHost>
Save and restart Apache.
a2dissite 000-default.conf
a2ensite moodle.conf

apachectl -t
systemctl restart apache2
We will install Certbot via snap to get a free Let’s Encrypt SSL. Skip this if you have your own certificates from another vendor.
snap install certbot --classic
certbot certonly --webroot -w /var/www/html -d DOAMIN.COMUpdate the Apache configuration file located at /etc/apache2/sites-available/moodle.conf with port 443 section.
<VirtualHost *:443>
	ServerName DOMAIN.COM
	DocumentRoot /var/www/html

	SSLCipherSuite EECDH+AESGCM:EDH+AESGCM:AES256+EECDH:ECDHE-RSA-AES128-SHA:DHE-RSA-AES128-GCM-SHA256:AES256+EDH:ECDHE-RSA-AES256-GCM-SHA384:ECDHE-RSA-AES128-GCM-SHA256:DHE-RSA-AES256-GCM-SHA384:ECDHE-RSA-AES256-SHA384:ECDHE-RSA-AES128-SHA256:ECDHE-RSA-AES256-SHA:DHE-RSA-AES256-SHA256:DHE-RSA-AES128-SHA256:DHE-RSA-AES256-SHA:DHE-RSA-AES128-SHA:ECDHE-RSA-DES-CBC3-SHA:EDH-RSA-DES-CBC3-SHA:AES256-GCM-SHA384:AES128-GCM-SHA256:AES256-SHA256:AES128-SHA256:AES256-SHA:AES128-SHA:DES-CBC3-SHA:HIGH:!aNULL:!eNULL:!EXPORT:!DES:!MD5:!PSK:!RC4
	SSLProtocol All -SSLv2 -SSLv3 -TLSv1 -TLSv1.1
	SSLHonorCipherOrder On
	Header always set Strict-Transport-Security "max-age=63072000; includeSubDomains; preload"
	Header always set X-Frame-Options DENY
	Header always set X-Content-Type-Options nosniff

	Protocols h2 http/1.1

	<Directory "/var/www/html">
		AllowOverride All
		Options -Indexes +FollowSymLinks
	</Directory>

	<FilesMatch ".(ico|pdf|flv|jpg|jpeg|png|gif|js|css|swf|ttf|woff)$">
		Header set Cache-Control "max-age=31536000, public"
	</FilesMatch>

	ErrorLog /var/log/apache2/moodle_error.log

	SSLEngine on
	SSLCertificateKeyFile /etc/letsencrypt/live/DOMAIN.COM/privkey.pem
	SSLCertificateFile /etc/letsencrypt/live/DOMAIN.COM/fullchain.pem
</VirtualHost>
Change the path to the SSL files and the domain name within it, save the changes, test the configuration, and then restart Apache.
apachectl -t
systemctl restart apache2
There is one more thing: to redirect HTTP traffic to HTTPS (even though Moodle will take care of it), we will make our setup foolproof. Add it to port 80 section in /etc/apache2/sites-available/moodle.conf. Don’t forget to restart Apache afterwards.
RewriteEngine On
RewriteCond %{HTTPS} off
RewriteRule (.*) https://%{HTTP_HOST}%{REQUEST_URI}
6- Moodle installation
At this point you will have a working Moodle setup with HTTPS. Browse the domain name in the browser with HTTPS. We don’t need to modify the config.php file; the installation will take care of it. It is located in the /var/www/html directory.
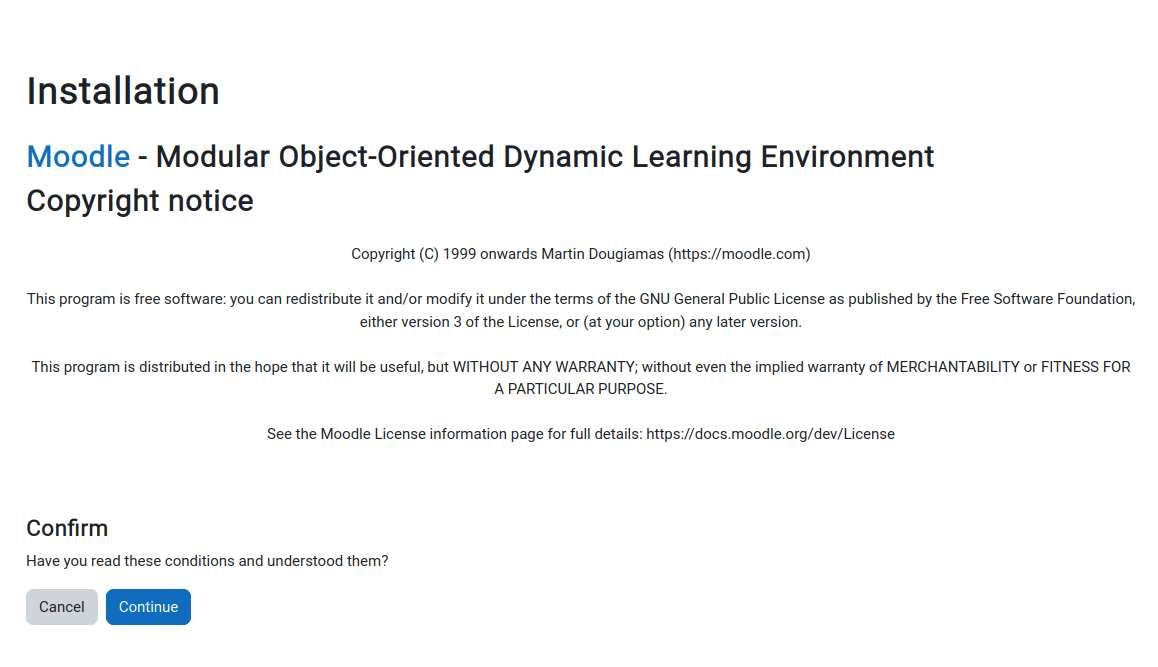
1- You will see this page on initial load of the domain.

2- Here you can change the moodle data directory path if it’s different.

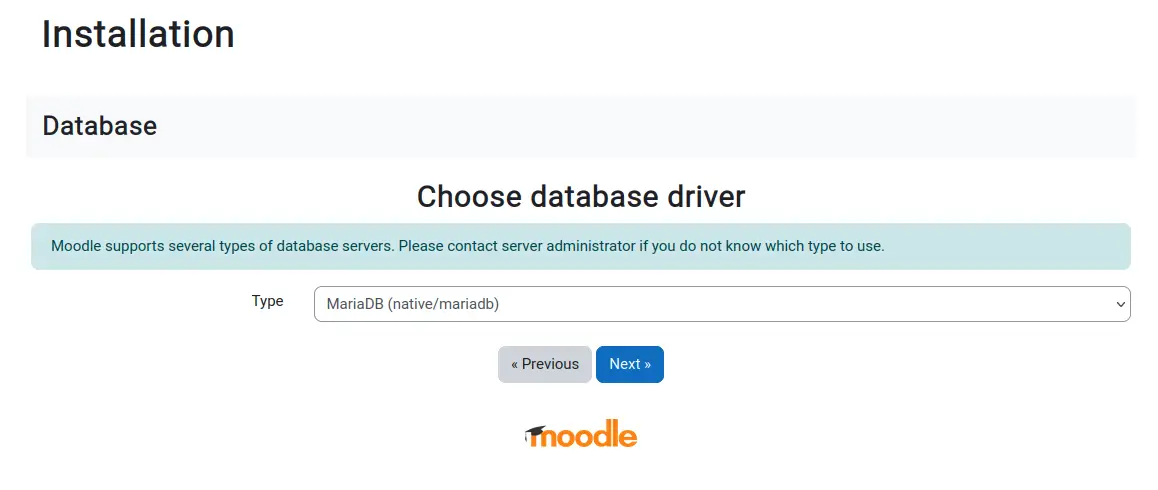
3- Moodle support wide variety of databases, for our setup we will choose MariaDB.
4- Enter the database details that you have created earlier.

5- Click Confirm to proceed.
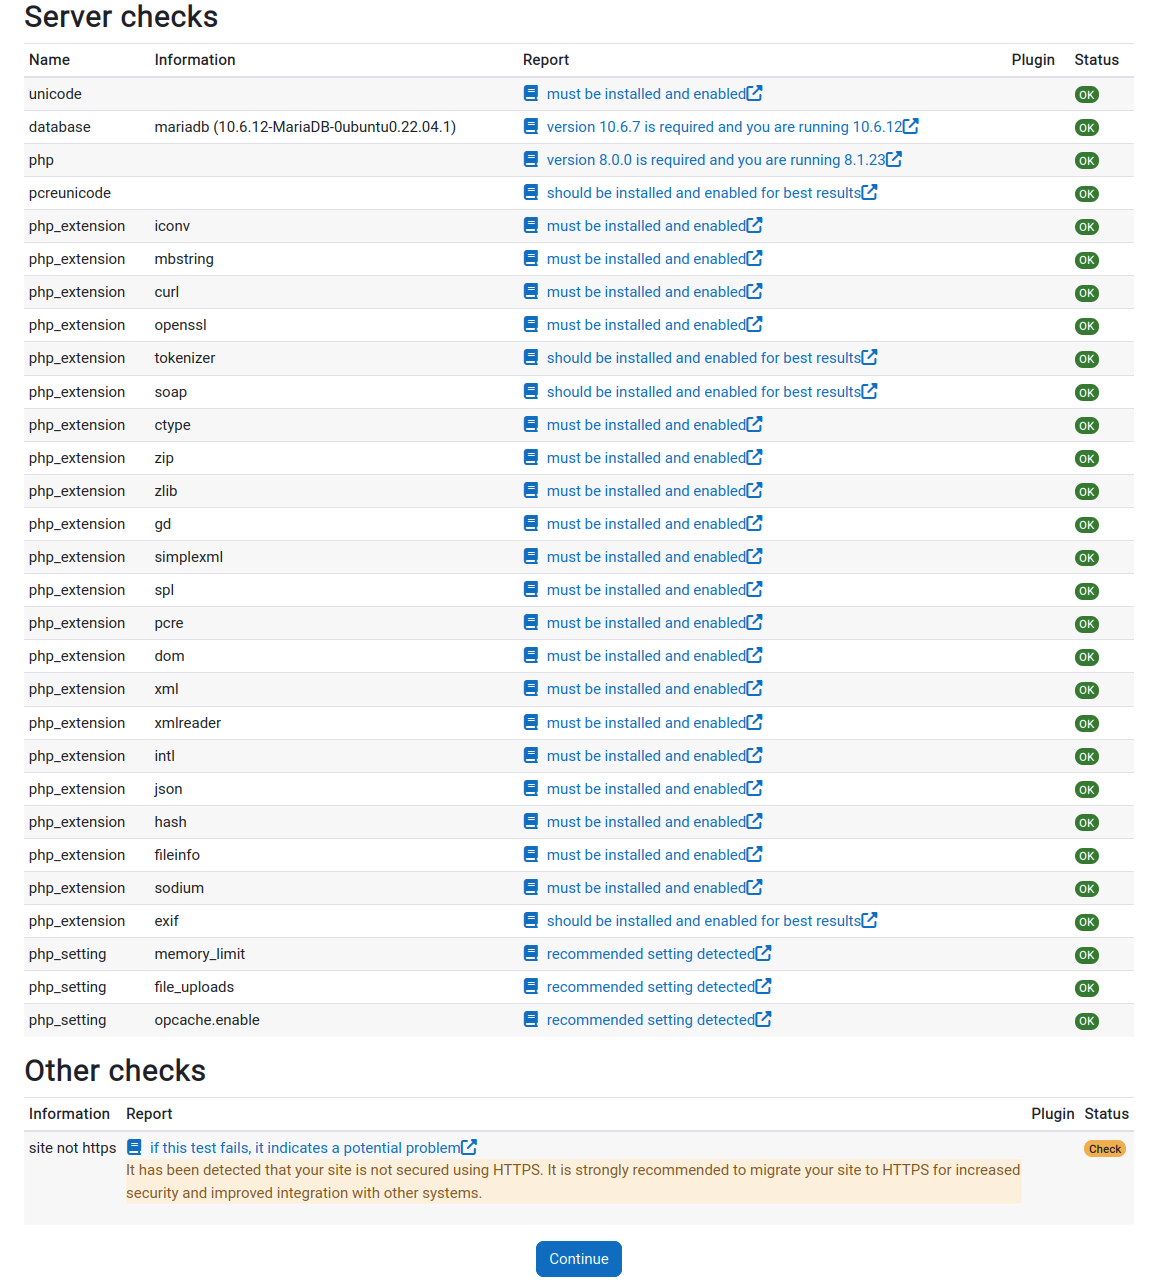
6- If all the extensions and configurations are correct, you will see a Continue button.
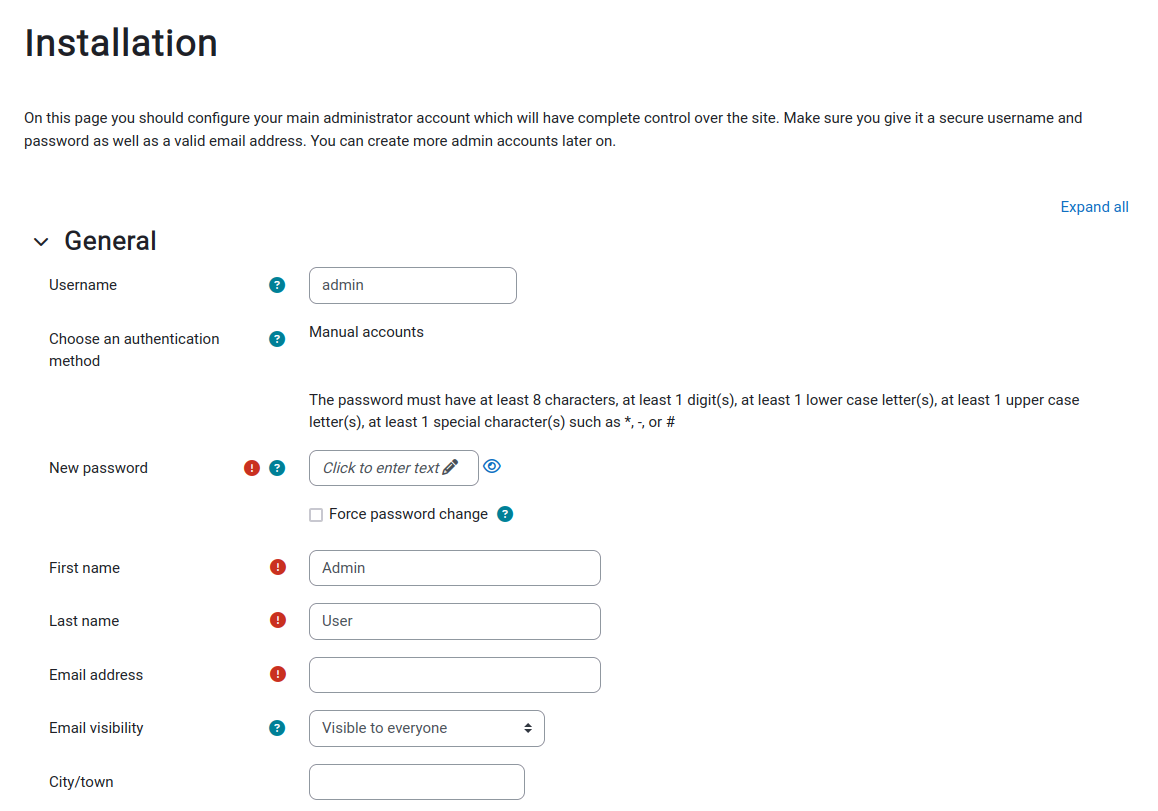
7- Here, you can set the name, username, password and email address for the Admin user, etc.
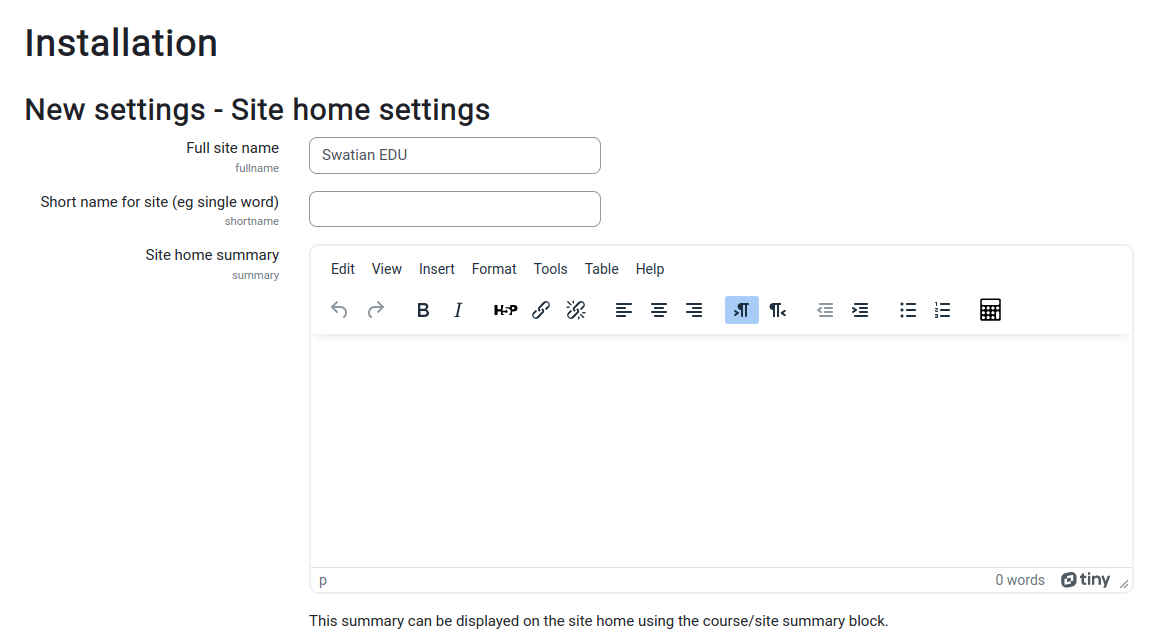
8- Enter the site name, a short name, and some optional data.
Once done, you will see one more screen to continue.
Browse through the Site administration to configure things like logos, courses, user roles, etc., according to your needs.
7- Cron job setup
There is one last thing to do on the server, and that is to set up the cron job.
crontab -u www-data -eAnd add the following to it.
* * * * * php /path/to/moodle/admin/cli/cron.php >/dev/null


