Nextcloud default search is very basic but it gets the job done. To enhance the search we will setup Elasticsearch 7 for Nextcloud in this article.
Elasticsearch is a free and open source search tool built with Java and Apache Lucene. Read more on their site about Elasticsearch and other products.
This setup was completed with:
- Ubuntu 20.04 server
- Nextcloud 22 and 23
- Elasticsearch 7
Install required tools
Go to your Nextcloud Apps page and install the following apps from the Search tab(left side).
Full text searchFull text search - Elasticsearch platformFull text search - Files
If you haven’t installed Java yet on the server.
sudo apt install openjdk-11-jreAdd repository
Elasticsearch GPG key:
wget -qO - https://artifacts.elastic.co/GPG-KEY-elasticsearch | sudo apt-key add -Repository:
echo "deb https://artifacts.elastic.co/packages/7.x/apt stable main" | sudo tee /etc/apt/sources.list.d/elastic-7.x.listInstall Elasticsearch
Update the system and install Elasticsearch:
sudo apt update && sudo apt install elasticsearchMost likely you would want to search PDF and other files too, install it’s Elasticsearch plugin.
sudo /usr/share/elasticsearch/bin/elasticsearch-plugin install ingest-attachmentAfter installation start and enable Elasticsearch:
sudo systemctl start elasticsearch
sudo systemctl enable elasticsearch
Securing Elasticsearch
It is a good idea to secure your setup of Elasticsearch even if it is accessible to localhost.
Find elasticsearch.yml if you don’t know where it is.
sudo find / -name 'elasticsearch.yml'Add the following to sudo vim /etc/elasticsearch/elasticsearch.yml.
xpack.security.enabled: true
discovery.type: single-node
Run elasticsearch-setup-passwords tool to set the passwords.
sudo /usr/share/elasticsearch/bin/elasticsearch-setup-passwords auto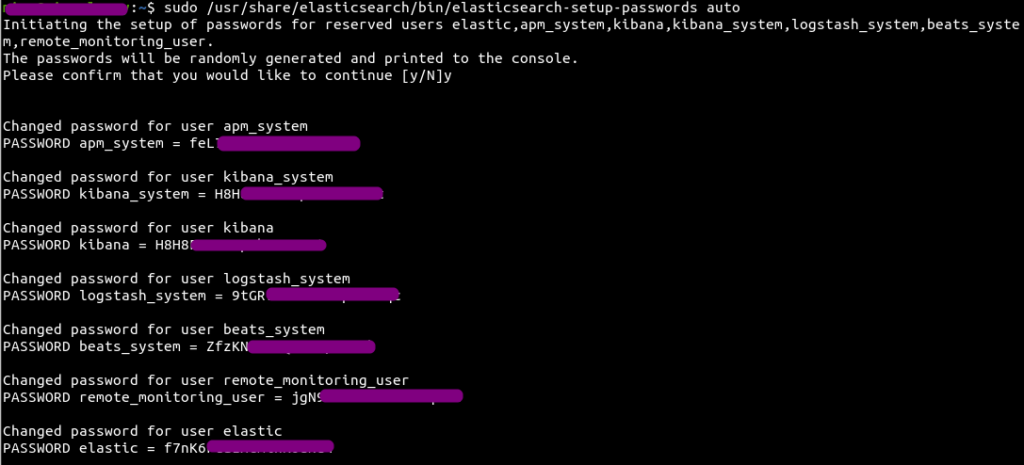
auto will create passwords automatically, if you want to set them manually use interactive flag.
Check if everything is installed and configured correctly.
curl -X GET "http://localhost:9200" -u USERNAME:PASSWORDYou will see an output like this:
{
  "name" : "server1",
  "cluster_name" : "elasticsearch",
  "cluster_uuid" : "LISBFDwcS5-tY8OxH9Jw7Q",
  "version" : {
    "number" : "7.16.3",
    "build_flavor" : "default",
    "build_type" : "deb",
    "build_hash" : "4e6e4eab2297e949ec994e688dad46290d018022",
    "build_date" : "2022-01-06T23:43:02.825887787Z",
    "build_snapshot" : false,
    "lucene_version" : "8.10.1",
    "minimum_wire_compatibility_version" : "6.8.0",
    "minimum_index_compatibility_version" : "6.0.0-beta1"
  },
  "tagline" : "You Know, for Search"
}
Configure Nextcloud and run the index
Now go to your Nextcloud Settings and click on Full Text Search tab. Select Elasticsearch from the drop down for Search Platform and enter it’s URL with username and password in the following format.
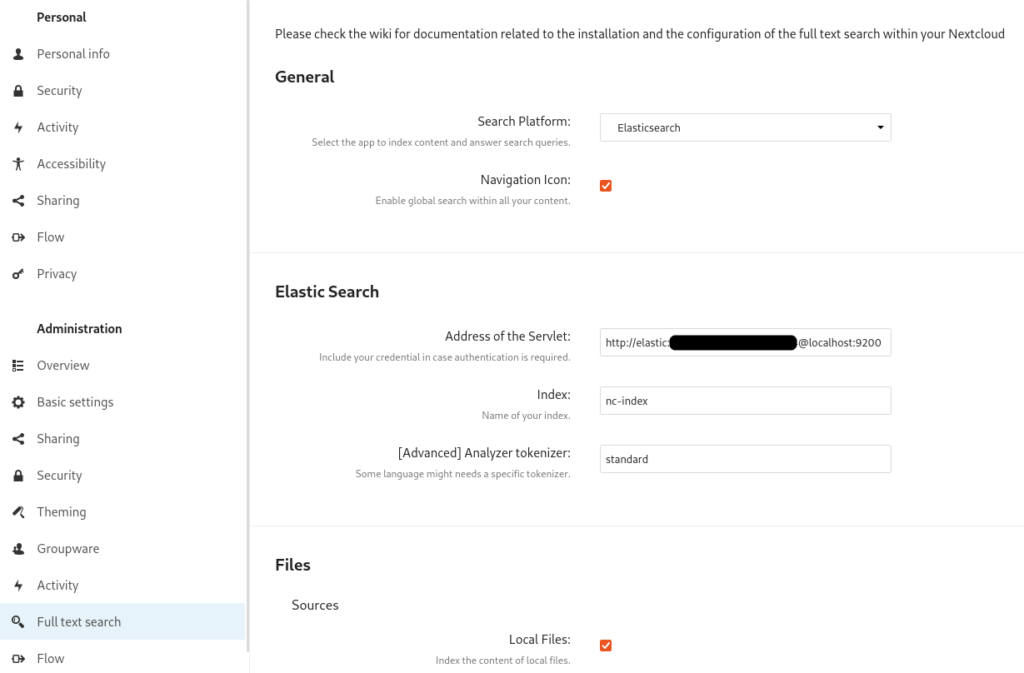
http://USERNAME:PASSWORD@localhost:9200On the server run the following command to test the integration.
*Change path to occ
sudo -u www-data php /var/www/html/occ fulltextsearch:test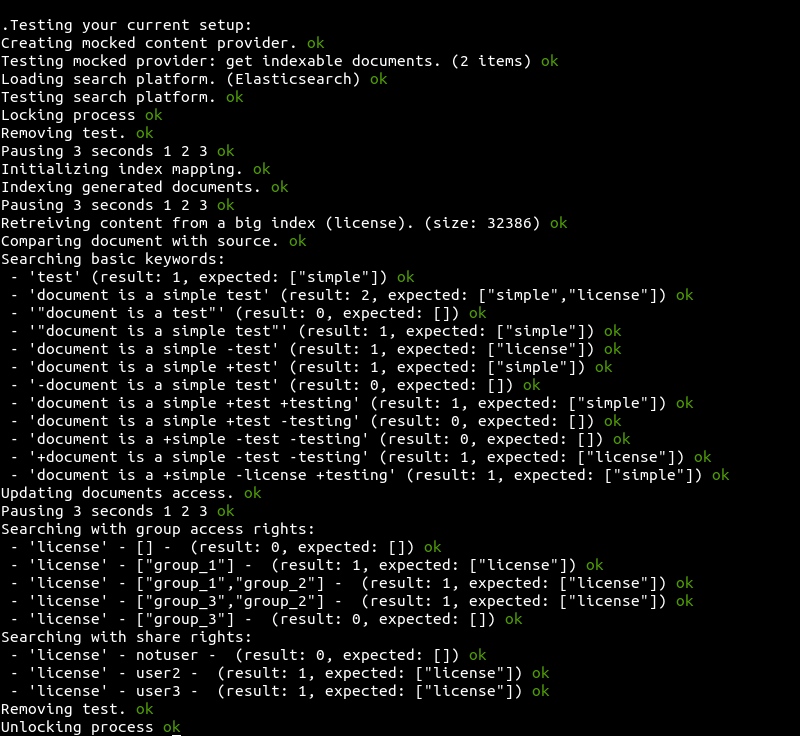
Finally run the following command to start indexing the files for the first time*. Be patient as it may take time, depends on how much data you have.
*You don’t need to run this next time.
sudo -u www-data php /var/www/html/occ fulltextsearch:index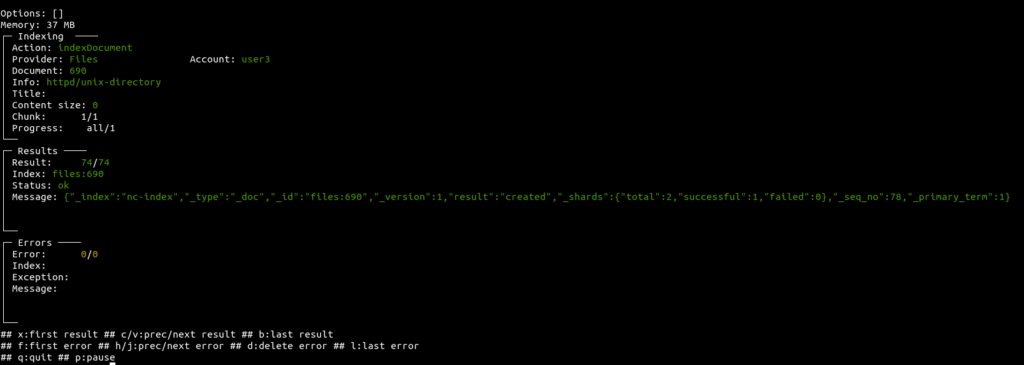
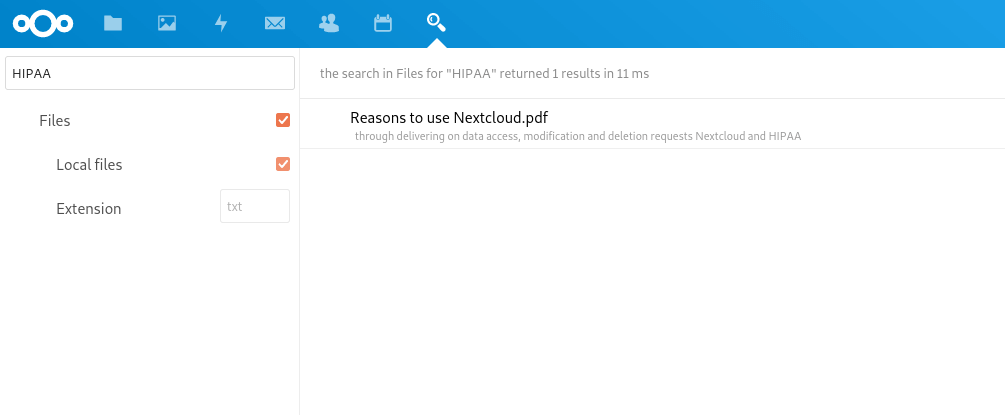
Search results when searching for a text inside a PDF file.