The story of Ghost’s creation is interesting and fun to read. John, a user interface lead from WordPress, thought it would be great to build a platform solely for blogging because WordPress is now more than just blogging. WordPress has become a content management platform that is too big and complex for simple blogging. Ghost installation is very simple, think of it as an alternative to WordPress for blogging that easy to use.
Here are the requirements and things to know before installation.
- Ubuntu 22.04 LTS server and minimum 1GB of RAM
- Nginx web server
- Node.js 16.x
- MySQL 8
- A domain pointed to the server IP
To get an SSL certificate successfully, make sure to point your domain to your server’s IP and ensure DNS propagation.
1- Server setup and firewall
Before starting the process, update your server.
apt update && apt upgradeReboot the server if required.
Enable firewall and allow specific ports only.
ufw default allow outgoing
ufw default deny incoming
ufw allow 22
ufw allow 80
ufw allow 443
ufw enable
ufw status
Looking to install WordPress on Ubuntu 22.04 instead? Click here
2- Create new user
To perform all our tasks, we will create a new user and switch to it.
adduser ghost-blogFollow the instructions after running the command above. Do not use username ghost, it will be used by Ghost CLI.
su - ghost-blog3- Install MySQL, Node.js and Nginx
Run the following command to install MySQL and the Nginx web server.
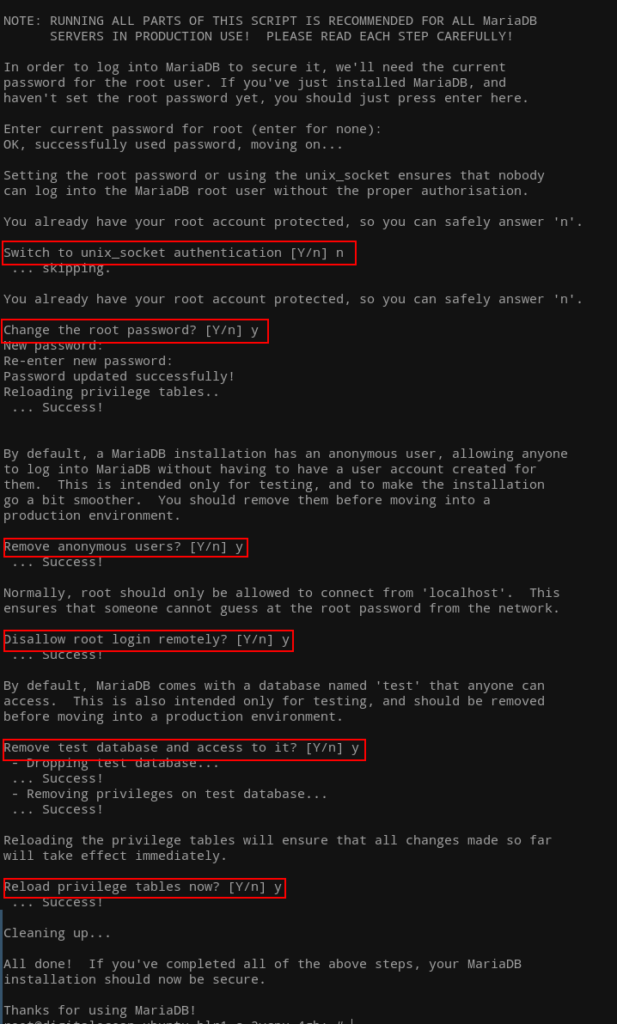
sudo apt install mysql-server nginxTo set the MySQL root password and perform other tasks, run:
sudo mysql_secure_installation
Ubuntu 22.04 has Node.js version 12.22, which is not supported by Ghost. Therefore, we will install Node.js 16.x from the official Node.js repository. To do this, we need to add the repository first.
curl -sL https://deb.nodesource.com/setup_16.x | sudo -E bashWe will now install Node.js after adding the repository.
sudo apt install nodejs4- Install Ghost CLI
Ghost will be installed via Ghost CLI, for that we will need to install Ghost CLI via npm.
sudo npm install ghost-cli@latest -g-g flag stands for global.
If you get command not found for npm, just install it with sudo apt install npm.
5- Install Ghost
Run the following commands one by one. Change myblog directory name if you want to.
sudo mkdir -p /var/www/myblog

sudo chown ghost-blog:ghost-blog /var/www/myblog

sudo chmod 775 /var/www/myblog

cd /var/www/myblog
The above commands will create a directory, change its ownership, set proper permissions, and navigate to it using ‘cd’.
Once you are inside the myblog directory, you can run the ghost install command to get started.
ghost installHere are some of the questions that will be asked by the CLI during the installation process:
1- Blog URL
Provide your blog’s full URL with HTTPS (to enable SSL).
2- MySQL hostname, username/password, database
This part will ask for the MySQL hostname, username/password, and database.
For a local install of MySQL, just enter localhost for the hostname.
I prefer to let the Ghost CLI handle the username/password and database part. So provide root as the username and the root user password. Enter the database name for the blog.
3- Set up a ghost MySQL user?
As mentioned before, it is important to let Ghost CLI handle the database and username/password setup.
4- Nginx
Allow it to set up Nginx for you, too, and remove the hardship of doing a manual setup.
5- SSL
Let Ghost CLI handle this to obtain a Let’s Encrypt certificate automatically for your domain. You will be asked to provide your email during the process.
6- Systemd
To start Ghost on reboot, it is important to set up a service to start it. For this, we will use Systemd. Ghost CLI can take care of this as well.
7- Start Ghost
Choose yes to start Ghost right away.
And that would be pretty much it for the CLI part. If everything goes well, your website is now set up and should function normally under your domain.
Updating Ghost
Updating Ghost is easy as it could get.
Run the following command to check for updates:
cd /var/www/myblog

ghost check-update
If an update is available, run the update command, but make sure to take a backup beforehand.
ghost backup

ghost update


