
BigBlueButton doesn’t need any introduction. If you have used or heard of Jitsi, I am confident that you may have heard of BigBlueButton too. In this article, we will install BigBlueButton and integrate it with a Rocket.Chat instance. Even if you don’t have Rocket.Chat, you can still use BigBlueButton as a standalone software with the Greenlight frontend for meetings and calls.
BigBlueButton is resource-intensive software, especially when handling multiple simultaneous calls. If you plan to use it for such purposes, the recommended requirements are as follows:
- Fresh server with Ubuntu 20.04 LTS
- Latest docker version
- Minimum of 8GB ram, 16GB (Recommended)
- 8 CPU cores
- 50GB of space (with no recording enabled)
- TCP ports 80 and 443
- UDP ports 16384 – 32768
- IPV4 and IPV6 address
1- Prepare the server
To ensure the server is up to date and to enhance security, perform a system update.
apt update && apt upgrade

apt autoremove && apt autoclean
We will install necessary applications such as Docker, Nginx, and other required components.
apt install nginx vimTo install the latest version of Docker, execute the following command:
curl -fsSL get.docker.com | sudo sh2- Pre-installation checks
Once we have the server ready, there are a few checks to perform to confirm that we have fulfilled all the requirements.
1- Make sure that your domain is ready and that the server IP is pointed to it.
2- Check your system locale with the command cat /etc/default/locale. You should see something like LANG="en_US.UTF-8".
If you don’t see the expected locale, install and set it using the following commands:
apt install language-pack-en

update-locale LANG=en_US.UTF-8
Logout from the SSH session and log back in. Check to see if everything is now correct by running the command cat /etc/default/locale.
If there are any additional languages enabled, you can remove them from the file /etc/default/locale.
3- Now, run the following command to check if LANG=en_US.UTF-8 is present:
systemctl show-environmentIf it is missing, you can add it by running the command systemctl set-environment LANG=en_US.UTF-8.
4- If you are using Ubuntu 20.04, these settings are most likely already in place. However, it’s still a good idea to double-check them.
cat /etc/lsb-releaseThis will print the information about Ubuntu 20.04 and its codename.
uname -mrRun the above command to see the kernel version and system architecture. Most likely, you will see 5.4.0-122-generic x86_64.
ip addr | grep inet6Check to see if IPv6 is enabled. If it is not enabled, you can disable it after the installation.
If you have a server with a minimum of 8GB of RAM and at least 4 CPU cores, you may not need to check, but you can double-check to confirm.
free -h

grep -c ^processor /proc/cpuinfo
Once everything is in order, you can proceed to the next step.
3- Installation
BigBlueButton provides a bash script for easy installation, so there is no need to install anything manually. Run the following command to install BigBlueButton with Greenlight and the firewall, etc.
Please change ‘bbb.DOMAIN.COM‘ and ‘[email protected]‘ to your actual domain and email.
-s hostname / domain name
-e email address used for Let’s encrypt
-g install Greenlight
-w install and setup firewall
wget -qO- https://ubuntu.bigbluebutton.org/bbb-install-2.6.sh | bash -s -- -v focal-260 -s bbb.DOMAIN.COM -e [email protected] -g -w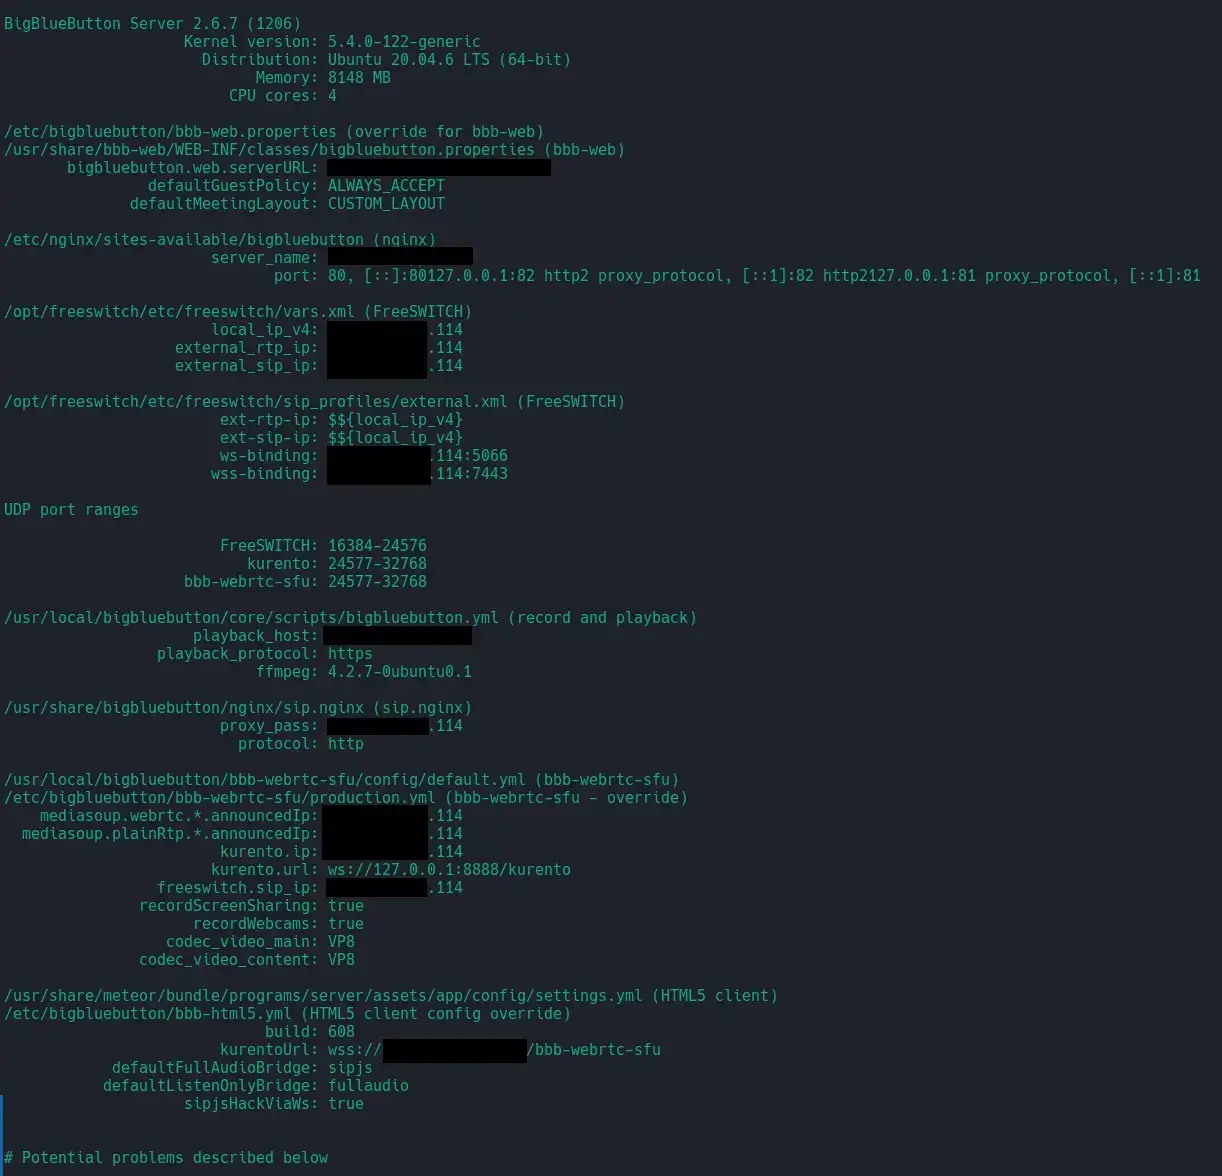
At the end of the installation, a check will be performed to provide you with an overview of the system status. If you encounter any issues listed under ‘Potential problems described below‘, detailed explanations on how to resolve them will be provided. However, it is highly likely that no issues will be found.
To check the statuses of the BigBlueButton services, you can utilize bbb-conf.
bbb-conf --status

nginx —————————————————► [✔ - active]
freeswitch ————————————► [✔ - active]
redis-server ——————————► [✔ - active]
bbb-apps-akka —————————► [✔ - active]
bbb-fsesl-akka ————————► [✔ - active]
mongod ————————————————► [✔ - active]
bbb-html5 —————————————► [✔ - active]
bbb-webrtc-sfu ————————► [✔ - active]
kurento-media-server ——► [✔ - active]
bbb-html5-backend@1 ———► [✔ - active]
bbb-html5-backend@2 ———► [✔ - active]
bbb-html5-frontend@1 ——► [✔ - active]
bbb-html5-frontend@2 ——► [✔ - active]
etherpad ——————————————► [✔ - active]
bbb-web ———————————————► [✔ - active]
bbb-pads ——————————————► [✔ - active]
bbb-export-annotations ► [✔ - active]
bbb-rap-caption-inbox —► [✔ - active]
bbb-rap-resque-worker —► [✔ - active]
bbb-rap-starter ———————► [✔ - active]
If you intend to use Greenlight, it is advised to create an administrator account for accessing the control panel. Please run the following command and modify the text in bold accordingly.
docker exec -it greenlight-v3 bundle exec rake admin:create['Admin','[email protected]','mypassword']If you are not utilizing Rocket.Chat, feel free to skip step 4 and 5 below. You can continue using BigBlueButton alongside Greenlight.
4- Integration with Rocket.Chat
This is the easiest part. Go to your Rocket.Chat instance and install the BigBlueButton app from Administration > Apps.
You may need to register an account with Rocket.Chat Cloud to install apps from the marketplace.
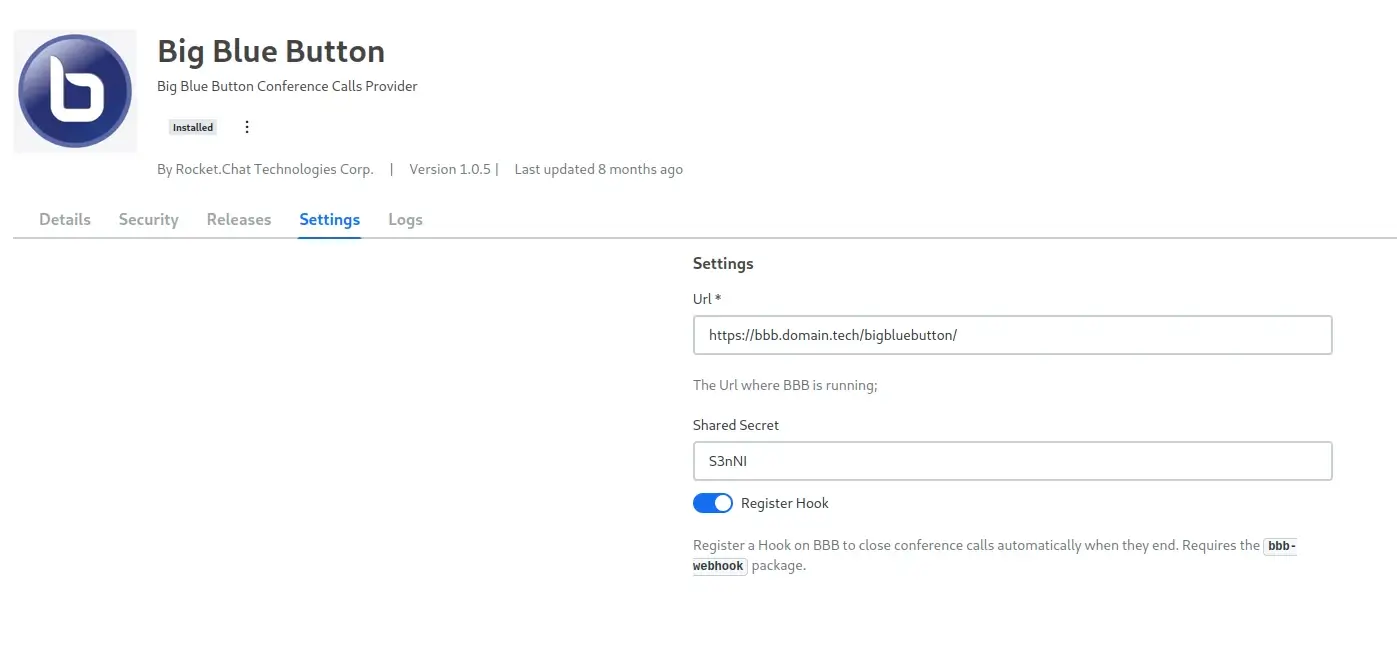
Now, switch to your BigBlueButton server and obtain the server URL and secret.
bbb-conf --secretOn your Rocket.Chat instance, navigate to the BigBlueButton Settings by clicking on the installed app. Enter the URL and secret, then save the settings.
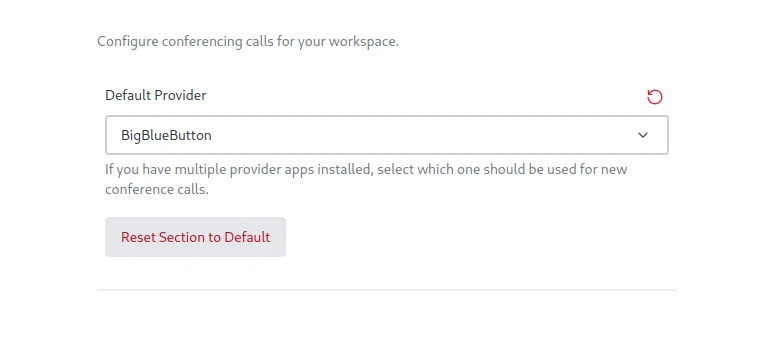
If BigBlueButton is not yet set as the Default Provider, navigate to Administration > Settings > Conference Call, select BigBlueButton from the dropdown menu, and save the changes.
5- Uninstall Greenlight
This step is not really necessary, but if you prefer to access BBB only via Rocket.Chat, you can choose to disable or completely uninstall it.
To disable it, run the following commands:
cd ~/greenlight-v3
docker-compose down
Now, for some reason, if you want to enable it:
cd ~/greenlight-v3
docker-compose up -d
This will uninstall it completely.
cd ~
docker rmi bigbluebutton/greenlight:v3
rm -rf greenlight-v3/


