
Are you considering migrating your Moodle instance from shared hosting, any control panel, or outdated operating system and hardware? Continue reading to learn how to migrate Moodle to an Ubuntu 22.04 LTS server.
Installing Moodle from scratch? Click here
Control panel
If you are using a control panel such as cPanel or Plesk, I assume that you already know how to back up the database and data.
In cPanel, click on ‘Backups,’ and then select ‘Databases.’ Choose the Moodle database to create a zip archive for downloading. You can also use phpMyAdmin, but for larger installations, it may time out or crash halfway.
Next, click on ‘File Manager’ in cPanel. You may see the domain or subdomain where you’ve installed Moodle. Click on it and select all folders and files inside. Right-click to compress it and then download the created archive. If you find it easier, you can use FileZilla.
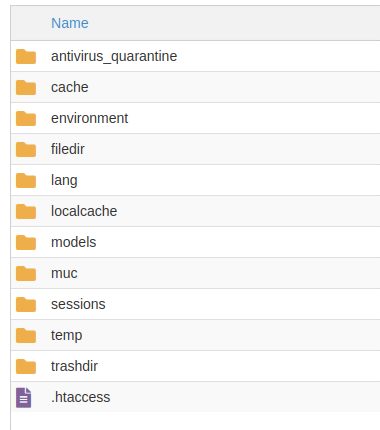
For ‘moodledata,’ it will be located outside the domain. You should see a ‘moodledata’ folder in the file manager. Click on it, select all folders and files except cache, localcache, sessions, temp, and trashdir. Right-click to compress it, and then download it when it’s done.
So you should have a database backup, Moodle backup, and Moodle data backup now. Upload these to the new server using rsync. More information is provided below.
Old server
If your old server has no control panels, you can use rsync to sync the data directly to the new server. See below for instructions on using rsync.
Upload using rsync
From your old server or local machine (assuming you are using Linux or a related operating system), use rsync to upload the folders and files.
Example
rsync -r -av --progress /downloads/moodledata root@SERVER_IP:/var/moodleHere, we are recursively uploading our moodledata folder to the /var/moodle directory on the server. You can change /var/moodle to any other directory you may have created on the server.
Follow the same process for Moodle and the database.
Server setup
We will now follow a few steps from the article titled “How to Install Moodle on Ubuntu 22.04 LTS” to set up our server and get things going.
Follow steps 1, 2, and 3 from the above-mentioned article. Once you have created the database, it’s time to restore the old one.
mysql -u moodle_user -p moodle < /var/moodle/moodle.sqlRemember, I used /var/moodle to upload the data and database, etc. Change the path if it’s different in your case.
Now we will move Moodle and its data to appropriate directories.
rm -r /var/www/html/*
shopt -s dotglob
mv /var/moodle/moodle/* /var/www/html/

mkdir /var/www/moodledata
mv /var/moodle/moodledata/* /var/www/moodledata/

rm -r /var/moodle/moodle
rm -r /var/moodle/moodledata
Modify the ownership and group of the web server root and moodle data directory.
chown -R www-data:www-data /var/www/html
chown -R www-data:www-data /var/www/moodledata
After that open config.php file in /var/www/html and edit it accordingly. Change wwwroot, dirroot, database user/pass, database name and any other related changes you made.
vim /var/www/html/config.phpOnce done, return to the article and follow step 5 now.
Your Moodle should be running now. If you get stuck or encounter any errors, check the server logs.
One last thing to do is set up the cron job. To do that, follow step 7 in the article.


