
The new SBC boards are coming with PCIe slots, mainly for using them with NVME drives for faster read and writes. I bought an Orange Pi 3B on AliExpress and, at the same time, purchased an NVME drive (HAUDISK 256GB PCIe drive). Because an SD card is not something I would like to use for the long run, I am considering this board as a home web server for my pet projects. So let’s jump in to show you how to boot from an NVME drive on your Orange Pi 3B.
You can apply the same process on Orange Pi 5 and 5 Plus, but I haven’t tested it.
The default username and password are orangepi.
1- Initial setup
Before we delve into the details of how to write the OS to the NVME drive and how to use it, let’s start with the basics first.
I have downloaded Ubuntu XFCE and Ubuntu Server OS from the official download page. You can use any variant and OS.
The first thing you would want to do is to write the XFCE edition to the SD card, and you can use Raspberry Pi Imager for this. After writing the image file to the SD card, you can now insert it into the Orange Pi 3B and power on the Pi.
Once you are on the desktop, you can either note down the Pi’s IP (to connect via SSH), which will be connected to your router, or proceed with the rest of the process without switching to your other PC to connect to Pi via SSH.
2- Burn image to NVME
You can do this on the PC where you wrote the image to SD card if you have the proper tools to connect the NVME drive. But let’s say you don’t have. Just connect it to the Orange Pi 3B and boot up the Pi.
If you are using the desktop of the Pi, open the terminal. If using another PC, SSH into the Pi and run the lsblk command to see the output.
NAME        MAJ:MIN RM   SIZE RO TYPE MOUNTPOINTS
mtdblock0    31:0    0    16M  0 disk
mmcblk1     179:0    0  59.5G  0 disk
├─mmcblk1p1 179:1    0     1G  0 part /boot
└─mmcblk1p2 179:2    0  57.8G  0 part /var/log.hdd
                                      /
zram0       252:0    0   3.8G  0 disk [SWAP]
zram1       252:1    0    50M  0 disk /var/log
zram2       252:2    0     0B  0 disk
nvme0n1     259:0    0 238.5G  0 disk
My 256GB drive is detected as nvme0n1. Now, run fdisk -l to get the path to the drive. It should be something like /dev/nvme0n1.
It is up to you to choose which image and OS to burn and use. I will write the Ubuntu Server image to the NVME.
Download your preferred image and burn it to NVME using the following command.
dd if=/home/orangepi/Orangepi3b_1.0.2_ubuntu_jammy_server_linux5.10.160.img of=/dev/nvme0n1 bs=1MBChange the path to the img file in the above command.
3- Update boot loader
Orange Pi comes with its own small partition for the boot loader. What we need to do is change/install it on the SPI Flash.
In the terminal, run the following command:
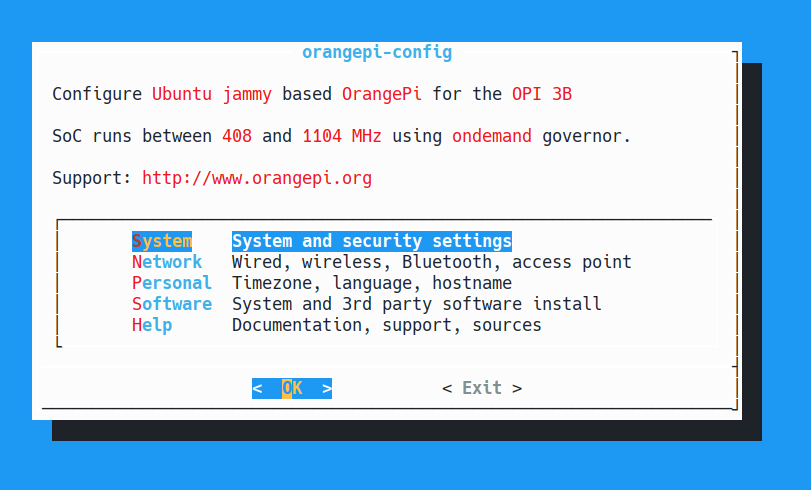
orangepi-configOn the first screen, choose System and proceed.
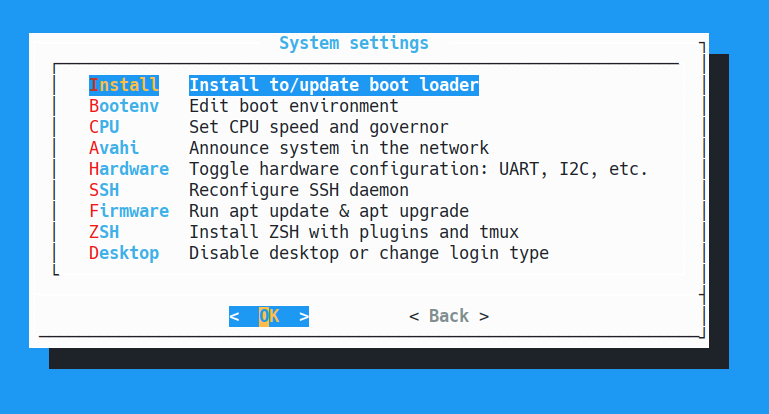
Here choose Install and hit Enter.
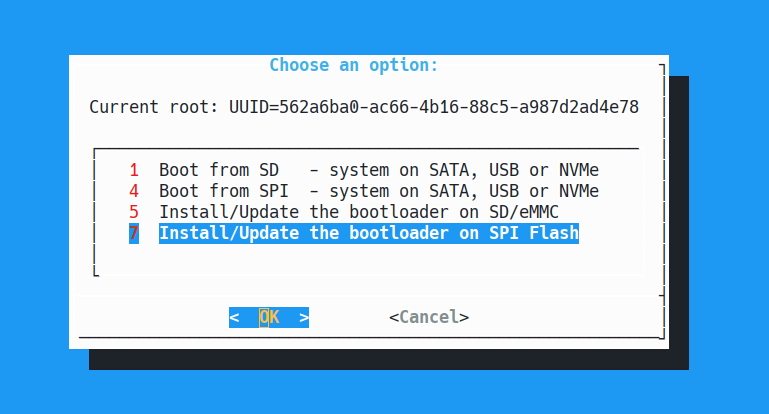
Select Install/Update the bootloader on SPI Flash.
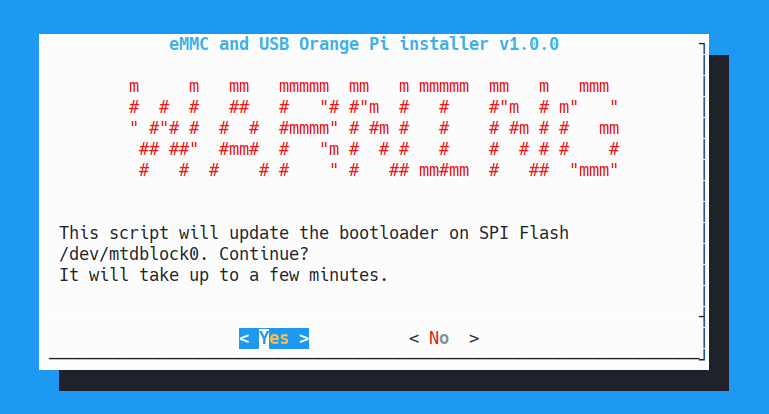
Choose Yes and hit Enter. Wait for a minute or two to complete. Once done, you will be sent back to the Install screen.
Quit the orangepi-config and shut down the Pi.
Remove the SD card and power on the Pi; the Orange Pi will now boot from the NVME drive.
A quick check by running lsblk will give you the following information:
NAME        MAJ:MIN RM   SIZE RO TYPE MOUNTPOINTS
mtdblock0    31:0    0    16M  0 disk
zram0       254:0    0   3.8G  0 disk [SWAP]
zram1       254:1    0    50M  0 disk /var/log
nvme0n1     259:0    0 238.5G  0 disk
├─nvme0n1p1 259:1    0     1G  0 part /boot
└─nvme0n1p2 259:2    0   235G  0 part /var/log.hdd
If on Ubuntu OS, update it with apt update && apt upgrade.
If you want to test the read speed of your NVME drive, you can use hdparm.
apt install hdparm

hdparm -t /dev/nvme0n1
For me the read speed is around 350 MB/s. Not bad I would say.


Hi, i did it but when boot on nvme
this is what writes in the screen
loading please wait..
startin version 247..
begin: loading essencial drivers .. done
begin: running scripts/init-premount.. ( inittramfs)
and dont do anything more..
can you help me ?
the same message when i burn the os with the nvme usb adapter or doing by the command line booting with sd in the orange