
I will show you how to install and setup Nextcloud 24 on Rocky Linux 9 in this article, which was released last month. I have already wrote an article about setting up a web server on Rocky Linux 9, we will continue from there. Click on the button below to install the basics first.
If you want to install PHP 8.1, check this article, it’s optional though.
Create database
Login to the database server as root.
mysql -u root -pCreate nextcloud database
create database nextcloud CHARACTER SET utf8mb4 COLLATE utf8mb4_general_ci;Create a user and grant permissions on nextcloud database. Change the username ncuser and ncpass to a strong password.
grant all on nextcloud.* to 'ncuser'@'localhost' identified by 'ncpass';Flush and exit the database server.
flush privileges;
exit
Download and install Nextcloud
Run the following commands one by one to download and unzip the archive.
cd /var/www

wget https://download.nextcloud.com/server/releases/nextcloud-24.0.4.zip

unzip nextcloud-24.0.4.zip

rm -r /var/www/html/*

shopt -s dotglob

mv nextcloud/* html/
Change the group and owner.
chown -R apache:apache /var/www/htmlFor the basics, create a nextcloud.conf file in /etc/httpd/conf.d dir.
<VirtualHost *:80>
        ServerName IP/DOMAIN
        DocumentRoot /var/www/html

        <Directory "/var/www/html">
                AllowOverride All
                Options -Indexes +FollowSymLinks
                Require all granted
        </Directory>

        ErrorLog /var/log/httpd/nc-error.log
</VirtualHost>
Save and restart Apache.
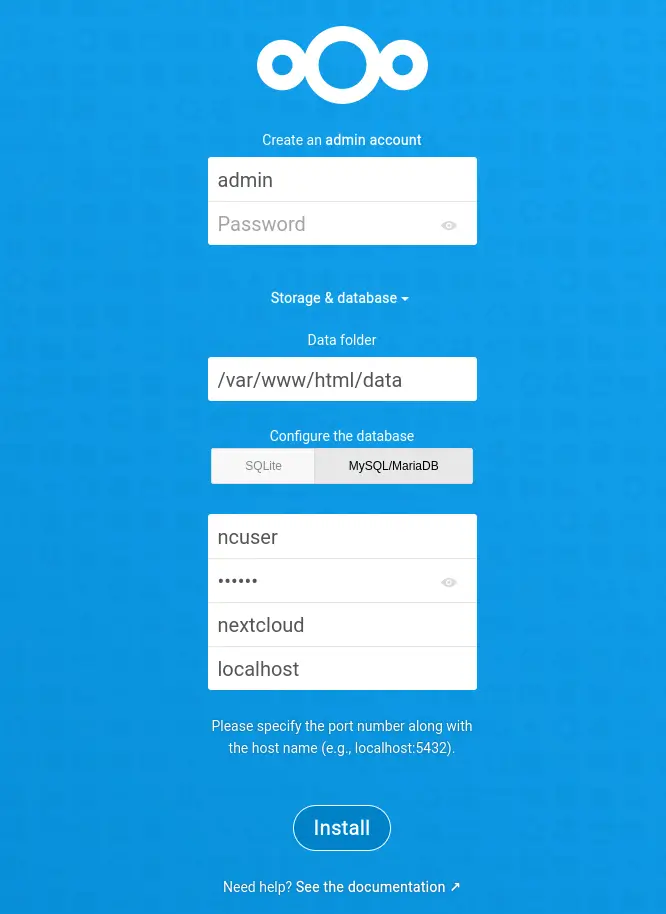
systemctl restart httpdNow go to the server IP/domain in a browser and start the installation process.
SSL via certbot
Install certbot through dnf package manager.
dnf install certbotGet a certificate with web root.
certbot certonly --webroot -w /var/www/html -d DOAMIN.COMFor more information on certbot check the link below.
The updated Apache configuration including SSL part, http to https redirection and http2 is below.
<VirtualHost *:80>
	ServerName DOMAIN.COM
	DocumentRoot /var/www/html
	RewriteEngine On
	RewriteCond %{HTTPS} off
	RewriteRule (.*) https://%{HTTP_HOST}%{REQUEST_URI}

	<Directory "/var/www/html">
		AllowOverride All
		Options -Indexes +FollowSymLinks
        Require all granted
	</Directory>

	ErrorLog /var/log/httpd/nc-error.log
</VirtualHost>

<VirtualHost *:443>
	ServerName DOMAIN.COM
	ServerAlias www.DOMAIN.COM
	DocumentRoot /var/www/html

	SSLCipherSuite EECDH+AESGCM:EDH+AESGCM:AES256+EECDH:ECDHE-RSA-AES128-SHA:DHE-RSA-AES128-GCM-SHA256:AES256+EDH:ECDHE-RSA-AES256-GCM-SHA384:ECDHE-RSA-AES128-GCM-SHA256:DHE-RSA-AES256-GCM-SHA384:ECDHE-RSA-AES256-SHA384:ECDHE-RSA-AES128-SHA256:ECDHE-RSA-AES256-SHA:DHE-RSA-AES256-SHA256:DHE-RSA-AES128-SHA256:DHE-RSA-AES256-SHA:DHE-RSA-AES128-SHA:ECDHE-RSA-DES-CBC3-SHA:EDH-RSA-DES-CBC3-SHA:AES256-GCM-SHA384:AES128-GCM-SHA256:AES256-SHA256:AES128-SHA256:AES256-SHA:AES128-SHA:DES-CBC3-SHA:HIGH:!aNULL:!eNULL:!EXPORT:!DES:!MD5:!PSK:!RC4
	SSLProtocol All -SSLv2 -SSLv3 -TLSv1 -TLSv1.1
	SSLHonorCipherOrder On
	Header always set Strict-Transport-Security "max-age=63072000; includeSubDomains; preload"
	Header always set X-Frame-Options DENY
	Header always set X-Content-Type-Options nosniff

	Protocols h2 http/1.1

	<Directory "/var/www/html">
		AllowOverride All
		Options -Indexes +FollowSymLinks
        Require all granted
	</Directory>

	<FilesMatch ".(ico|pdf|flv|jpg|jpeg|png|gif|js|css|swf|ttf|woff)$">
		Header set Cache-Control "max-age=31536000, public"
	</FilesMatch>

	ErrorLog /var/log/httpd/nc-error.log

	SSLEngine on
	SSLCertificateKeyFile /etc/letsencrypt/live/DOMAIN.COM/privkey.pem
	SSLCertificateFile /etc/letsencrypt/live/DOMAIN.COM/fullchain.pem
</VirtualHost>
Cronjob
Setup cronjob as apache user.
crontab -e -u apache

*/5 * * * * php -f /var/www/html/cron.php
Save and go to Basic settings in Settings(as Admin user) and change to Cron from AJAX.
Cache
You can either use Redis which I explained in the installation article or APCu.
For APCu, add this to config/config.php file.
'memcache.local' => '\\OC\\Memcache\\APCu',For Redis, add the following instead.
'memcache.distributed' => '\\OC\\Memcache\\Redis',
'memcache.local' => '\\OC\\Memcache\\Redis',
'redis' =>
  array (
   'host' => 'localhost',
   'port' => 6379,
 ),
If you are getting 500 internal server error after enabling Redis cache, it is because of blocking connections to other ports by SELinux.
OR
Messages in the log file like, "Message":"Permission denied", "Message":"Redis server went away".
setsebool -P httpd_can_network_connect 1PHP configuration
To increase memory_limit and change other settings, create a file (we don’t want to modify php.ini directly) 30-user.ini in /etc/php.d/ and paste the following in it.
memory_limit = 512M
max_execution_time = 120
post_max_size = 500M
upload_max_filesize = 500M
Restart PHP FPM.
systemctl restart php-fpmThat would be it, happy file sharing. Check the hacks and improvements article to improve your instance setup.


