Email desktop clients are common to use, but there are also web apps which most users use on daily basis. Almost all email providers provide web app to access their services. But in case you have your own mail server, you can also host a web app client act as webmail either on a server or local PC. In this article I am going to guide you how to install Webmail Lite on your server or PC to access your IMAP server.
I will use Ubuntu 22.04 LTS OS on the server.
You can read more about Webmail Lite and it’s features here.
1- Setup web server
We will start with the installation of Apache, PHP and MariaDB.
apt update && apt upgradeapt install apache2 mariadb-server libapache2-mod-php8.1 php8.1 php8.1-gmp php8.1-bcmath php8.1-gd php-json php8.1-mysql php8.1-curl php8.1-mbstring php8.1-intl php8.1-imagick php8.1-xml php8.1-zip php8.1-fpm php8.1-apcu php8.1-opcache php8.1-memcache php8.1-memcached php8.1-ldap bzip2 zip unzip imagemagick vimLet’s enable some Apache modules:
a2enmod ssl rewrite headers proxy proxy_http deflate cache proxy_wstunnel http2 proxy_fcgi env expiresWe will use PHP-FPM, for that we will disable PHP and enable PHP-FPM.
a2enconf php8.1-fpm
a2dismod php8.1
a2dismod mpm_prefork
a2enmod mpm_event
systemctl restart apache2

systemctl enable apache2
systemctl enable mariadb
systemctl enable php8.1-fpm
If you want to update some PHP options, you can find the configuration file at /etc/php/8.1/fpm/php.ini.
2- Setup database
Run the following command to set root password etc.
/usr/bin/mysql_secure_installation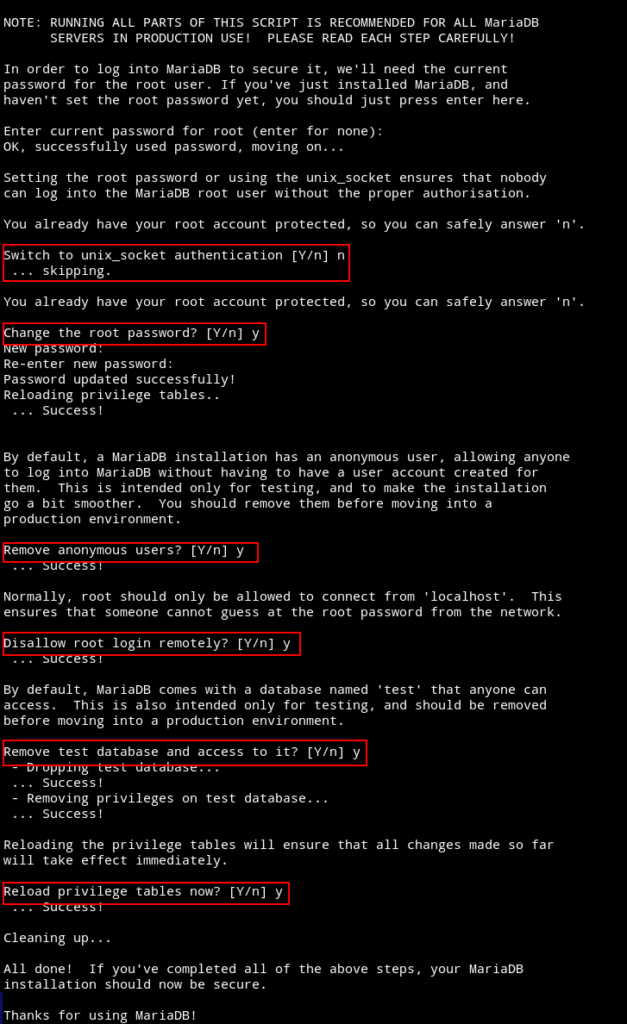
Now login to the database server to create a user and database.
mysql -u root -p

create database webmail-lite CHARACTER SET utf8mb4 COLLATE utf8mb4_general_ci;
grant all on webmail-lite.* to 'webmail_user'@'localhost' identified by 'PASSWORD';

flush privileges;
exit
Change PASSWORD with a strong password.
3- Apache virtual host
Create a virtual host file webmail.conf.
cd /etc/apache2/sites-available

vim webmail.conf
Copy the following into it:
<VirtualHost *:80>
	ServerName DOMAIN.COM
	ServerAlias DOMAIN.COM
	DocumentRoot /var/www/html

	<Directory "/var/www/html">
		AllowOverride All
		Options -Indexes +FollowSymLinks
	</Directory>

	ErrorLog /var/log/apache2/DOMAIN.COM-error.log
</VirtualHost>
If you are hosting it on a local PC, for DOMAIN.COM you can use localhost. Make sure to change the Directory to the correct path.
For a server, just change DOMAIN.COM and leave the rest as is.
Now disable the default vhost file and enable webmail configuration.
a2dissite 000-default.conf
a2ensite webmail.conf

apachectl -t
systemctl restart apache2
4- Download Webmail Lite
We will now download and setup Webmail Lite.
cd /var/www/

wget https://afterlogic.org/download/webmail_php.zip
Unzip the archive and move it to the web root directory.
unzip webmail_php.zip
rm -r /var/www/html/*
shopt -s dotglob
mv webmail_php/* html/
Clean up and change the directory ownership.
rm -r webmail_php
rm webmail_php.zip

chown -R www-data:www-data /var/www/html
5- Webmail Lite setup
At this point, you can point to the server IP or domain in the browser to start the setup process. We will access the admin panel to setup the basic things first.
Note: change DOMAIN.COM to your actual domain or IP etc.
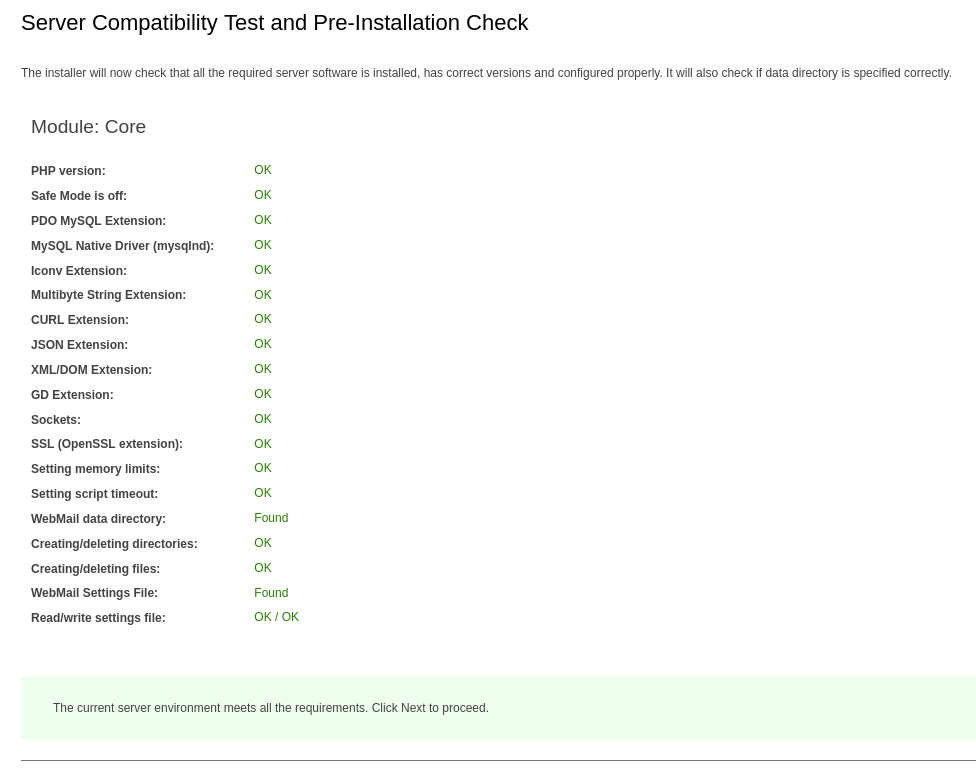
But before we login, we can also run a check to see if there is anything missing or need changes. For that you can visit, http://DOMAIN.COM/adminpanel/?install.
Admin panel link: http://DOMAIN.COM/adminpanel
Username is superadmin and password is blank.
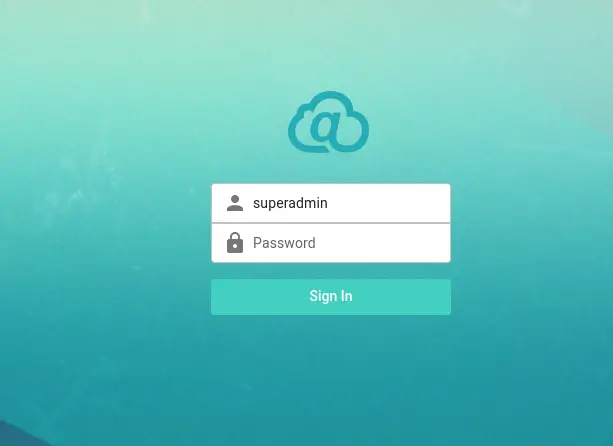
On first login, you will be shown errors like setup database, enter admin password.

1- First click on the database settings and enter the database username, password, name and host. Click Test connection button. If everything is entered correctly, you will see connection successful message.

After that click Create/Update tables button.

Once that is done, click on Update configuration button.

2- You can now change the Site name, Theme etc in Common page.
3- To use Webmail with your IMAP server, you will need to enter your server details in Mail server page.
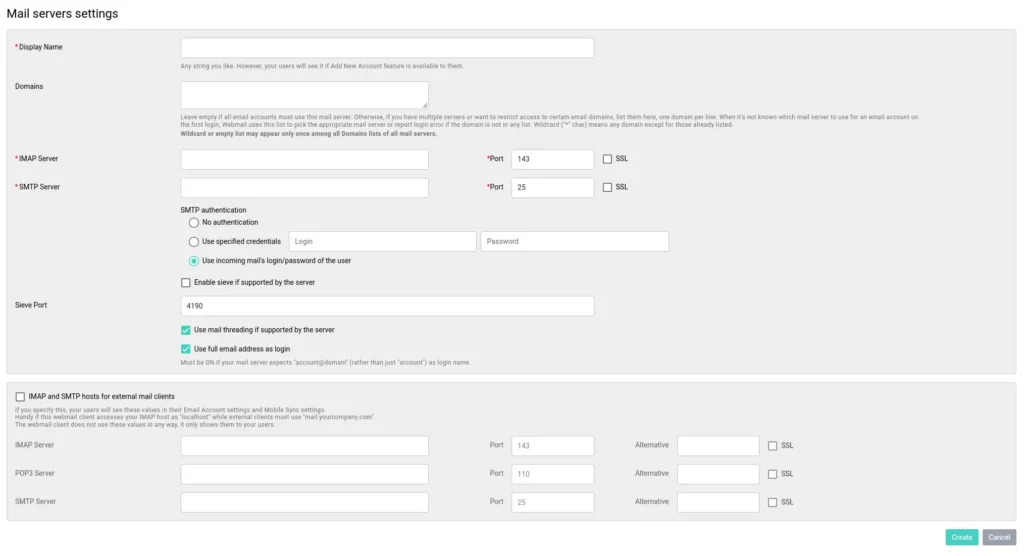
You can always check the Webmail Lite version at About page.

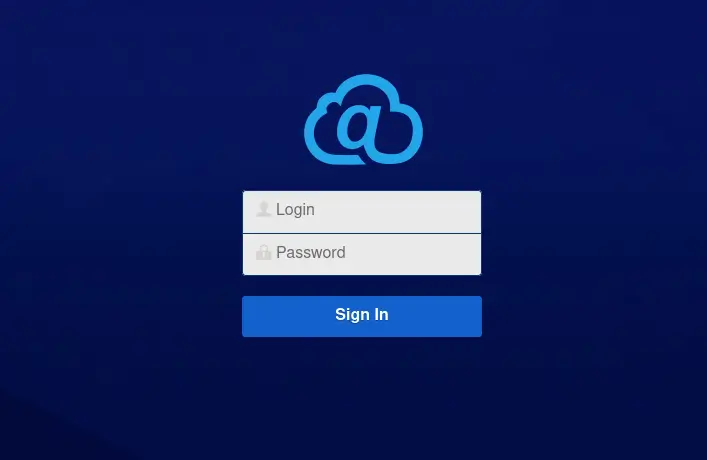
Once you have added a Mail server, you can go to http://DOMAIN.COM and login to see your emails.
6- SSL
If you are hosting Webmail Lite on a public server, it is recommended to get a SSL certificate. We will get one from Let’s Encrypt using certbot.
Note: you don’t need SSL on your local PC. You can skip this step.
apt install snap

snap install certbot --classic
Get a SSL certificate for the web root.
certbot certonly --webroot -w /var/www/html -d DOAMIN.COMOnce you get the certificate successfully, modify webmail.conf file to add Port 443 block.
vim /etc/apache2/sites-available/webmail.confAdd the following into it. Change where necessary.
<VirtualHost *:443>
	ServerName DOMAIN.COM
	DocumentRoot /var/www/html

	SSLCipherSuite EECDH+AESGCM:EDH+AESGCM:AES256+EECDH:ECDHE-RSA-AES128-SHA:DHE-RSA-AES128-GCM-SHA256:AES256+EDH:ECDHE-RSA-AES256-GCM-SHA384:ECDHE-RSA-AES128-GCM-SHA256:DHE-RSA-AES256-GCM-SHA384:ECDHE-RSA-AES256-SHA384:ECDHE-RSA-AES128-SHA256:ECDHE-RSA-AES256-SHA:DHE-RSA-AES256-SHA256:DHE-RSA-AES128-SHA256:DHE-RSA-AES256-SHA:DHE-RSA-AES128-SHA:ECDHE-RSA-DES-CBC3-SHA:EDH-RSA-DES-CBC3-SHA:AES256-GCM-SHA384:AES128-GCM-SHA256:AES256-SHA256:AES128-SHA256:AES256-SHA:AES128-SHA:DES-CBC3-SHA:HIGH:!aNULL:!eNULL:!EXPORT:!DES:!MD5:!PSK:!RC4
	SSLProtocol All -SSLv2 -SSLv3 -TLSv1 -TLSv1.1
	SSLHonorCipherOrder On
	Header always set Strict-Transport-Security "max-age=63072000; includeSubDomains; preload"
	Header always set X-Frame-Options DENY
	Header always set X-Content-Type-Options nosniff

    Protocols h2 http/1.1

	<Directory "/var/www/html">
		AllowOverride All
		Options -Indexes +FollowSymLinks
	</Directory>

    ErrorLog /var/log/apache2/DOMAIN.COM-error.log

	SSLEngine on
	SSLCertificateKeyFile /etc/letsencrypt/live/DOMAIN.COM/privkey.pem
	SSLCertificateFile /etc/letsencrypt/live/DOMAIN.COM/fullchain.pem
</VirtualHost>
If you want to redirect from http to https, add the following lines to Port 80 block to redirect automatically to HTTPS.
RewriteEngine On
RewriteCond %{HTTPS} off
RewriteRule (.*) https://%{HTTP_HOST}%{REQUEST_URI}
Test the configuration and restart Apache.
apachectl -t
systemctl restart apache2
That would be it, enjoy mailing.


