
Nextcloud 29 (Hub 8) has been released, and Ubuntu 24.04 LTS as well. This presents an intriguing combination. Most cloud providers already have the Ubuntu 24.04 image available on their portals for initializing a server. In this article, we will explore how to install Nextcloud 29 (Hub 8) on a newly created Ubuntu 24.04 LTS server.
What you need to get started:
- A server with minimum 1GB RAM and Ubuntu 24.04 OS
- Domain pointed to the server IP
Ubuntu 24.04 comes with PHP 8.3 and MariaDB 10.11, both of which are supported by Nextcloud.
Some of the key features of Nextcloud 29 are:
- Faster than previous versions
- Nextcloud Assistant 2.0
- Nextcloud Teams
- Improved and Speedy new Mail
- Advanced Talk
- Optimized Files
For more detailed information about the other features, please check the release page of Nextcloud 29.
1- Server preparation
Once logged in, we will prepare the server by updating the package manager and enabling the firewall.
apt update && apt upgradeWe will only open ports 22 (SSH), 80, and 443. If you need to open additional ports, simply replicate the command with the desired port number.
ufw default allow outgoing
ufw default deny incoming
ufw allow 22
ufw allow 80
ufw allow 443
ufw enable
ufw status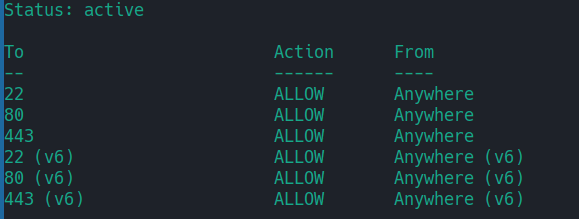
You can reboot the server at this stage if you’d like.
2- Install LAMP stack
We will now proceed to install LAMP stack along other packages.
apt install apache2 mariadb-server libapache2-mod-php php php-gmp php-bcmath php-gd php-json php-mysql php-cli php-curl php-mbstring php-intl php-imagick php-xml php-zip php-fpm php-redis php-apcu php-opcache php-ldap php-bz2 bzip2 zip unzip imagemagick vim ffmpeg redis-serverTo enable PHP FPM, execute the following commands.
a2enconf php8.3-fpm
a2dismod php8.3
a2dismod mpm_prefork
a2enmod mpm_event
Also, enable some of the Apache modules.
a2enmod ssl rewrite headers proxy proxy_http deflate cache proxy_wstunnel http2 proxy_fcgi env expiresEnable PHP FPM, Apache and MariaDB at boot time.
systemctl enable apache2
systemctl enable php8.3-fpm
systemctl enable mariadb
Finally restart Apache.
systemctl restart apache23- Configure PHP
Since we’re using PHP FPM, we’ll configure and update the FPM configuration file.
vim /etc/php/8.3/fpm/php.iniI have mentioned line numbers for your reference in the snippet below.
Check PHP timezone manual for your timezone.
output_buffering = off (line 236)
max_execution_time = 180 (line 419)
memory_limit = 512M (line 445)
post_max_size = 200M (line 713)
upload_max_filesize = 200M (line 865)
date.timezone = Europe/Berlin (line 989)

opcache.enable=1 (line 1782)
opcache.enable_cli=1 (line 1785)
opcache.memory_consumption=512 (line 1788)
opcache.interned_strings_buffer=96 (line 1791)
opcache.max_accelerated_files=10000 (line 1795)
opcache.revalidate_freq=1 (line 1813)
opcache.save_comments=1 (line 1820)
Restart PHP FPM afterward.
systemctl restart php8.3-fpm4- Fine-tune PHP FPM
You can also fine-tune and enhance PHP FPM to handle heavy loads.
cd /etc/php/8.3/fpm/pool.d
vim www.conf
Enable or change the values:
pm = dynamic  (line 116)
pm.max_children = 12  (line 127)
pm.start_servers = 6  (line 132)
pm.min_spare_servers = 4  (line 137)
pm.max_spare_servers = 8  (line 142)
pm.max_requests = 0  (line 159)
systemctl restart php8.3-fpm5- Create database
Run mysql_secure_installation to set up the initialization options for MariaDB startup.

Once done, you can now proceed to create a database, user. Change PASSWORD in the grant command.
mysql

create database nextcloud CHARACTER SET utf8mb4 COLLATE utf8mb4_general_ci;

grant all on nextcloud.* to 'ncuser'@'localhost' identified by 'PASSWORD';

flush privileges;
exit
6- Download Nextcloud
We are all set now to download and set up Nextcloud!
cd /var/www
wget https://download.nextcloud.com/server/releases/nextcloud-29.0.0.zip
Unzip Nextcloud archive and move it to the web root directory (html).
unzip nextcloud-29.0.0.zip
rm /var/www/html/index.html
shopt -s dotglob
mv nextcloud/* html/
Create a data directory outside of the html directory.
mkdir /var/www/dataChange the permissions and ownership.
chown -R www-data:www-data /var/www/html
chown -R www-data:www-data /var/www/data
Do the cleanup tasks with:
rm -r nextcloud
rm nextcloud-29.0.0.zip
7- Apache virtual host
Let’s set up a virtual host for Nextcloud.
cd /etc/apache2/sites-available/
vim nextcloud.conf
Add the following in it:
<VirtualHost *:80>
	ServerName DOMAIN.COM

	DocumentRoot /var/www/html

	<Directory "/var/www/html">
		AllowOverride All
		Options -Indexes +FollowSymLinks
	</Directory>

	ErrorLog /var/log/apache2/nextcloud_error.log
</VirtualHost>
Change DOMAIN.COM to your actual domain name.
Enable this configuration and restart Apache.
a2dissite 000-default.conf
a2ensite nextcloud.conf

apachectl -t
systemctl restart apache2
8- Install Certbot
If you want to obtain a free certificate from Let’s Encrypt, you can use Certbot for this purpose.
apt install certbotOnce installation is finished, run the following command to get an SSL certificate for your domain.
certbot certonly --webroot -w /var/www/html -d DOAMIN.COMTo enable automatic renewal, set up a cron job.
crontab -eAdd the following in it, which runs every morning at 4:30 AM, to check the certificate validity and perform renewal.
30 4 * * * certbot renew9- Update virtual host
We have now SSL at hand and can proceed to update our virtual host file with a new 443 block.
vim /etc/apache2/sites-available/nextcloud.conf Add the following in it by changing DOMAIN.COM, paths to the certificates etc.
<VirtualHost *:443>
	ServerName DOMAIN.COM
	DocumentRoot /var/www/html

	SSLCipherSuite EECDH+AESGCM:EDH+AESGCM:AES256+EECDH:ECDHE-RSA-AES128-SHA:DHE-RSA-AES128-GCM-SHA256:AES256+EDH:ECDHE-RSA-AES256-GCM-SHA384:ECDHE-RSA-AES128-GCM-SHA256:DHE-RSA-AES256-GCM-SHA384:ECDHE-RSA-AES256-SHA384:ECDHE-RSA-AES128-SHA256:ECDHE-RSA-AES256-SHA:DHE-RSA-AES256-SHA256:DHE-RSA-AES128-SHA256:DHE-RSA-AES256-SHA:DHE-RSA-AES128-SHA:ECDHE-RSA-DES-CBC3-SHA:EDH-RSA-DES-CBC3-SHA:AES256-GCM-SHA384:AES128-GCM-SHA256:AES256-SHA256:AES128-SHA256:AES256-SHA:AES128-SHA:DES-CBC3-SHA:HIGH:!aNULL:!eNULL:!EXPORT:!DES:!MD5:!PSK:!RC4
	SSLProtocol All -SSLv2 -SSLv3 -TLSv1 -TLSv1.1
	SSLHonorCipherOrder On

	Header always set Strict-Transport-Security "max-age=63072000; includeSubDomains; preload"
	Header always set X-Frame-Options "SAMEORIGIN"
	Header always set X-Content-Type-Options "nosniff"
	Header always set X-XSS-Protection "0"
	Header always set X-Permitted-Cross-Domain-Policies "none"
	Header always set Referrer-Policy "no-referrer-when-downgrade"
	Header always set Permissions-Policy "camera=(self), geolocation=(self), microphone=(self)"

	Protocols h2 http/1.1

	<Directory "/var/www/html">
		AllowOverride All
		Options -Indexes +FollowSymLinks
	</Directory>

	<FilesMatch ".(ico|pdf|flv|jpg|jpeg|png|gif|js|css|swf|ttf|woff)$">
		Header set Cache-Control "max-age=31536000, public"
	</FilesMatch>

	ErrorLog /var/log/apache2/nextcloud_error.log

	SSLEngine on
	SSLCertificateKeyFile /etc/letsencrypt/live/DOMAIN.COM/privkey.pem
	SSLCertificateFile /etc/letsencrypt/live/DOMAIN.COM/fullchain.pem
</VirtualHost>
Also you can add redirection from HTTP to HTTPS in the port 80 block.
RewriteEngine On
RewriteCond %{HTTPS} off
RewriteRule (.*) https://%{HTTP_HOST}%{REQUEST_URI}
apachectl -t
systemctl restart apache210- Install Nextcloud
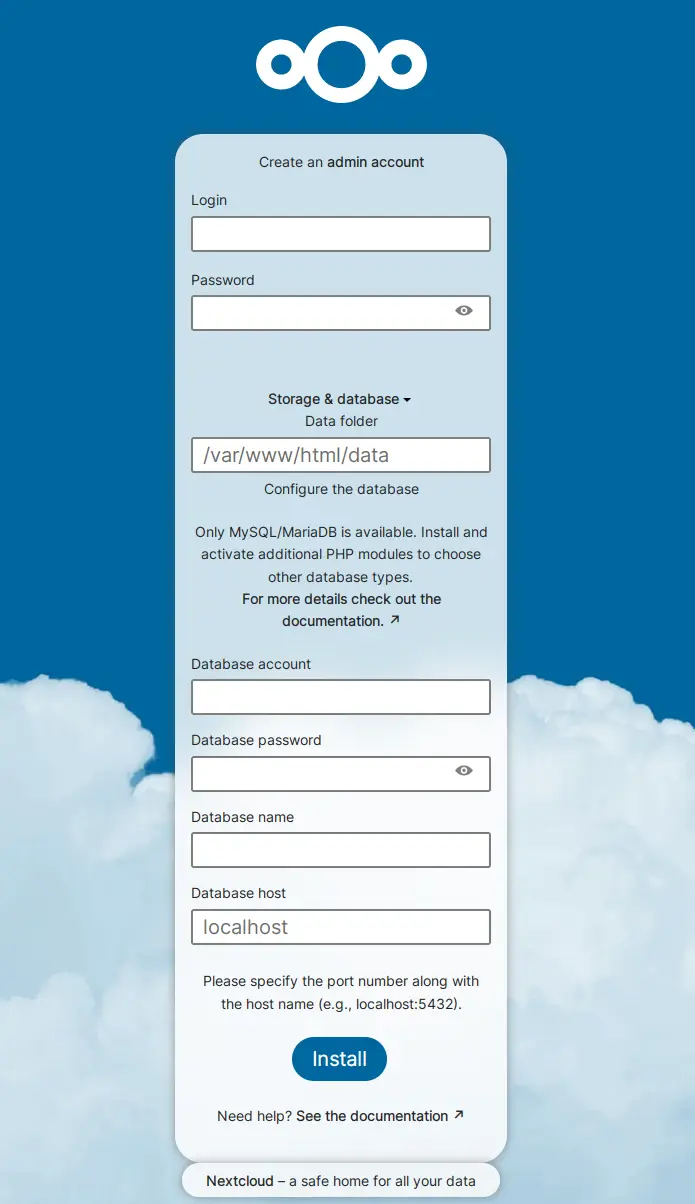
We’re all set up with configuring the server; now we can install Nextcloud. Direct your browser to the domain name and begin the installation process.
Data folder should be /var/www/data, database account is the username for the database which was ncuser.
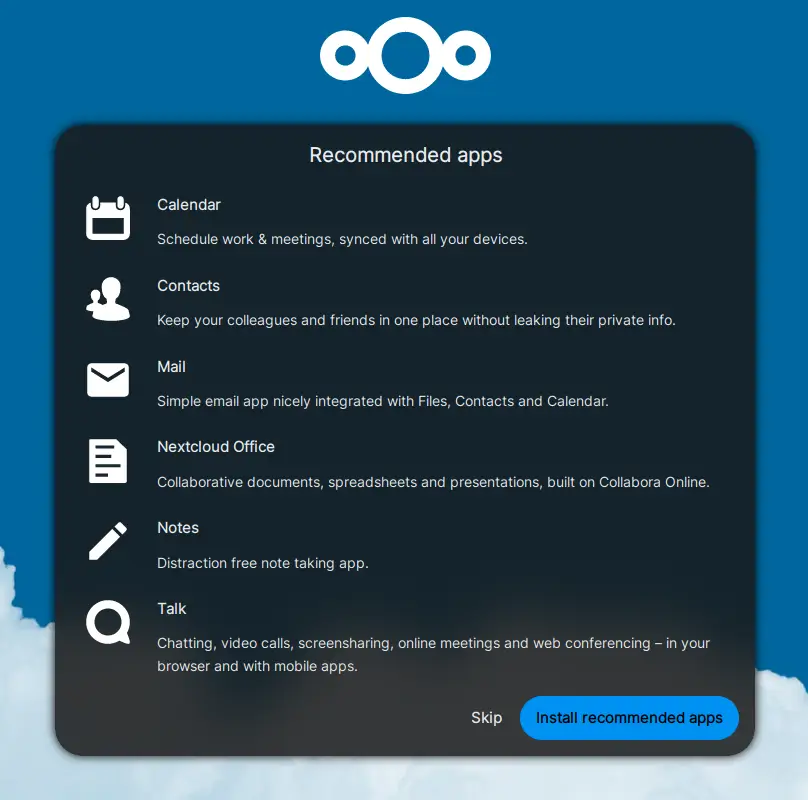
The apps screen is optional. I would skip it for now.
And that would be it.
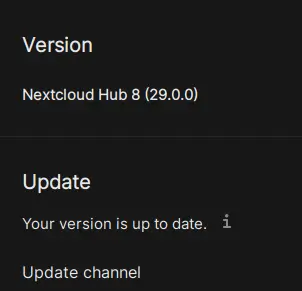
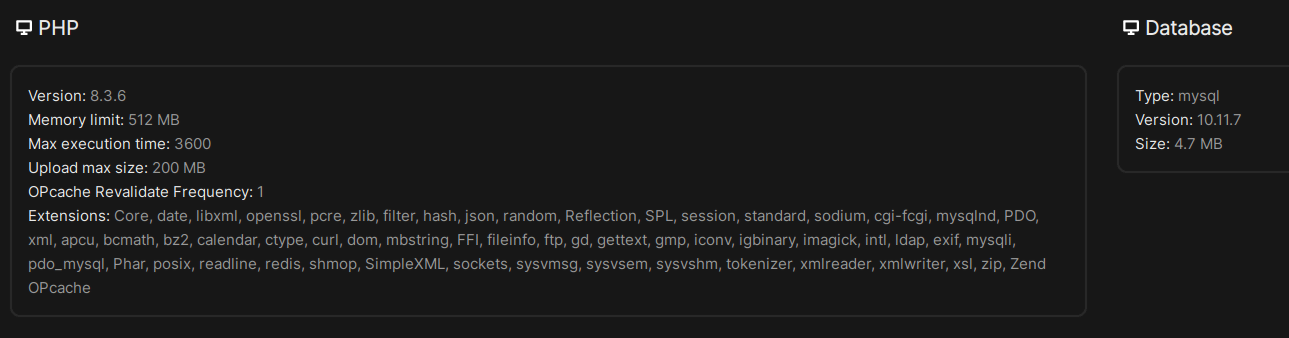
The administration overview page will display the version of Nextcloud, system page PHP and database details, and more.
If you would like to set up cache, cronjob for Nextcloud, and apply improvements, check out the improvements guide.


Hello I get two error messages
At point 9 after Update virtual host :
(terminal apachectl -t)
[ AH00558: apache2: Could not reliably determine the server’s fully qualified domain name, using 127.0.1.1. Set the ‘ServerName’ directive globally to suppress this message]
****************************************************************************************
and at point 10 INSTALL NEXTCLOUD:
(web browser https://sandrocloud.ddns.net)
[Connessione sicura non riuscita
Si è verificato un errore durante la connessione a sandrocloud.ddns.net. SSL ha ricevuto un pacchetto che eccede la dimensione massima consentita.
Codice di errore: SSL_ERROR_RX_RECORD_TOO_LONG]
(terminal curl)
[root@cloudserver:~# curl https://sandrocloud.ddns.net
curl: (35) OpenSSL/3.0.13: error:0A00010B:SSL routines::wrong version number]
I have put error messages in square brackets
Sandro
The first one is not an error but a warning. You can skip it or add `ServerName 127.0.0.1` to `/etc/apache2/apache2.conf`.
For the 2nd one, check your virtual host configuration for the ssl engine and port 443 block.