A week or so ago, I wrote about how to set up BigBlueButton and seamlessly integrate it with Rocket.Chat. While BigBlueButton may not be as popular compared to Jitsi, it still has its space among different walks of life. If you are a Jitsi fan, worry not; I will guide you step-by-step in installing and integrating Jitsi with Rocket.Chat for video and audio conferencing.
Before we jump into the setup part, here are the rough estimated requirements to run Jitsi on your server.
- Minimum 8GB ram for lag free calls
- CPU 2 cores to start with
- 25GB disk space
And here are the things to do or know before installation.
- Ubuntu 22.04 LTS as a server
- Point your domain to the server IP
- Run all commands as root or user with sudo privileges
1- Prepare the server
Update your server and add the universe repository, which is needed for Jitsi dependencies.
apt update && apt upgrade

apt install gnupg2 nginx-full curl

apt-add-repository universe

apt update
Set the hostname as suggested by Jitsi. I have used a dummy domain, jitsi.mydomain.com, so please replace it with your desired domain wherever you see it.
hostnamectl set-hostname jitsi.mydomain.comNext add it to the hosts file (IP_ADDRESS is your server public IP) vim /etc/hosts.
IP_ADDRESS jitsi.mydomain.com2- Update firewall
We will also enable UFW firewall and open some required ports.
ufw allow 80/tcp
ufw allow 443/tcp
ufw allow 10000/udp
ufw allow 22/tcp
ufw allow 3478/udp
ufw allow 5349/tcp
ufw enable
Check the status with:
ufw status3- Add repositories
Since our installation is on Ubuntu 22.04 LTS, we will add all the required repositories for it.
Prosody:
curl -sL https://prosody.im/files/prosody-debian-packages.key | sudo tee /etc/apt/keyrings/prosody-debian-packages.key

echo "deb [signed-by=/etc/apt/keyrings/prosody-debian-packages.key] http://packages.prosody.im/debian $(lsb_release -sc) main" | sudo tee /etc/apt/sources.list.d/prosody-debian-packages.list

apt install lua5.2
Jitsi:
curl -sL https://download.jitsi.org/jitsi-key.gpg.key | gpg --dearmor | sudo tee /usr/share/keyrings/jitsi-keyring.gpg

echo "deb [signed-by=/usr/share/keyrings/jitsi-keyring.gpg] https://download.jitsi.org stable/" | sudo tee /etc/apt/sources.list.d/jitsi-stable.list
4- Jitsi installation
Update the system and install Jitsi.
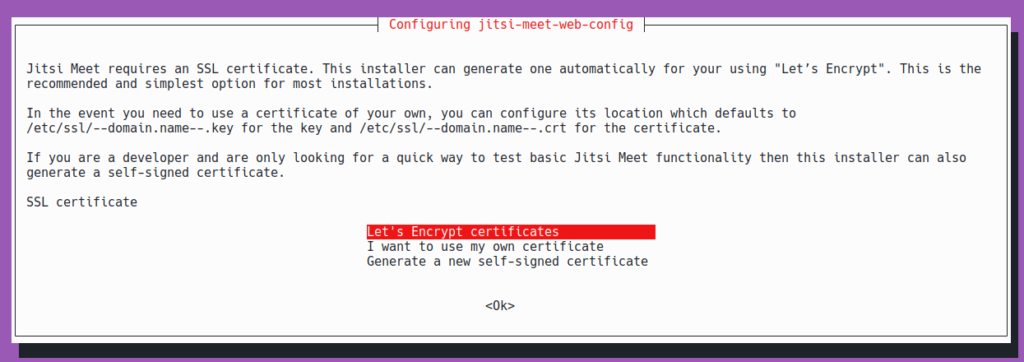
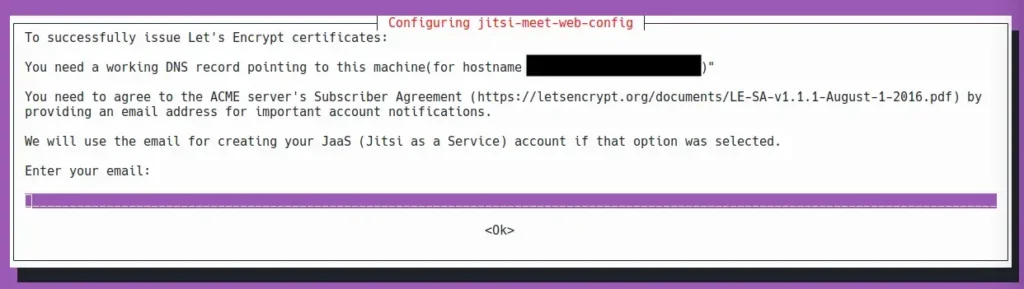
Note: If you want to have SSL from Let’s Encrypt, Jitsi will ask you during installation. To make this work, ensure that you have pointed the domain to the server’s IP.
You will need to provide your email during the process.
apt update

apt install jitsi-meet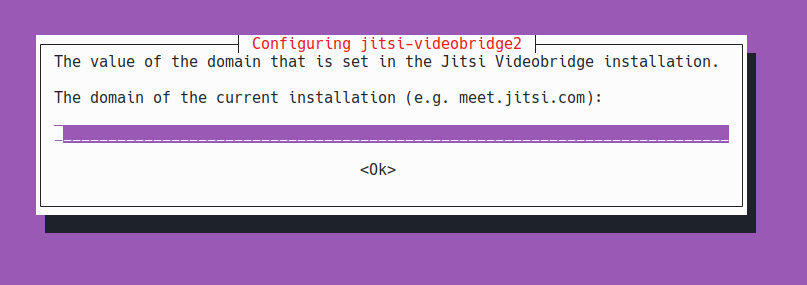
If you are not utilizing Rocket.Chat, feel free to skip step 5 below. You can continue using Jitsi.
By default, anyone with the URL can access Jitsi. However, you can change the access control settings. You can read more about it here. Personally, I find this process to be quite complicated. Hopefully, in the future, Jitsi will provide an easier way to change these settings, perhaps through an admin interface.
5- Integration with Rocket.Chat
Switch to your Rocket.Chat instance and install the Jitsi app from Administration > Apps.
You may need to register an account with Rocket.Chat Cloud to install apps from the marketplace.
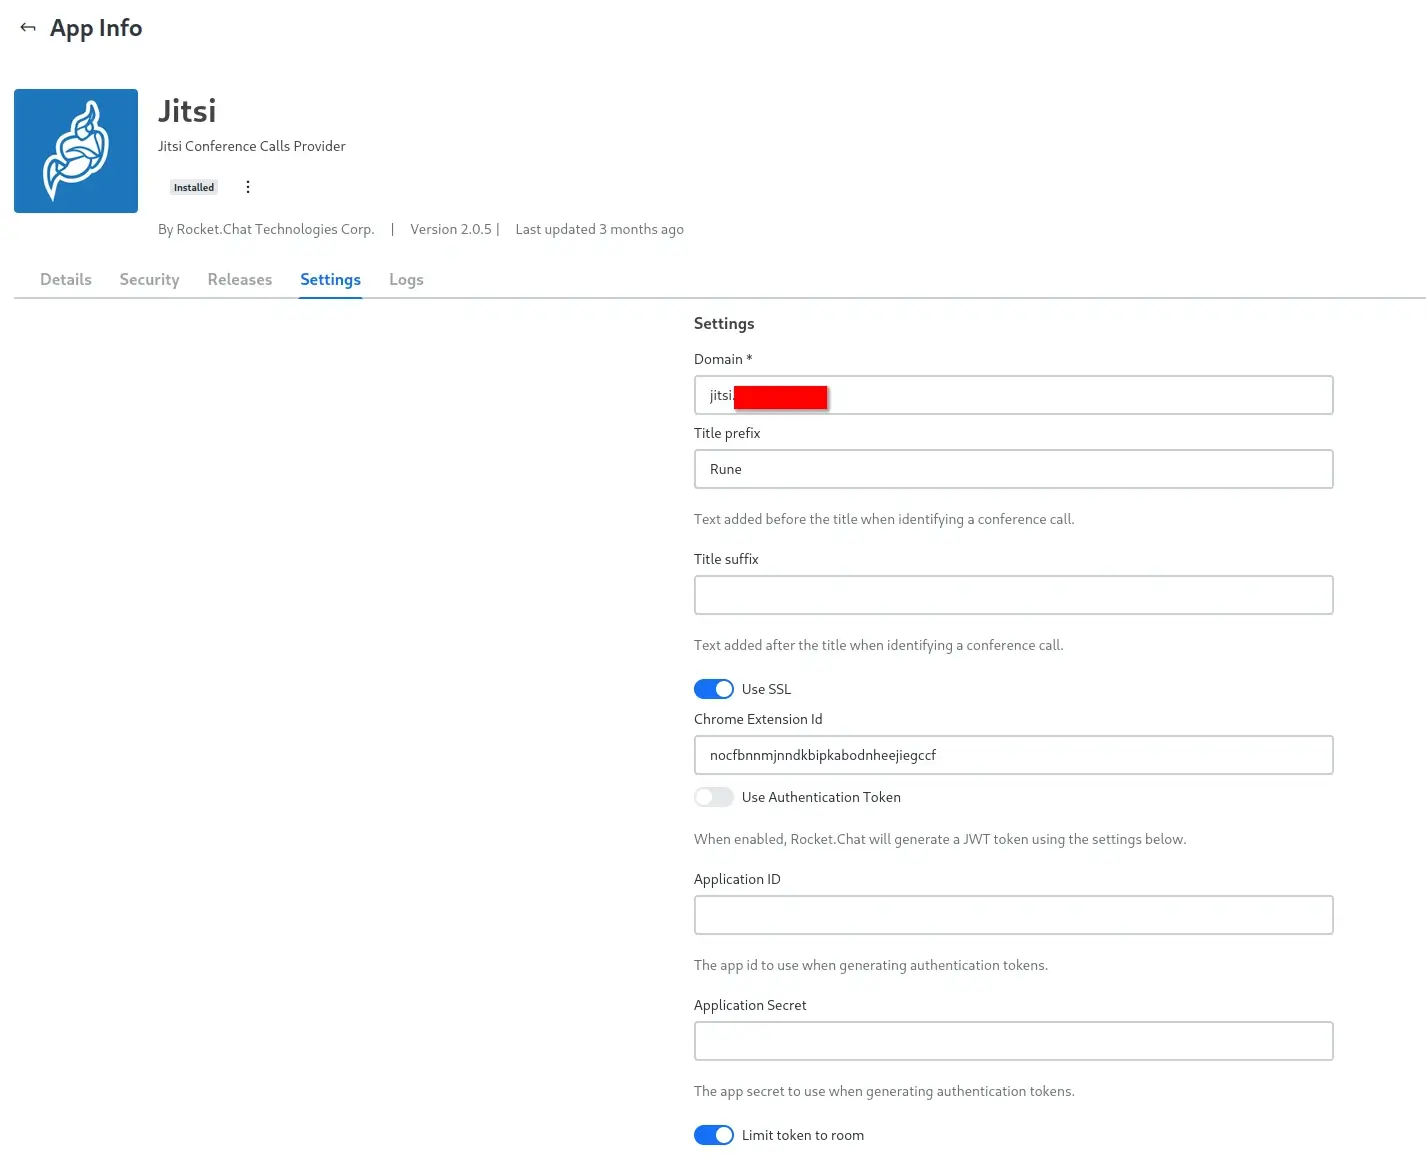
After installation click on the installed Jitsi app and switch to Settings tab. Enter the Domain, enable Use SSL switch, and that’s pretty much it.
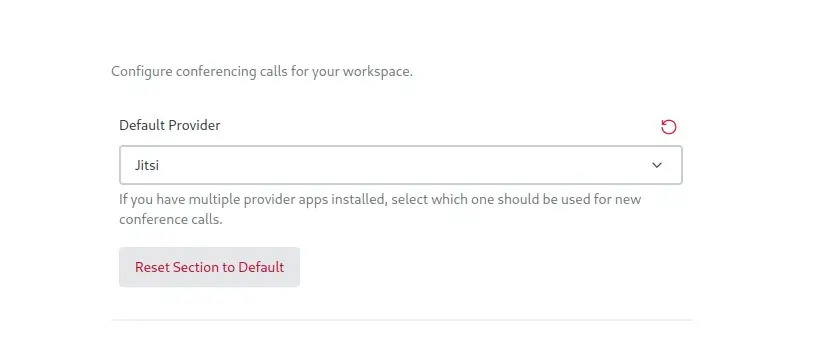
To use Jitsi as the Default Provider, navigate to Administration > Settings > Conference Call, select Jitsi from the dropdown menu, and save the changes.